HP Deskjet 3050 Reference Guide - Page 3
Connect to additional computers on a network, Change the HP Deskjet from a USB connection to a, - j610 software
 |
View all HP Deskjet 3050 manuals
Add to My Manuals
Save this manual to your list of manuals |
Page 3 highlights
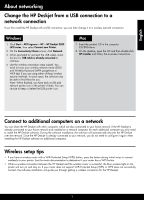
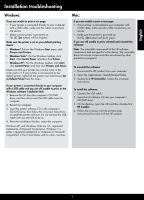
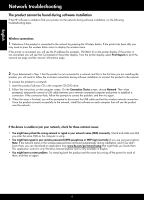
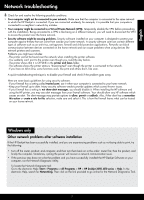
English About networking Change the HP Deskjet from a USB connection to a network connection If you first install the HP Deskjet with a USB connection, you can later change it to a wireless network connection. Windows 1. Click Start > All Programs > HP > HP Deskjet 3050 J610 series, then select Connect new Printer. 2. On the Connectivity Choice screen, click Network. 3. When prompted to connnect the USB cabel, check the box for USB cable is already connected to continue. 4. Use the wireless connection setup wizard. You need to know your wireless network name (SSID) and Wireless Password (WPA passphrase or WEP key) if you are using either of these wireless security methods. In some cases, the software may be able to find these for you. Note: When finished, you have both a USB and network printer icon in the printer's folder. You can choose to keep or delete the USB printer icon. Mac 1. Insert the product CD in the computer CD/DVD drive. 2. On the desktop, open the CD and then double-click HP Installer and follow the on-screen instructions. Connect to additional computers on a network You can share the HP Deskjet with other computers which are also connected to your home network. If the HP Deskjet is already connected to your home network and installed on a network computer, for each additional computer you only need to install the HP Deskjet software. During the software installation, the software will automatically discover the HP Deskjet over the network. Since the HP Deskjet is already connected to your network, you do not need to configure it again when installing the HP Deskjet software on additional computers. Wireless setup tips •• If you have a wireless router with a WiFi Protected Setup (WPS) button, press the button during initial setup to connect wirelessly to your printer. See the router documentation to determine if your router has a WPS button. •• When a wireless connection between the HP Deskjet and the wireless router is successful, the blue wireless light on the printer will turn on and stay on. If your router does not support WiFi Protected Setup (WPS) or WPS does not successfully connect, the software installation will guide you through getting a wireless connection for the HP Deskjet. 3
-
 1
1 -
 2
2 -
 3
3 -
 4
4 -
 5
5 -
 6
6 -
 7
7 -
 8
8 -
 9
9 -
10
-
11
-
12
-
13
-
14
-
15
-
16
-
17
-
18
-
19
-
20
-
21
-
22
-
23
-
24
 |
 |