HP Deskjet Ink Advantage 2060 User Guide - Page 12
Print photos, Print envelopes - for windows 8
 |
View all HP Deskjet Ink Advantage 2060 manuals
Add to My Manuals
Save this manual to your list of manuals |
Page 12 highlights
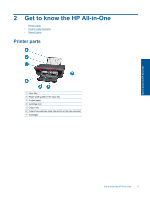
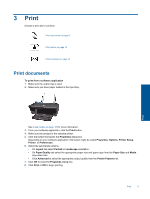
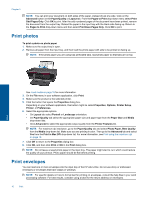
Chapter 3 NOTE: You can print your document on both sides of the paper, instead of just one side. Click on the Advanced button on the Paper/Quality or Layout tab. From the Pages to Print drop-down menu select Print Odd Pages Only. Click OK to print. After the odd numbered pages of the document have been printed, remove the document from the output tray. Reload the paper in the input tray with the blank side facing up. Return to the Pages to Print drop-down menu and then select Print Even Pages Only. Click OK to print. Print photos To print a photo on photo paper 1. Make sure the output tray is open. 2. Remove all paper from the input tray, and then load the photo paper with side to be printed on facing up. NOTE: If the photo paper you are using has perforated tabs, load photo paper so that tabs are on top. Print See Load media on page 16 for more information. 3. On the File menu in your software application, click Print. 4. Make sure the product is the selected printer. 5. Click the button that opens the Properties dialog box. Depending on your software application, this button might be called Properties, Options, Printer Setup, Printer, or Preferences. 6. Select the appropriate options. • On Layout tab select Portrait or Landscape orientation. • On Paper/Quality tab select the appropriate paper size and paper type from the Paper Size and Media drop-down lists. • Click Advanced to select the appropriate output quality from the Printer Features list. NOTE: For maximum dpi resolution, go to the Paper/Quality tab and select Photo Paper, Best Quality from the Media drop-down list. Make sure you are printing in color. Then go to the Advanced tab and select Yes from the Print in Max DPI drop-down list. For more information, see Print using the maximum dpi on page 12. 7. Click OK to return to the Properties dialog box. 8. Click OK, and then click Print or OK in the Print dialog box. NOTE: Do not leave unused photo paper in the input tray. The paper might start to curl, which could reduce the quality of your printout. Photo paper should be flat before printing. Print envelopes You can load one or more envelopes into the input tray of the HP All-in-One. Do not use shiny or embossed envelopes or envelopes that have clasps or windows. NOTE: For specific details on how to format text for printing on envelopes, consult the help files in your word processing software. For best results, consider using a label for the return address on envelopes. 10 Print
-
 1
1 -
2
-
3
-
4
-
5
-
6
-
 7
7 -
 8
8 -
 9
9 -
 10
10 -
 11
11 -
 12
12 -
 13
13 -
 14
14 -
 15
15 -
 16
16 -
 17
17 -
18
-
19
-
20
-
21
-
22
-
23
-
24
-
25
-
26
-
27
-
28
-
29
-
30
-
31
-
32
-
33
-
34
-
35
-
36
-
37
-
38
-
39
-
40
-
41
-
42
-
43
-
44
-
45
-
46
-
47
-
48
 |
 |