HP Dragonfly Folio 13.5 Maintenance and Service Guide - Page 58
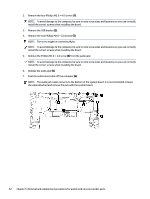
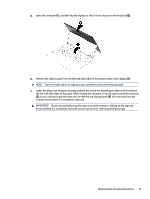
Remove the Phillips M2.0 × 4.0 screw, from the audio jack.
 |
View all HP Dragonfly Folio 13.5 manuals
Add to My Manuals
Save this manual to your list of manuals |
Page 58 highlights
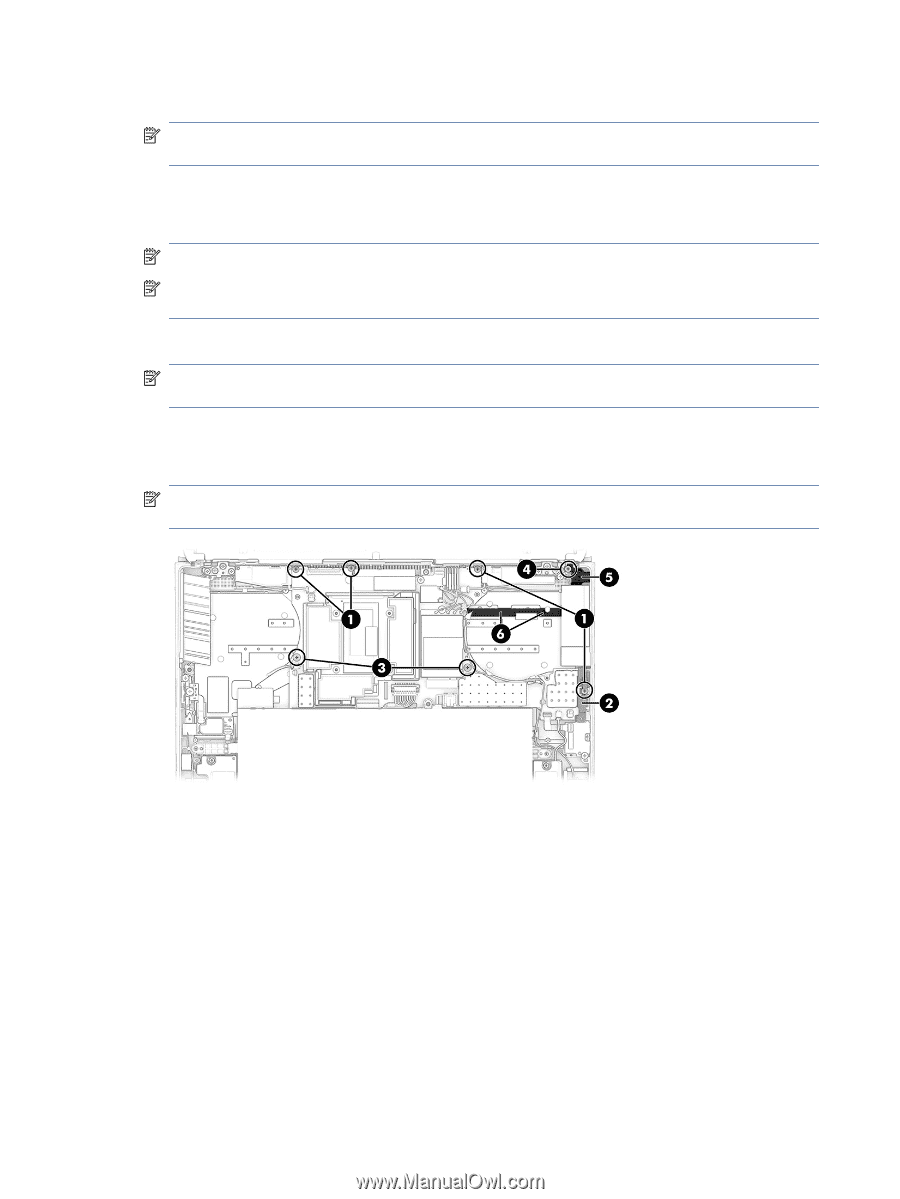
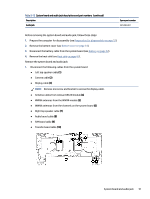
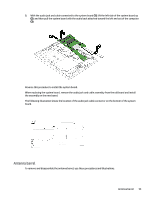
2. Remove the four Phillips M2.0 × 4.0 screws (1). NOTE: To avoid damage to the computer, be sure to note screw sizes and locations so you can correctly install the correct screws when installing the board. 3. Remove the USB bracket (2). 4. Remove the two Phillips M2.0 × 2.0 screws (3). NOTE: The screw might be covered by Mylar. NOTE: To avoid damage to the computer, be sure to note screw sizes and locations so you can correctly install the correct screws when installing the board. 5. Remove the Phillips M2.0 × 4.0 screw (4) from the audio jack. NOTE: To avoid damage to the computer, be sure to note screw sizes and locations so you can correctly install the correct screws when installing the board. 6. Release the audio jack (5). 7. Peel the audio board cable off the computer (6). NOTE: The audio jack cable connects to the bottom of the system board. It is recommended to leave the cable attached and remove the jack with the system board. 52 Chapter 5 Removal and replacement procedures for authorized service provider parts
-
 1
1 -
2
-
3
-
4
-
5
-
6
-
7
-
8
-
9
-
10
-
11
-
12
-
13
-
14
-
15
-
16
-
17
-
18
-
19
-
20
-
21
-
22
-
23
-
24
-
25
-
26
-
27
-
28
-
29
-
30
-
31
-
32
-
33
-
34
-
35
-
36
-
37
-
38
-
39
-
40
-
41
-
42
-
43
-
44
-
45
-
46
-
47
-
48
-
49
-
50
-
51
-
52
-
 53
53 -
 54
54 -
 55
55 -
 56
56 -
 57
57 -
 58
58 -
 59
59 -
 60
60 -
 61
61 -
 62
62 -
 63
63 -
64
-
65
-
66
-
67
-
68
-
69
-
70
-
71
-
72
-
73
-
74
-
75
-
76
-
77
-
78
-
79
-
80
-
81
-
82
-
83
-
84
-
85
-
86
-
87
-
88
-
89
-
90
-
91
-
92
-
93
-
94
-
95
-
96
-
97
-
98
-
99
-
100
-
101
-
102
-
103
-
104
-
105
-
106
-
107
-
108
-
109
 |
 |