HP Indigo 20000 Dripping Troubleshooting - Page 3
General inspection, Cleaning Station
 |
View all HP Indigo 20000 manuals
Add to My Manuals
Save this manual to your list of manuals |
Page 3 highlights
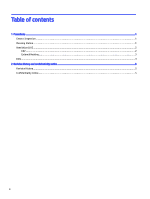
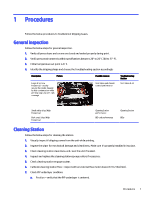
1 Procedures Follow the below procedures to troubleshoot dripping issues. General inspection Follow the below steps for general inspection. 1. Verify all press doors and covers are closed and sealed properly during print. 2. Verify press environment is within specifications between 20° to 25° C (68 to 77° F). 3. Chiller temperature set point is 6° C. 4. Identify the dripping shape and choose the Troubleshooting section accordingly: Description Picture Large drips (Low frequency) - usually around the center. Caused by high condensation while printing long runs with high coverage Possible reasons Ventilation and climate control performance Troubleshooting Section Ventilation & UC Small white drips (High frequency) Dark small drips (High frequency) Cleaning Station performance BID unit performance Cleaning Station BIDs Cleaning Station Follow the below steps for cleaning the station. 1. Visually inspect if dripping comes from the unit while printing. 2. Inspect the wiper for mechanical damage and cleanliness. Make sure it's properly installed in its place. 3. Check cleaning station cleanliness and clean the unit if needed. 4. Inspect and replace the cleaning station sponge rollers if necessary. 5. Check cleaning station engage system. 6. Calibrate cleaning station flow - inspect with an external flow meter device (8 ±0.2 liter/min). 7. Check PIP underlayer condition: a. Position - verify that the PIP underlayer is centered. Procedures 1
-
 1
1 -
 2
2 -
 3
3 -
 4
4 -
 5
5 -
 6
6 -
 7
7
 |
 |