HP J4580 Fax Getting Started Guide - Page 5
Step 3: Manage and con fax settings, Dedicated phone line - officejet windows 7
 |
UPC - 883585633531
View all HP J4580 manuals
Add to My Manuals
Save this manual to your list of manuals |
Page 5 highlights
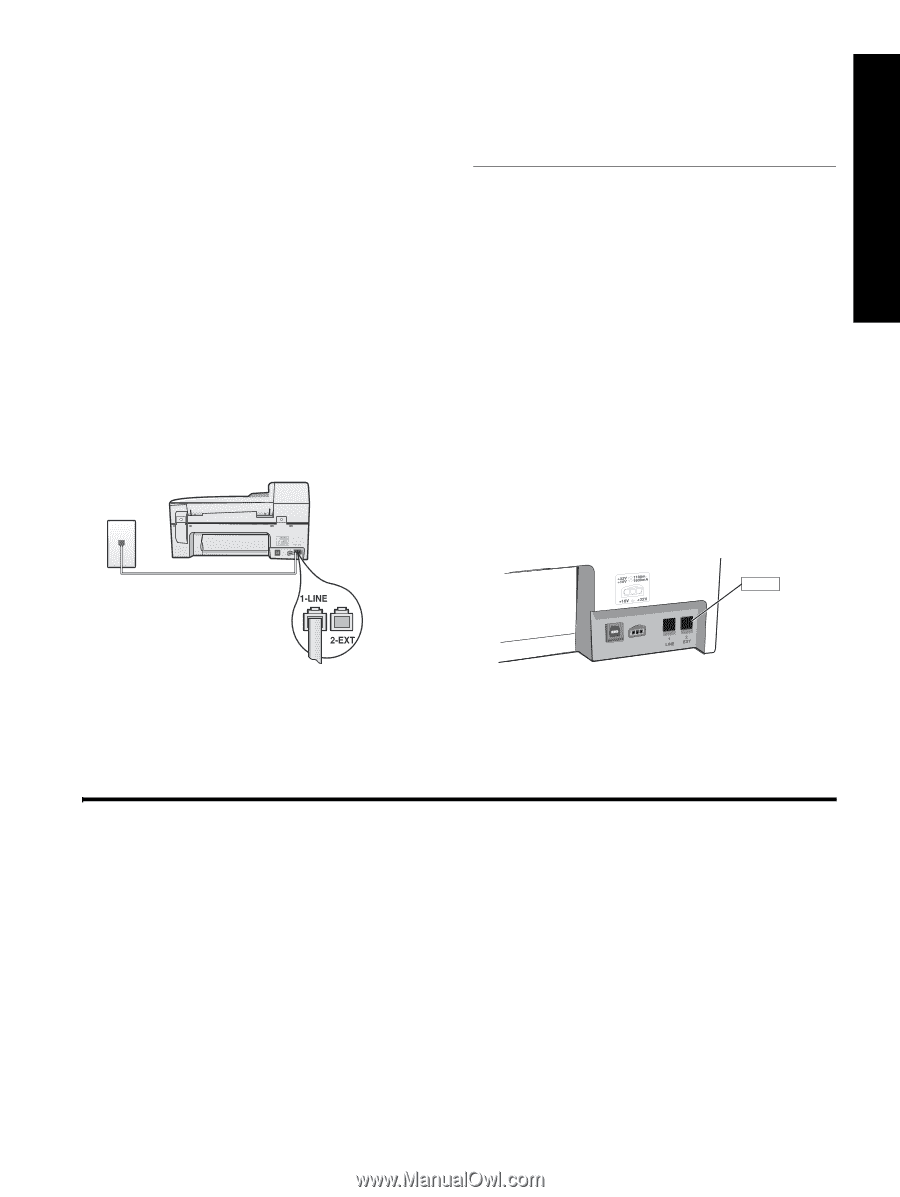
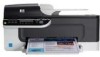
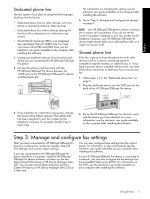
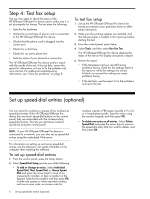
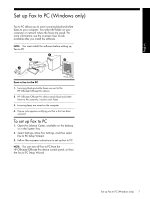
English Dedicated phone line Use this section if you plan on using the following type of phone line for the fax: • Dedicated phone line (no other devices, such as a phone or answering machine, share the line). • Dedicated phone line without devices sharing the line but with a subscription to a distinctive ring service. • Private Branch Exchange (PBX) or an Integrated Services Digital Network (ISDN) line. For more information about PBX and ISDN lines, see the electronic user guide available on the computer after installing the software. 1. Unplug any telephone devices from the phone jack where you are connecting the HP Officejet/Officejet Pro device. 2. Connect the phone cord that came with the HP Officejet/Officejet Pro device between the 1-LINE port on the HP Officejet/Officejet Pro device and the phone jack. For information on changing this setting, see the electronic user guide available on the computer after installing the software. 4. Go to "Step 3: Manage and configure fax settings" on page 5. NOTE: Your HP Officejet/Officejet Pro device is factoryset to answer all ring patterns. If you do not set the correct ring pattern assigned to your fax number by the telephone company, your HP Officejet/Officejet Pro device might answer both voice calls and fax calls, or it might not answer at all. Shared phone line If the fax is going to share the phone line with other devices, such as a phone, answering machine, computer/computer modem, or caller ID box, or if you have voicemail service included with your line, you must follow these instructions to determine how to set up your fax. 1. Follow steps 1-3 in the "Dedicated phone line" on page 5. 2. Plug the additional device into the 2-EXT port on the back of the HP Officejet/Officejet Pro device. 2-EXT 3. If you subscribe to a distinctive ring service, change the Answer Ring Pattern setting to the pattern that has been assigned to your fax number by the telephone company, for example, double rings or triple rings. 3. Set up the HP Officejet/Officejet Pro device to work with the device you have attached. For more information, see the electronic user guide available on the computer after installing the software. Step 3: Manage and configure fax settings After you have connected the HP Officejet/Officejet Pro device to a phone line, set the fax header, date and time settings, and country/region settings. If you are connecting the HP Officejet/Officejet Pro device directly to a computer, install the HP Officejet/ Officejet Pro device software, and then run the Fax Setup Wizard (Windows) or HP Device Manager (Mac OS). You can also launch these tools from Solution Center (Windows) or HP Device Manager (Mac OS) at a later time. You can also configure these settings from the control panel. For information on the control panel, see the electronic user guide available on your computer after installing the software. If your HP Officejet/Officejet Pro device is connected to a network, you can also configure the fax settings from the embedded Web server (EWS). For information on the EWS, see the electronic user guide available on your computer after installing the software. Set up the fax 5
-
 1
1 -
 2
2 -
 3
3 -
 4
4 -
 5
5 -
 6
6 -
 7
7 -
 8
8 -
 9
9 -
 10
10 -
 11
11 -
12
-
13
-
14
-
15
-
16
-
17
-
18
-
19
-
20
-
21
-
22
-
23
-
24
-
25
-
26
-
27
-
28
-
29
-
30
-
31
-
32
-
33
-
34
-
35
-
36
-
37
-
38
-
39
-
40
 |
 |