HP L5006tm L5006tm and L5009tm Touchscreen Monitors User Guide - Page 11
Setting Up the Monitor, Identifying Rear Connectors
 |
UPC - 882780645967
View all HP L5006tm manuals
Add to My Manuals
Save this manual to your list of manuals |
Page 11 highlights
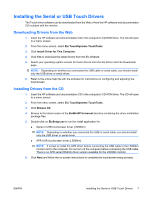
3 Setting Up the Monitor To set up the monitor, ensure that the power is turned off to the monitor, computer system, and other attached devices, then follow the instructions below. Identifying Rear Connectors Figure 3-1 Rear Connectors Connector 1 AC Power 2 USB 3 Serial 4 VGA Function Connects the AC power cord to the monitor. Connects the touchscreen USB cable to the monitor. Connects the touchscreen serial cable to the monitor (not available on L5009tm model). Connects the VGA video cable to the monitor. NOTE: A +12VDC input jack is available on the connector panel of the L5009tm monitor. This jack accepts an external DC power brick (not included with the monitor). ENWW Identifying Rear Connectors 5
-
 1
1 -
2
-
3
-
4
-
5
-
 6
6 -
 7
7 -
 8
8 -
 9
9 -
 10
10 -
 11
11 -
 12
12 -
 13
13 -
 14
14 -
 15
15 -
 16
16 -
17
-
18
-
19
-
20
-
21
-
22
-
23
-
24
-
25
-
26
-
27
-
28
-
29
-
30
-
31
-
32
-
33
-
34
-
35
-
36
-
37
-
38
 |
 |

3
Setting Up the Monitor
To set up the monitor, ensure that the power is turned off to the monitor, computer system, and other
attached devices, then follow the instructions below.
Identifying Rear Connectors
Figure 3-1
Rear Connectors
Connector
Function
1
AC Power
Connects the AC power cord to the monitor.
2
USB
Connects the touchscreen USB cable to the monitor.
3
Serial
Connects the touchscreen serial cable to the monitor (not
available on L5009tm model).
4
VGA
Connects the VGA video cable to the monitor.
NOTE:
A +12VDC input jack is available on the connector panel of the L5009tm monitor. This jack
accepts an external DC power brick (not included with the monitor).
ENWW
Identifying Rear Connectors
5