HP LaserJet M1319 Service Manual - Page 205
Secondary service menu
 |
View all HP LaserJet M1319 manuals
Add to My Manuals
Save this manual to your list of manuals |
Page 205 highlights
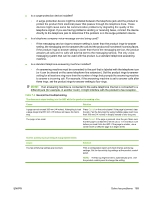
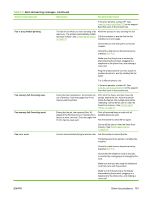
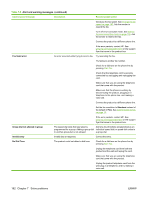
Secondary service menu Use this menu to perform various tests and print out special reports. Open the secondary service menu 1. Press the Setup button. 2. Simultaneously press and then release both the left arrow button and the OK button. 3. Press the OK button. 4. Use the arrow buttons to select the desired secondary-service option, and then press the OK button. 5. Use the arrow buttons to select the desired submenu option, and then press OK . 6. After making the necessary menu item choices, wait for the product to enter the Ready state, and then press Cancel to close the secondary service menu. Menu item Service Reports Display test Button test Show FW Version Cal Graphs File Sys Format Submenu Description Cont. Self-Test Cont. Copy The continuous self-test prints the configuration page repeatedly until you press Cancel. Run a continuous copy test to test the copy function. Error Report Print the error report to see firmware errors. Use the Display test menu to run a test of the control-panel display lights and LCD screen. Use the Button test menu to run a test of the control-panel buttons. Mono Red Use the Show FW Version menu to display the firmware version number. Use the Cal Graphs sub-menus to calibrate the product scanner. Green Blue NOTE: These submenus include additional calibration submenus. Use the File Sys Format menu to reformat the fax file system for fax storage. CAUTION: All stored faxes and Phonebook entries are lost when the fax file system is reformatted. ENWW Service-mode functions 187
-
 1
1 -
2
-
3
-
4
-
5
-
6
-
7
-
8
-
9
-
10
-
11
-
12
-
13
-
14
-
15
-
16
-
17
-
18
-
19
-
20
-
21
-
22
-
23
-
24
-
25
-
26
-
27
-
28
-
29
-
30
-
31
-
32
-
33
-
34
-
35
-
36
-
37
-
38
-
39
-
40
-
41
-
42
-
43
-
44
-
45
-
46
-
47
-
48
-
49
-
50
-
51
-
52
-
53
-
54
-
55
-
56
-
57
-
58
-
59
-
60
-
61
-
62
-
63
-
64
-
65
-
66
-
67
-
68
-
69
-
70
-
71
-
72
-
73
-
74
-
75
-
76
-
77
-
78
-
79
-
80
-
81
-
82
-
83
-
84
-
85
-
86
-
87
-
88
-
89
-
90
-
91
-
92
-
93
-
94
-
95
-
96
-
97
-
98
-
99
-
100
-
101
-
102
-
103
-
104
-
105
-
106
-
107
-
108
-
109
-
110
-
111
-
112
-
113
-
114
-
115
-
116
-
117
-
118
-
119
-
120
-
121
-
122
-
123
-
124
-
125
-
126
-
127
-
128
-
129
-
130
-
131
-
132
-
133
-
134
-
135
-
136
-
137
-
138
-
139
-
140
-
141
-
142
-
143
-
144
-
145
-
146
-
147
-
148
-
149
-
150
-
151
-
152
-
153
-
154
-
155
-
156
-
157
-
158
-
159
-
160
-
161
-
162
-
163
-
164
-
165
-
166
-
167
-
168
-
169
-
170
-
171
-
172
-
173
-
174
-
175
-
176
-
177
-
178
-
179
-
180
-
181
-
182
-
183
-
184
-
185
-
186
-
187
-
188
-
189
-
190
-
191
-
192
-
193
-
194
-
195
-
196
-
197
-
198
-
199
-
 200
200 -
 201
201 -
 202
202 -
 203
203 -
 204
204 -
 205
205 -
 206
206 -
 207
207 -
 208
208 -
 209
209 -
 210
210 -
211
-
212
-
213
-
214
-
215
-
216
-
217
-
218
-
219
-
220
-
221
-
222
-
223
-
224
-
225
-
226
-
227
-
228
-
229
-
230
-
231
-
232
-
233
-
234
-
235
-
236
-
237
-
238
-
239
-
240
-
241
-
242
-
243
-
244
-
245
-
246
-
247
-
248
-
249
-
250
-
251
-
252
-
253
-
254
-
255
-
256
-
257
-
258
-
259
-
260
-
261
-
262
-
263
-
264
-
265
-
266
-
267
-
268
-
269
-
270
-
271
-
272
-
273
-
274
-
275
-
276
-
277
-
278
-
279
-
280
-
281
-
282
-
283
-
284
-
285
-
286
-
287
-
288
-
289
-
290
 |
 |