| Section |
Page |
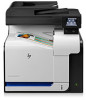
| Product introduction |
15 |
| Product comparison |
19 |
| Interface ports |
20 |
| Serial number and model number location |
21 |
| Control panel |
22 |
| Control-panel layout |
22 |
| Control-panel Home screen |
23 |
| Control-panel help system |
24 |
| Print product reports |
25 |
| Paper trays |
27 |
| Supported paper sizes |
33 |
| Tray capacity and paper orientation |
33 |
| Load Tray 1 |
35 |
| Print envelopes |
38 |
| Tray 2 |
39 |
| Tray capacity and paper orientation |
39 |
| Load Tray 2 |
40 |
| Optional Tray 3 |
42 |
| Tray capacity and paper orientation |
42 |
| Load Tray 3 |
43 |
| Parts, supplies, and accessories |
45 |
| Order parts, accessories, and supplies |
46 |
| HP policy on non-HP supplies |
47 |
| HP anticounterfeit Web site |
48 |
| Print when a toner cartridge is at estimated end of life |
49 |
| Enable or disable the At Very Low settings |
50 |
| Customer self-repair parts |
51 |
| Accessories |
52 |
| Toner cartridges |
53 |
| Toner-cartridge view |
53 |
| Toner-cartridge information |
54 |
| Recycle toner cartridges |
54 |
| Toner-cartridge storage |
54 |
| HP policy on non-HP toner cartridges |
54 |
| Replace the toner cartridges |
55 |
| Toner collection unit |
58 |
| Replace the toner collection unit |
58 |
| Print |
61 |
| Supported print drivers (Windows) |
62 |
| HP Universal Print Driver (UPD) |
62 |
| UPD installation modes |
63 |
| Change print-job settings (Windows) |
64 |
| Priority for changing print-job settings |
64 |
| Change the settings for all print jobs until the software program is closed |
64 |
| Change the default settings for all print jobs |
65 |
| Change the product configuration settings |
65 |
| Change print-job settings (Mac OS X) |
66 |
| Priority for changing print-job settings |
66 |
| Change the settings for all print jobs until the software program is closed |
66 |
| Change the default settings for all print jobs |
66 |
| Change the product configuration settings |
67 |
| Print tasks (Windows) |
68 |
| Use a printing shortcut (Windows) |
68 |
| Create printing shortcuts (Windows) |
70 |
| Automatically print on both sides (Windows) |
72 |
| Manually print on both sides (Windows) |
74 |
| Print multiple pages per sheet (Windows) |
75 |
| Select the page orientation (Windows) |
77 |
| Select the paper type (Windows) |
79 |
| Print the first or last page on different paper (Windows) |
82 |
| Scale a document to fit page size (Windows) |
85 |
| Create a booklet (Windows) |
87 |
| Print tasks (Mac OS X) |
89 |
| Use a printing preset (Mac OS X) |
89 |
| Create a printing preset (Mac OS X) |
89 |
| Automatically print on both sides (Mac OS X) |
90 |
| Manually print on both sides (Mac OS X) |
90 |
| Print multiple pages per sheet (Mac OS X) |
90 |
| Select the page orientation (Mac OS X) |
91 |
| Select the paper type (Mac OS X) |
91 |
| Print a cover page (Mac OS X) |
91 |
| Scale a document to fit page size (Mac OS X) |
91 |
| Create a booklet (Mac OS X) |
92 |
| Additional print tasks (Windows) |
93 |
| Cancel a print job (Windows) |
93 |
| Select the paper size (Windows) |
93 |
| Select a custom paper size (Windows) |
94 |
| Print watermarks (Windows) |
94 |
| Additional print tasks (Mac OS X) |
95 |
| Cancel a print job (Mac OS X) |
95 |
| Select the paper size (Mac OS X) |
95 |
| Select a custom paper size (Mac OS X) |
95 |
| Print watermarks (Mac OS X) |
96 |
| Create archival-quality prints |
97 |
| Color printing |
98 |
| Use the HP EasyColor option |
98 |
| Change the color options (Windows) |
98 |
| Change the color theme for a print job (Windows) |
99 |
| Change the color options (Mac OS X) |
100 |
| Manual color options |
100 |
| Match colors |
100 |
| Use HP ePrint |
102 |
| Use AirPrint |
103 |
| Use walk-up USB printing |
105 |
| Set new default copy settings |
106 |
| Restore copy default settings |
107 |
| Make a single copy |
108 |
| Make multiple copies |
109 |
| Copy a multiple-page original |
110 |
| Copy identification cards |
112 |
| Copy on both sides (duplex) |
113 |
| Copy on both sides automatically |
113 |
| Copy on both sides manually |
114 |
| Reduce or enlarge a copy |
115 |
| Make color or black and white copies |
116 |
| Optimize copy quality |
117 |
| Adjust the lightness or darkness for copies |
118 |
| Adjust the copy image |
119 |
| Copy in draft mode |
120 |
| Set the paper size and type for copying on special paper |
121 |
| Scan |
123 |
| Scan by using the HP Scan software (Windows) |
124 |
| Scan by using the HP Scan software (Mac OS X) |
125 |
| Scan to a USB flash drive |
126 |
| Set up scan to network folder and scan to email features |
127 |
| Scan to a network folder |
128 |
| Scan to email |
129 |
| Scan by using other software |
130 |
| Scan from a TWAIN-compliant program (Windows) |
130 |
| Scan from a WIA-compliant program (Windows) |
130 |
| Scan by using optical character recognition (OCR) software |
130 |
| Fax |
131 |
| Connect fax to a telephone line |
133 |
| Configure the fax time, date, and header |
134 |
| Use the control panel |
134 |
| Use the HP Fax Setup Wizard |
134 |
| Use special characters in fax headers |
134 |
| Use the phone book |
135 |
| Use the control panel to create and edit the fax phone book |
135 |
| Delete phone book entries |
135 |
| Create and edit speed-dial entries |
136 |
| Delete speed-dial entries |
137 |
| Create and edit group-dial entries |
138 |
| Delete group-dial entries |
139 |
| Configure send fax settings |
140 |
| Set special dialing symbols and options |
140 |
| Set a dialing prefix |
140 |
| Set the dial tone detection |
141 |
| Tone dial or pulse dial |
141 |
| Set autoredial and the time between redials |
141 |
| Set light/dark and resolution |
142 |
| Set the default light/dark (contrast) setting |
142 |
| Set resolution settings |
142 |
| Set billing codes |
143 |
| Configure receive fax settings |
145 |
| Set fax forwarding |
145 |
| Set the answer mode |
145 |
| Block or unblock fax numbers |
146 |
| Set the number of rings-to-answer |
146 |
| Set distinctive ring |
147 |
| Use autoreduction for incoming faxes |
148 |
| Set fax reprint settings |
148 |
| Set the fax sounds volume |
149 |
| Set the alarm volume, phone-line volume, and ring volume |
149 |
| Set stamp-received faxes |
149 |
| Set the private receive feature |
149 |
| Set fax polling |
150 |
| Use fax |
151 |
| Supported fax programs |
151 |
| Cancel a fax |
151 |
| Cancel the current fax |
152 |
| Cancel a pending fax job |
152 |
| Delete faxes from memory |
152 |
| Use fax on a DSL, PBX, or ISDN system |
152 |
| DSL |
153 |
| PBX |
153 |
| ISDN |
153 |
| Use fax on a VoIP service |
153 |
| Fax memory contents are retained when there is a loss of power |
153 |
| Security issues when connecting internal networks to public phone lines |
154 |
| Fax from the flatbed scanner |
154 |
| Fax from the document feeder |
155 |
| Use speed dials and group-dial entries |
156 |
| Send a fax from the software (Windows) |
156 |
| Send a fax by dialing from a telephone connected to the fax line |
159 |
| Use access codes, credit cards, or calling cards |
159 |
| Send faxes internationally |
159 |
| Print a fax |
160 |
| Reprint a fax |
161 |
| Automatically print on both sides of received faxes |
162 |
| Receive faxes when fax tones are audible on the phone line |
162 |
| Print a stored fax when the private receive feature is on |
162 |
| Manage and maintain |
163 |
| Use the HP Reconfiguration Utility to change the product connection (Windows) |
164 |
| Set up HP Wireless Direct Printing |
165 |
| Use HP Web Services applications |
166 |
| Configure IP network settings |
167 |
| Printer sharing disclaimer |
167 |
| View or change network settings |
167 |
| Manually configure IPv4 TCP/IP parameters from the control panel |
167 |
| Rename the product on a network |
168 |
| Link speed and duplex settings |
169 |
| HP Device Toolbox (Windows) |
170 |
| HP Utility for Mac OS X |
172 |
| Open HP Utility |
172 |
| HP Utility features |
172 |
| Use HP Web Jetadmin software |
173 |
| Economy settings |
174 |
| Print with EconoMode |
174 |
| Set the Sleep Delay |
174 |
| Set the Auto Power Down delay |
174 |
| Product security features |
176 |
| Lock the product |
176 |
| Set or change the product password |
176 |
| Upgrade the firmware |
177 |
| Manually upgrade the firmware |
177 |
| Set the product to automatically upgrade the firmware |
177 |
| Solve problems |
179 |
| Solve problems checklist |
180 |
| Step 1: Make sure that the product is set up correctly |
180 |
| Step 2: Check the cabling or wireless connection |
180 |
| Step 3: Check the control panel for error messages |
181 |
| Step 4: Check the paper |
181 |
| Step 5: Check the software |
181 |
| Step 6: Test print functionality |
181 |
| Step 7: Test copy functionality |
182 |
| Step 8: Test the fax functionality |
182 |
| Step 9: Check the toner cartridge |
182 |
| Step 10: Try sending a print job from a computer |
182 |
| Step 11: Verify that the product is on the network |
182 |
| Restore the factory-set defaults |
183 |
| Control panel help system |
184 |
| Paper feeds incorrectly or becomes jammed |
185 |
| The product does not pick up paper |
185 |
| The product picks up multiple sheets of paper |
185 |
| The document feeder jams, skews, or picks up multiple sheets of paper |
186 |
| Prevent paper jams from the paper trays |
186 |
| Clear jams |
187 |
| Jam locations |
187 |
| Clear jams in the document feeder |
188 |
| Clear jams in the output bin area |
190 |
| Clear jams in Tray 1 |
191 |
| Clear jams in Tray 2 |
193 |
| Clear jams in the right door |
194 |
| Clear jams in optional Tray 3 |
198 |
| Clear jams in the lower right door (Tray 3) |
199 |
| Improve print quality |
200 |
| Print from a different software program |
200 |
| Set the paper-type setting for the print job |
200 |
| Check the paper-type setting (Windows) |
200 |
| Check the paper-type setting (Mac OS X) |
201 |
| Check the toner-cartridge status |
201 |
| Calibrate the product to align the colors |
201 |
| Print a cleaning page |
203 |
| Check the paper and printing environment |
204 |
| Use paper that meets HP specifications |
204 |
| Check the product environment |
204 |
| Check the EconoMode settings |
204 |
| Adjust color settings (Windows) |
205 |
| Try a different print driver |
206 |
| Improve copy quality |
208 |
| Check the scanner glass for dirt and smudges |
208 |
| Check the paper settings |
209 |
| Check the image adjustment settings |
209 |
| Optimize for text or pictures |
210 |
| Edge-to-edge copying |
210 |
| Clean the pickup rollers and separation pad in the document feeder |
211 |
| Improve scan quality |
212 |
| Check the scanner glass for dirt and smudges |
212 |
| Clean the pickup rollers and separation pad in the document feeder |
213 |
| Improve fax quality |
215 |
| Check the scanner glass for dirt and smudges |
215 |
| Check the send-fax resolution setting |
216 |
| Check the error correction setting |
217 |
| Send to a different fax machine |
217 |
| Clean the pickup rollers and separation pad in the document feeder |
217 |
| Check the fit-to-page setting |
218 |
| Check the sender's fax machine |
218 |
| The product does not print or it prints slowly |
219 |
| The product does not print |
219 |
| The product prints slowly |
220 |
| Solve walk-up USB printing problems |
221 |
| The USB Flash Drive menu does not open when you insert the USB flash drive |
221 |
| The file does not print from the USB flash drive |
221 |
| The file that you want to print is not listed in the USB Flash Drive menu |
222 |
| Solve fax problems |
223 |
| Checklist for solving fax problems |
223 |
| Perform a fax diagnostic test |
224 |
| Fax trace report |
225 |
| Fax error report printing |
225 |
| Print all fax reports |
225 |
| Print individual fax reports |
225 |
| Set the fax error report |
226 |
| Set the fax-error-correction mode |
226 |
| Change the fax speed |
226 |
| Solve problems sending faxes |
227 |
| An error message displays on the control panel |
227 |
| The Communication error message appears |
227 |
| No dial tone |
228 |
| The Fax is busy message appears |
228 |
| The No fax answer message appears |
230 |
| Scanner error |
230 |
| The control panel displays a Ready message with no attempt to send the fax |
230 |
| The control panel displays the message \ |
231 |
| Faxes can be received, but not sent |
231 |
| Product is password protected |
231 |
| Unable to use fax functions from the control panel |
231 |
| Unable to use speed dials |
232 |
| Unable to use group dials |
232 |
| Receive a recorded error message from the phone company when trying to send a fax |
232 |
| Unable to send a fax when a phone is connected to the product |
233 |
| Solve problems receiving faxes |
233 |
| The fax does not respond |
233 |
| The fax has a dedicated phone line |
233 |
| An answering machine is connected to the product |
234 |
| The Answer Mode setting is set to the Manual setting |
234 |
| Voice mail is available on the fax line |
235 |
| The product is connected to a DSL phone service |
235 |
| The product uses a fax over IP or VoIP phone service |
235 |
| An error message displays on the control panel |
236 |
| The No fax detected. message displays |
236 |
| The Communication error message appears |
236 |
| The Fax storage is full message appears |
237 |
| The Fax is busy message appears |
237 |
| A fax is received but does not print |
238 |
| The Private Receive feature is on |
238 |
| Sender receives a busy signal |
238 |
| A handset is connected to the product |
238 |
| A phone line splitter is being used |
238 |
| No dial tone |
238 |
| Cannot send or receive a fax on a PBX line |
238 |
| Solve general fax problems |
239 |
| Faxes are sending slowly |
239 |
| Fax quality is poor |
240 |
| Fax cuts off or prints on two pages |
240 |
| Solve USB connection problems |
242 |
| Solve wired network problems |
243 |
| Poor physical connection |
243 |
| The computer is using the incorrect IP address for the product |
243 |
| The computer is unable to communicate with the product |
244 |
| The product is using incorrect link and duplex settings for the network |
244 |
| New software programs might be causing compatibility problems |
244 |
| The computer or workstation might be set up incorrectly |
244 |
| The product is disabled, or other network settings are incorrect |
244 |
| Solve wireless network problems |
245 |
| Wireless connectivity checklist |
245 |
| The product does not print after the wireless configuration completes |
246 |
| The product does not print, and the computer has a third-party firewall installed |
246 |
| The wireless connection does not work after moving the wireless router or product |
246 |
| Cannot connect more computers to the wireless product |
246 |
| The wireless product loses communication when connected to a VPN |
247 |
| The network does not appear in the wireless networks list |
247 |
| The wireless network is not functioning |
247 |
| Perform a wireless network diagnostic test |
248 |
| Reduce interference on a wireless network |
248 |
| Solve product software problems with Windows |
249 |
| A print driver for the product is not visible in the Printer folder |
249 |
| An error message was displayed during the software installation |
249 |
| The product is in Ready mode, but nothing prints |
249 |
| Solve product software problems with Mac OS X |
251 |
| The print driver is not listed in the Print & Fax or Print & Scan list |
251 |
| The product name does not appear in the product list in the Print & Fax or Print & Scan list |
251 |
| The print driver does not automatically set up the selected product in the Print & Fax or Print & Sc ... |
251 |
| A print job was not sent to the product that you wanted |
252 |
| When connected with a USB cable, the product does not appear in the Print & Fax or Print & Scan list ... |
252 |
| You are using a generic print driver when using a USB connection |
252 |
| Remove software (Windows) |
253 |
| Remove software (Mac OS X) |
254 |
| Solve scan to email problems |
255 |
| Cannot connect to the email server |
255 |
| The email failed |
255 |
| Unable to scan |
255 |
| Solve scan to network folder problems |
256 |
| The scan failed |
256 |
 1
1 133
133 134
134 135
135 136
136 137
137 138
138 139
139 140
140 141
141 142
142 143
143