HP M3035 HP LaserJet M3027/M3035 MFP - User Guide for Model Numbers CB414A/CB4 - Page 95
Create a stored print job, Print a stored job, Stored Job - scan to folder
 |
UPC - 883585038466
View all HP M3035 manuals
Add to My Manuals
Save this manual to your list of manuals |
Page 95 highlights
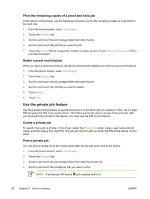
4. Specify the name for the stored job in one of these ways: ● Select an existing folder from the list. Touch New Job and type a job name. ● Touch the box below the existing Folder Name: or Job Name: on the right-hand side of the screen, and then edit the text. 5. A private stored job has a lock icon next to the name, and it requires that you specify a PIN to retrieve it. To make the job private, select PIN to Print and then type the PIN for the job. Touch OK. 6. Touch More Options to view and change other job storage options. 7. After all the options are set, touch Create Stored Job ( ) in the upper-left corner of the screen to scan the document and store the job. The job is saved on the device until you delete it, so you can print it as often as necessary. For information about printing the job, see Print a stored job. Create a stored print job In the driver, select the Stored Job option, and then type a user name and job name. The job does not print until someone requests it at the device control panel. See Print a stored job. Print a stored job At the control panel, you can print a job that is stored on the device hard disk. 1. From the Home screen, touch Job Storage. 2. Touch the Retrieve tab. 3. Scroll to and touch the job storage folder that holds the stored job. 4. Scroll to and touch the stored job that you want to print. 5. Touch Retrieve Stored Job ( ) to print the document. 6. Touch the Copies field to change the number of copies to print. 7. Touch Retrieve Stored Job ( ) to print the document. If the file has (lock symbol) next to it, the job is a private job and requires a PIN. See Use the private job feature. Delete a stored job Jobs stored on the device hard disk can be deleted at the control panel. 1. From the Home screen, touch Job Storage. 2. Touch the Retrieve tab. 3. Scroll to and touch the job storage folder that holds the stored job. 4. Scroll to and touch the stored job that you want to delete. ENWW Use job storage features 83
-
 1
1 -
2
-
3
-
4
-
5
-
6
-
7
-
8
-
9
-
10
-
11
-
12
-
13
-
14
-
15
-
16
-
17
-
18
-
19
-
20
-
21
-
22
-
23
-
24
-
25
-
26
-
27
-
28
-
29
-
30
-
31
-
32
-
33
-
34
-
35
-
36
-
37
-
38
-
39
-
40
-
41
-
42
-
43
-
44
-
45
-
46
-
47
-
48
-
49
-
50
-
51
-
52
-
53
-
54
-
55
-
56
-
57
-
58
-
59
-
60
-
61
-
62
-
63
-
64
-
65
-
66
-
67
-
68
-
69
-
70
-
71
-
72
-
73
-
74
-
75
-
76
-
77
-
78
-
79
-
80
-
81
-
82
-
83
-
84
-
85
-
86
-
87
-
88
-
89
-
 90
90 -
 91
91 -
 92
92 -
 93
93 -
 94
94 -
 95
95 -
 96
96 -
 97
97 -
 98
98 -
 99
99 -
 100
100 -
101
-
102
-
103
-
104
-
105
-
106
-
107
-
108
-
109
-
110
-
111
-
112
-
113
-
114
-
115
-
116
-
117
-
118
-
119
-
120
-
121
-
122
-
123
-
124
-
125
-
126
-
127
-
128
-
129
-
130
-
131
-
132
-
133
-
134
-
135
-
136
-
137
-
138
-
139
-
140
-
141
-
142
-
143
-
144
-
145
-
146
-
147
-
148
-
149
-
150
-
151
-
152
-
153
-
154
-
155
-
156
-
157
-
158
-
159
-
160
-
161
-
162
-
163
-
164
-
165
-
166
-
167
-
168
-
169
-
170
-
171
-
172
-
173
-
174
-
175
-
176
-
177
-
178
-
179
-
180
-
181
-
182
-
183
-
184
-
185
-
186
-
187
-
188
-
189
-
190
-
191
-
192
-
193
-
194
-
195
-
196
-
197
-
198
-
199
-
200
-
201
-
202
-
203
-
204
-
205
-
206
-
207
-
208
-
209
-
210
-
211
-
212
-
213
-
214
-
215
-
216
-
217
-
218
-
219
-
220
-
221
-
222
-
223
-
224
-
225
-
226
-
227
-
228
-
229
-
230
-
231
-
232
-
233
-
234
-
235
-
236
-
237
-
238
-
239
-
240
-
241
-
242
-
243
-
244
-
245
-
246
-
247
-
248
-
249
-
250
-
251
-
252
-
253
-
254
-
255
-
256
-
257
-
258
-
259
-
260
-
261
-
262
-
263
-
264
-
265
-
266
-
267
-
268
 |
 |