HP Nc4010 HP Compaq nc4010 Notebook PC - Maintenance and Service Guide - Page 118
Position the notebook so the front faces toward you and open, the notebook as far as it will open. - hinge
 |
View all HP Nc4010 manuals
Add to My Manuals
Save this manual to your list of manuals |
Page 118 highlights
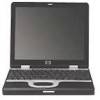
Removal and Replacement Procedures 5. Close the notebook and position the notebook so the rear panel faces toward you. 6. Remove the two T8M2.0×8.0 screws that secure the hinge covers to the notebook. Removing the Display Assembly Screws 7. Position the notebook so the front faces toward you and open the notebook as far as it will open. Maintenance and Service Guide 5-39
-
 1
1 -
2
-
3
-
4
-
5
-
6
-
7
-
8
-
9
-
10
-
11
-
12
-
13
-
14
-
15
-
16
-
17
-
18
-
19
-
20
-
21
-
22
-
23
-
24
-
25
-
26
-
27
-
28
-
29
-
30
-
31
-
32
-
33
-
34
-
35
-
36
-
37
-
38
-
39
-
40
-
41
-
42
-
43
-
44
-
45
-
46
-
47
-
48
-
49
-
50
-
51
-
52
-
53
-
54
-
55
-
56
-
57
-
58
-
59
-
60
-
61
-
62
-
63
-
64
-
65
-
66
-
67
-
68
-
69
-
70
-
71
-
72
-
73
-
74
-
75
-
76
-
77
-
78
-
79
-
80
-
81
-
82
-
83
-
84
-
85
-
86
-
87
-
88
-
89
-
90
-
91
-
92
-
93
-
94
-
95
-
96
-
97
-
98
-
99
-
100
-
101
-
102
-
103
-
104
-
105
-
106
-
107
-
108
-
109
-
110
-
111
-
112
-
 113
113 -
 114
114 -
 115
115 -
 116
116 -
 117
117 -
 118
118 -
 119
119 -
 120
120 -
 121
121 -
 122
122 -
 123
123 -
124
-
125
-
126
-
127
-
128
-
129
-
130
-
131
-
132
-
133
-
134
-
135
-
136
-
137
-
138
-
139
-
140
-
141
-
142
-
143
-
144
-
145
-
146
-
147
-
148
-
149
-
150
-
151
-
152
-
153
-
154
-
155
-
156
-
157
-
158
-
159
-
160
-
161
-
162
-
163
-
164
-
165
-
166
-
167
-
168
-
169
-
170
-
171
-
172
-
173
-
174
-
175
-
176
-
177
-
178
-
179
-
180
-
181
-
182
-
183
-
184
-
185
-
186
-
187
-
188
-
189
 |
 |

Removal and Replacement Procedures
Maintenance and Service Guide
5–39
5. Close the notebook and position the notebook so the rear
panel faces toward you.
6. Remove the two T8M2.0×8.0 screws that secure the hinge
covers to the notebook.
Removing the Display Assembly Screws
7. Position the notebook so the front faces toward you and open
the notebook as far as it will open.