HP Officejet 4620 Getting Started Guide - Page 23
Wireless (802.11) setup problems, The printer cannot send faxes but can receive faxes - mac
 |
View all HP Officejet 4620 manuals
Add to My Manuals
Save this manual to your list of manuals |
Page 23 highlights
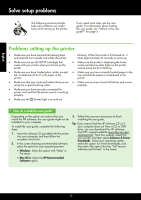
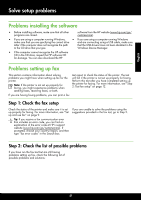
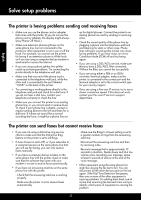
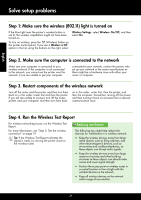
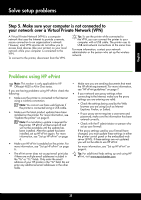
English Solve setup problems The printer cannot send faxes but can receive faxes • The printer might be dialing too fast or too soon. You might need to insert some pauses in the number sequence. For example, if you need to access an outside line before dialing the phone number, insert a pause following the access number. If your number is 95555555, and 9 accesses an outside line, you might insert pauses as follows: 9-555-5555. To enter a pause in the fax number you are typing, press the * button repeatedly, until a dash (-) appears on the display. • If you are having problems sending a fax manually from a phone that is connected directly to the printer-and if you are in the following countries/regions-you must use the keypad on the telephone to send the fax: Argentina Brazil Chile Colombia India Ireland Korea Malaysia Philippines Portugal Saudi Arabia Spain Thailand Venezuela Australia Canada China Greece Indonesia Japan Latin America Mexico Poland Russia Singapore Taiwan USA Vietnam Wireless (802.11) setup problems Note: This section is only applicable to HP Officejet 4620 e-All-in-One series. This section provides information about solving problems you might encounter when connecting the printer to your wireless network. Follow these instructions in the order listed. Note: If you are still encountering problems, see the problem-solving information in the user guide. (For information about finding the user guide, see "Where is the user guide?" on page 4.) Or visit the HP Wireless Printing Center (www.hp.com/go/wirelessprinting). After resolving the problems... After you resolve any problems and have successfully connected the printer to your wireless network, complete the following steps for your operating system: Windows Mac OS X 1. On the computer desktop, click Start, select Programs or All Programs, click HP, select your printer name, and then click Printer Setup & Software. 2. Click Connect a new printer, and then select the type of connection you want to use. 1. Open HP Utility. (HP Utility is located in the Hewlett-Packard folder in the Applications folder at the top level of the hard disk.) 2. Click the Applications icon on the HP Utility toolbar, double-click HP Setup Assistant, and then follow the onscreen instructions. 23
-
 1
1 -
2
-
3
-
4
-
5
-
6
-
7
-
8
-
9
-
10
-
11
-
12
-
13
-
14
-
15
-
16
-
17
-
 18
18 -
 19
19 -
 20
20 -
 21
21 -
 22
22 -
 23
23 -
 24
24 -
 25
25 -
 26
26 -
 27
27 -
 28
28 -
29
-
30
-
31
-
32
-
33
-
34
-
35
-
36
-
37
-
38
-
39
-
40
-
41
-
42
-
43
-
44
-
45
-
46
-
47
-
48
-
49
-
50
-
51
-
52
-
53
-
54
-
55
-
56
-
57
-
58
-
59
-
60
-
61
-
62
-
63
-
64
-
65
-
66
-
67
-
68
-
69
-
70
-
71
-
72
-
73
-
74
-
75
-
76
-
77
-
78
-
79
-
80
 |
 |
