HP PSC 2100 HP PSC 2100 Series all-in-one - (English) Reference Guide - Page 28
scan to a different software program, stop scanning, scan to a, different, software, program - series all in one software
 |
View all HP PSC 2100 manuals
Add to My Manuals
Save this manual to your list of manuals |
Page 28 highlights
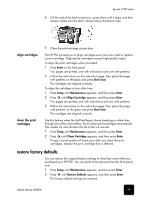
hp psc 2100 series scan to a different software program to scan an original to your Windows computer 1 Load your original on the glass. 2 Press Start Scan. A scan of the original appears in the HP Image Viewer. 3 In the HP Image Viewer window, you can edit the scanned image. When you have finished, click Accept. For more information about making changes to an image during the preview, see adjust an image during the preview in scan pictures and documents in the HP Photo & Imaging Help for more information. The HP PSC does a final scan of the original and sends the image to the HP Photo & Imaging Gallery. See manage images in how to use the software for more information about using the HP Photo & Imaging Gallery. to scan an original from your Macintosh computer 1 Load your original on the glass. For more information, see load originals on page 7. 2 Press Start Scan. The HP PSC scans the original and sends the image to the HP Photo & Imaging Gallery. See the HP Photo & Imaging Gallery online help for more information. If you prefer to scan your document to a software program other than the HP Photo & Imaging Gallery or HP Imaging Center, you can choose a different program from the Scan To list that appears in the front-panel display. The HP PSC scans the document, launches the selected software program, and displays the scanned image in that program. 1 Load your original. For more information, see load originals on page 7. 2 Press Setup until Scan Setup appears. 3 Press to scroll through the Scan To list until the desired scan-to software program appears. 4 Press Start Scan to begin the scan. The HP PSC scans your original and displays it in the selected software program. stop scanning You can stop a scan by pressing the Cancel button located on the front panel. 24 use the scan features
-
 1
1 -
2
-
3
-
4
-
5
-
6
-
7
-
8
-
9
-
10
-
11
-
12
-
13
-
14
-
15
-
16
-
17
-
18
-
19
-
20
-
21
-
22
-
 23
23 -
 24
24 -
 25
25 -
 26
26 -
 27
27 -
 28
28 -
 29
29 -
 30
30 -
 31
31 -
 32
32 -
 33
33 -
34
-
35
-
36
-
37
-
38
-
39
-
40
-
41
-
42
-
43
-
44
-
45
-
46
-
47
-
48
-
49
-
50
-
51
-
52
-
53
-
54
-
55
-
56
-
57
-
58
-
59
-
60
-
61
-
62
-
63
-
64
 |
 |
