HP Pavilion p6400 Upgrade and Service - Page 15
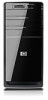
the tabs into the computer holes. Swing the right side
 |
View all HP Pavilion p6400 manuals
Add to My Manuals
Save this manual to your list of manuals |
Page 15 highlights
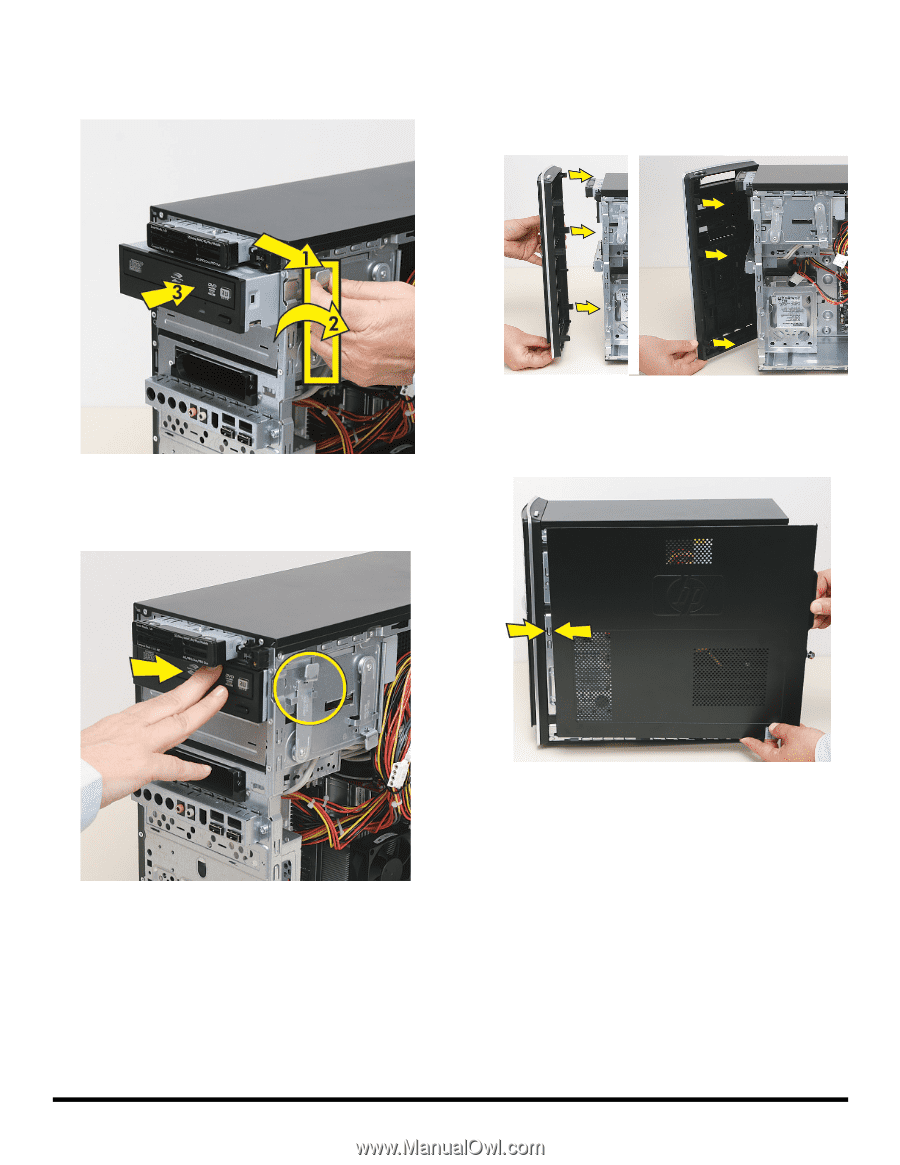
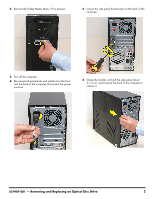
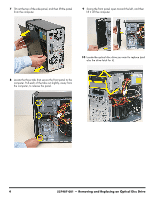
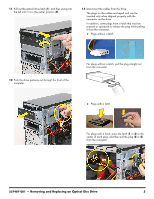
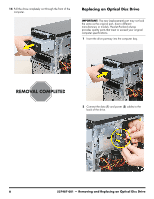
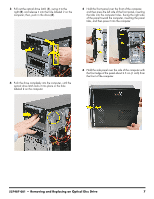
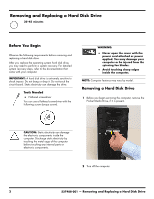
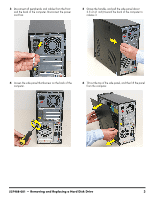
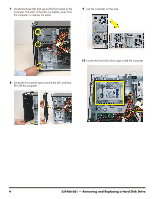
3 Pull out the optical drive latch (1), swing it to the right (2), and release it into the hole labeled 2 on the computer; then, push in the drive (3). 5 Hold the front panel over the front of the computer, and then press the left side of the front panel, inserting the tabs into the computer holes. Swing the right side of the panel toward the computer, inserting the panel tabs, and then press it into the computer. 4 Push the drive completely into the computer, until the optical drive latch locks it into place in the hole labeled 2 on the computer. 6 Hold the side panel over the side of the computer with the front edge of the panel about 2.5 cm (1 inch) from the front of the computer. 537487-001 - Removing and Replacing an Optical Disc Drive 7
-
 1
1 -
2
-
3
-
4
-
5
-
6
-
7
-
8
-
9
-
 10
10 -
 11
11 -
 12
12 -
 13
13 -
 14
14 -
 15
15 -
 16
16 -
 17
17 -
 18
18 -
 19
19 -
 20
20 -
21
-
22
-
23
-
24
-
25
-
26
-
27
-
28
-
29
-
30
-
31
-
32
-
33
-
34
-
35
-
36
-
37
-
38
-
39
-
40
-
41
-
42
-
43
-
44
-
45
-
46
-
47
-
48
-
49
-
50
 |
 |