HP Pavilion ze4400 HP Pavilion ze4x00, ze5x00 and specific xt notebook series - Page 22
Using the Documentation Library CD
 |
View all HP Pavilion ze4400 manuals
Add to My Manuals
Save this manual to your list of manuals |
Page 22 highlights
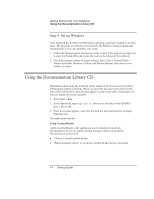
Getting Started with Your Notebook Using the Documentation Library CD Step 5: Set up Windows Your notebook has the Microsoft Windows operating system preinstalled on its hard drive. The first time you turn on your notebook, the Windows Setup program runs automatically so you can customize your setup. 1. Follow the Setup program instructions on the screen. If the program prompts you to enter the Product ID code, locate the code on the bottom of the notebook. 2. Check the modem country or region settings. Select Start > Control Panel > Printers and Other Hardware > Phone and Modem Options, then choose your country or region. Using the Documentation Library CD Information about using the notebook can be found on the Documentation Library CD included with the notebook. When you insert the Documentation Library CD into a CD or DVD drive, the CD menu appears on the screen after a brief pause. Or you can display the menu manually: 1. Select Start > Run. 2. In the Open field, type explorer X: (where X is the letter of the CD/DVD drive). Select OK. 3. From the list that appears, select the file with the .exe extension (for example, Filename.exe). The application launches. Using Acrobat Reader Adobe Acrobat Reader is the application used to display the notebook documentation. If you see Adobe Acrobat messages when you install the Documentation Library CD: • Choose to install Acrobat Reader. • When prompted, choose to accept the Acrobat Reader license agreement. 14 Startup Guide
-
 1
1 -
2
-
3
-
4
-
5
-
6
-
7
-
8
-
9
-
10
-
11
-
12
-
13
-
14
-
15
-
16
-
 17
17 -
 18
18 -
 19
19 -
 20
20 -
 21
21 -
 22
22 -
 23
23 -
 24
24 -
 25
25 -
 26
26 -
 27
27 -
28
-
29
-
30
-
31
-
32
-
33
-
34
-
35
-
36
-
37
-
38
-
39
-
40
-
41
-
42
 |
 |
