HP Photosmart 420 Setup Guide - Page 11
Install the HP Photosmart software Macintosh, Instale el software de HP Photosmart Macintosh,
 |
View all HP Photosmart 420 manuals
Add to My Manuals
Save this manual to your list of manuals |
Page 11 highlights
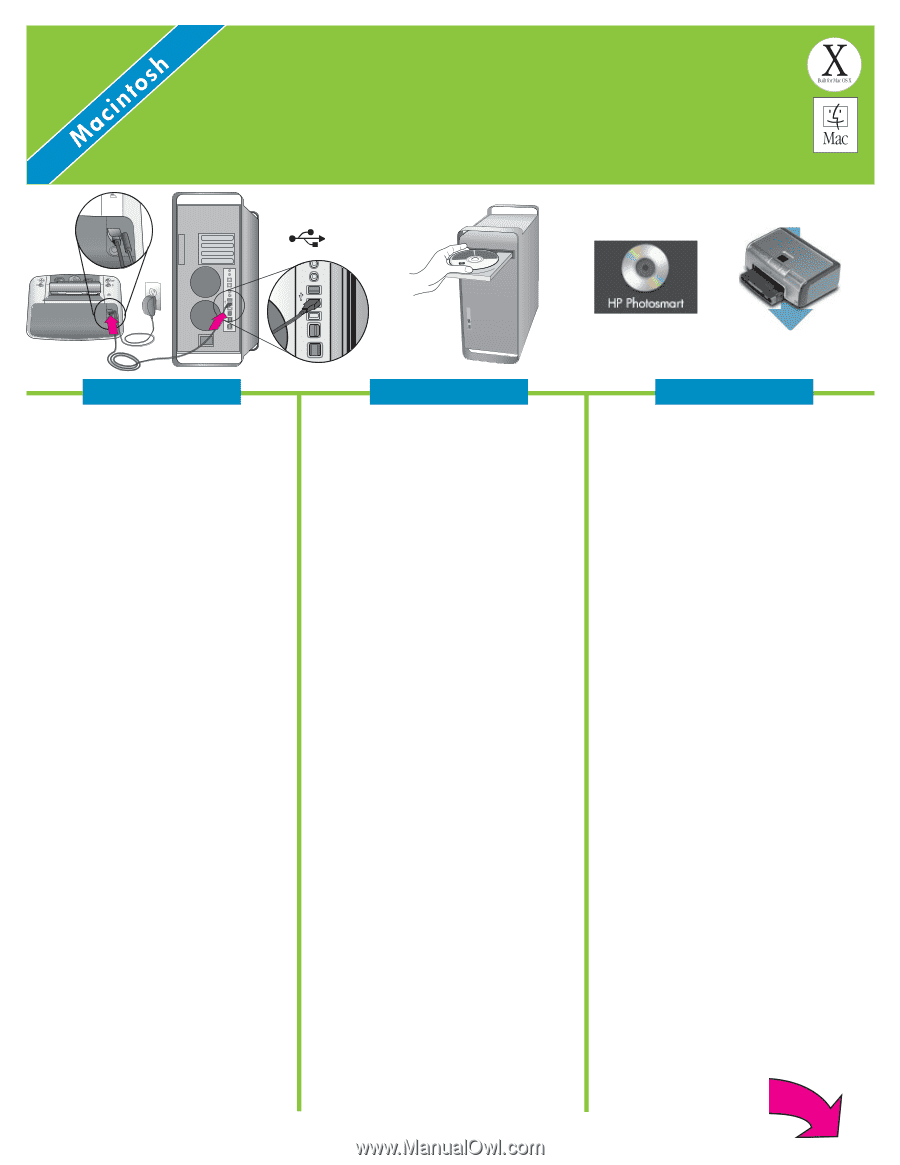
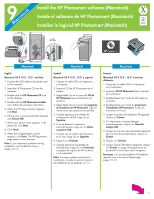
9 Install the HP Photosmart software (Macintosh) Instale el software de HP Photosmart (Macintosh) Installez le logiciel HP Photosmart (Macintosh) Macintosh English Macintosh OS X 10.2*, 10.3*, and later 1. Connect the USB cable to the printer and to the computer. 2. Insert the HP Photosmart CD into the computer. 3. Double-click the HP Photosmart CD icon on the desktop. 4. Double-click the HP Photosmart Installer icon. Follow the onscreen instructions. 5. When the HP Setup Assistant appears, click Next. 6. If the printer is not automatically detected, click Rescan USB. 7. When your device name appears in the device list, click Next. 8. Click Finish. 9. When the Congratulations screen appears, click Done. The HP Registration page opens in your browser. Note: If you experience problems during installation, see Troubleshooting on pages 12-13. Macintosh Español Macintosh OS X 10.2*, 10.3* y superior 1. Conecte el cable USB a la impresora y al equipo. 2. Inserte el CD de HP Photosmart en el equipo. 3. Haga doble clic en el icono del CD de HP Photosmart que encontrará en el escritorio. 4. Haga doble clic en el icono del programa de instalación de HP Photosmart. Siga las instrucciones que aparecen en pantalla. 5. Cuando aparezca el Asistente de configuración de HP, haga clic en Siguiente. 6. Si no se detecta la impresora automáticamente, haga clic en Volver a explorar USB. 7. Cuando vea el nombre del dispositivo en la lista, haga clic en Siguiente. 8. Haga clic en Finalizar. 9. Cuando aparezca la pantalla de enhorabuena, haga clic en Terminado. La página de registro de HP se abrirá en el explorador. Nota: Si surgen problemas durante la instalación, consulte la sección Solución de problemas en las páginas 12-13. Macintosh Français Macintosh OS X 10.2*, 10.3* et versions ultérieures 1. Connectez le câble USB à l'imprimante et à l'ordinateur. 2. Insérez le CD HP Photosmart dans le lecteur de l'ordinateur. 3. Double-cliquez sur l'icône du CD située sur le bureau. 4. Double-cliquez sur l'icône du programme d'installation HP Photosmart. Suivez les instructions à l'écran. 5. Lorsque l'assistant d'installation HP apparaît, cliquez sur Suivant. 6. Si l'imprimante n'est pas détectée automatiquement, cliquez sur Nouvelle analyse USB. 7. Lorsque le nom de votre imprimante apparaît dans la liste des périphériques, cliquez sur Suivant. 8. Cliquez sur Terminer. 9. Lorsque l'écran Félicitations apparaît, cliquez sur Terminé. La page d'enregistrement du produit HP s'ouvre dans votre navigateur. Remarque : en cas de problème d'installation, reportez-vous à la section Dépannage, pages 12-13. 11
-
 1
1 -
2
-
3
-
4
-
5
-
 6
6 -
 7
7 -
 8
8 -
 9
9 -
 10
10 -
 11
11 -
 12
12 -
 13
13 -
 14
14 -
 15
15 -
 16
16
 |
 |