HP Photosmart s20 HP PhotoSmart S20 Photo Scanner - Basics, User's Guide - Page 13
Scanning Photographs - film scanner
 |
View all HP Photosmart s20 manuals
Add to My Manuals
Save this manual to your list of manuals |
Page 13 highlights
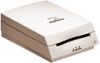
Chapter 3 - Scanning Photographs This chapter explains how to scan your photographs - mounted film, film strips, and prints - with the HP PhotoSmart S20 photo scanner. Scanning photographs consists of these simple steps: • Running the HP PhotoSmart scanning software on your PC • Setting the photo scanner for the format of the photograph you want to scan • Orienting the photograph for insertion into the photo scanner • Inserting and scanning the photograph Each of these steps is explained in this chapter. By following these simple steps, you will quickly gain professional-quality scanned images of your photographs from your S20 photo scanner. Caution: Do not attempt to scan either small prints (less than 2 inches x 2 inches, or 50 mm x 50 mm) or paper clippings (such as magazine or newspaper clippings) without inserting them in the photo sleeve that came with your photo scanner. They may jam the photo scanner or may be destroyed by it. See "Inserting and Scanning Small Prints and Paper Clippings" starting on page 22 for more information. Note: If you ever need to eject a photograph from the photo scanner during the scanning process, see "Manually Ejecting Photographs" starting on page 24. http://www.photosmart.com 11
-
 1
1 -
2
-
3
-
4
-
5
-
6
-
7
-
 8
8 -
 9
9 -
 10
10 -
 11
11 -
 12
12 -
 13
13 -
 14
14 -
 15
15 -
 16
16 -
 17
17 -
 18
18 -
19
-
20
-
21
-
22
-
23
-
24
-
25
-
26
-
27
-
28
-
29
-
30
-
31
-
32
-
33
-
34
-
35
-
36
-
37
-
38
-
39
-
40
-
41
-
42
-
43
-
44
-
45
-
46
 |
 |
