HP Photosmart s20 HP PhotoSmart S20 Photo Scanner - Basics, User's Guide - Page 18
Inserting and Scanning Photographs - photo negative slide scanner
 |
View all HP Photosmart s20 manuals
Add to My Manuals
Save this manual to your list of manuals |
Page 18 highlights
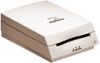
Inserting and Scanning Photographs You insert and scan mounted film, film strips, prints, and small prints and paper clippings in different ways with the S20 photo scanner. Please refer to the appropriate subsection for the photographic format you wish to scan. Inserting and Scanning Mounted Film Notice that mounted film has short sides and long sides. To scan mounted film with the S20 photo scanner, your mounted film must be: • A 35 mm, single-frame slide or negative mounted in a paper or plastic mount. The mount must not be more than 1.8 mm thick. • Clean and dust-free. (See the online help for information on cleaning mounted film.) • Inserted with a short side pointing into the photo insertion slot and with the emulsion side down. (The emulsion side is dull compared to the shiny base side.) Note: You cannot scan an unmounted or a glass-mounted, single-frame slide or negative in the photo scanner. (You can scan multiple-frame film strips, however. See the next subsection.) To insert and scan your mounted film, follow these steps: 1. Press the Photo Format button on the photo scanner until the photo insertion slot is set properly for mounted film, as shown in "Setting the Photo Scanner for the Photographic Format" on page 13. 2. Hold the mounted film by its mounting with the emulsion side down. (The emulsion side is dull compared to the shiny base side.) 16 HP PhotoSmart S20 Photo Scanner Basics
-
 1
1 -
2
-
3
-
4
-
5
-
6
-
7
-
8
-
9
-
10
-
11
-
12
-
 13
13 -
 14
14 -
 15
15 -
 16
16 -
 17
17 -
 18
18 -
 19
19 -
 20
20 -
 21
21 -
 22
22 -
 23
23 -
24
-
25
-
26
-
27
-
28
-
29
-
30
-
31
-
32
-
33
-
34
-
35
-
36
-
37
-
38
-
39
-
40
-
41
-
42
-
43
-
44
-
45
-
46
 |
 |