HP Photosmart s20 HP PhotoSmart S20 Photo Scanner - Basics, User's Guide - Page 9
Quick Setup - windows 7
 |
View all HP Photosmart s20 manuals
Add to My Manuals
Save this manual to your list of manuals |
Page 9 highlights
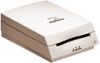
Quick Setup Chapter 2 - Quick Setup Note: You must install the HP PhotoSmart scanning software on your PC before you connect the S20 photo scanner to your PC. This chapter helps you quickly set up the HP PhotoSmart scanning software and S20 photo scanner with your PC. By following these simple steps, you'll be ready to scan photographs right away with your photo scanner. Installing the Software First, install the HP PhotoSmart scanning software on your PC, as follows: 1. Put the HP PhotoSmart CD into the CD-ROM drive of your PC. Within a minute or so, you will see the HP PhotoSmart setup screen displayed. Note: If the HP PhotoSmart setup screen does not display: Click the Start button in the Windows taskbar and choose Run. Type the drive letter for your CD-ROM drive and the file name setup.exe (for example, D:\setup.exe). Then click OK. 2. Click Install Software. 3. Follow the directions on the screen to have the setup program copy the scanning software onto your PC's hard disk. 4. Once the software copying process is complete, the setup program prompts you to restart your computer. If you choose to restart your computer now, it will take a minute or two to do so. 5. The HP PhotoSmart Setup Wizard next prompts you to connect the photo scanner to a power outlet and to your PC. Go on to the next page for specific instructions on how to do this. http://www.photosmart.com 7
-
 1
1 -
2
-
3
-
 4
4 -
 5
5 -
 6
6 -
 7
7 -
 8
8 -
 9
9 -
 10
10 -
 11
11 -
 12
12 -
 13
13 -
 14
14 -
15
-
16
-
17
-
18
-
19
-
20
-
21
-
22
-
23
-
24
-
25
-
26
-
27
-
28
-
29
-
30
-
31
-
32
-
33
-
34
-
35
-
36
-
37
-
38
-
39
-
40
-
41
-
42
-
43
-
44
-
45
-
46
 |
 |
