HP Presario 6500 Getting Started - Compaq Presario 6000 and 8000 Series Comput - Page 118
Reassembling the Diskette Adapter
 |
View all HP Presario 6500 manuals
Add to My Manuals
Save this manual to your list of manuals |
Page 118 highlights
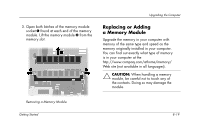
Upgrading the Computer 4. Complete the procedure described in "Reassembling the Computer" on page 8-27. 5. Turn on the computer. 6. If you replaced the hard drive, restore the system, software drivers, and any software applications that were pre-installed on the computer from Compaq. See "System Recovery Using Recovery CDs" on page 6-9 for details. When the recovery process is completed, reinstall the personal files that you backed up before replacing your hard drive. Reassembling the Diskette Adapter On the 8000 model, the diskette drive is enclosed in an adapter. (The 6000 model does not need an adapter.) To replace or add a new diskette drive to the 8000 model, you need to reassemble the adapter around the diskette drive. 1. Lower the diskette drive into the adapter 1. Ensure that the holes are aligned, and reinstall the screws 2 that secure the diskette drive to the adapter. 2. Snap the drive bezel into place 3. Press inward on each side of the bracket brace 4, and lower the bezel until it snaps into place. Ensure that the guide screws 5 are installed in the adapter. 8-16 Getting Started
-
 1
1 -
2
-
3
-
4
-
5
-
6
-
7
-
8
-
9
-
10
-
11
-
12
-
13
-
14
-
15
-
16
-
17
-
18
-
19
-
20
-
21
-
22
-
23
-
24
-
25
-
26
-
27
-
28
-
29
-
30
-
31
-
32
-
33
-
34
-
35
-
36
-
37
-
38
-
39
-
40
-
41
-
42
-
43
-
44
-
45
-
46
-
47
-
48
-
49
-
50
-
51
-
52
-
53
-
54
-
55
-
56
-
57
-
58
-
59
-
60
-
61
-
62
-
63
-
64
-
65
-
66
-
67
-
68
-
69
-
70
-
71
-
72
-
73
-
74
-
75
-
76
-
77
-
78
-
79
-
80
-
81
-
82
-
83
-
84
-
85
-
86
-
87
-
88
-
89
-
90
-
91
-
92
-
93
-
94
-
95
-
96
-
97
-
98
-
99
-
100
-
101
-
102
-
103
-
104
-
105
-
106
-
107
-
108
-
109
-
110
-
111
-
112
-
 113
113 -
 114
114 -
 115
115 -
 116
116 -
 117
117 -
 118
118 -
 119
119 -
 120
120 -
 121
121 -
 122
122 -
 123
123 -
124
-
125
-
126
-
127
-
128
-
129
-
130
-
131
-
132
-
133
-
134
-
135
-
136
-
137
-
138
-
139
-
140
-
141
-
142
 |
 |
