HP Pro 3115 Getting Started Guide - Page 10
Downloading the Latest Version of Vision Diagnostics, Turning Off the Computer
 |
View all HP Pro 3115 manuals
Add to My Manuals
Save this manual to your list of manuals |
Page 10 highlights
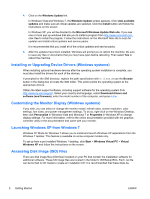
NOTE: Vision Diagnostics is included with some computer models only. If you have already downloaded Vision Diagnostics to a CD, then begin the following procedure at step 2. 1. In Windows Explorer, go to C:\SWSetup\ISOs and burn the file Vision Diagnostics.ISO to a CD. 2. While the computer is on, insert the CD into an optical drive on the computer. 3. Shut down the operating system and turn off the computer. 4. Turn on the computer. The system will boot into Vision Diagnostics. NOTE: If the system does not boot to the CD in the optical drive, you may need to change the boot order in the Computer Setup utility. Refer to the Maintenance and Service Guide (English only) for more information. 5. At the boot menu, select either the Vision Diagnostics utility to test the various hardware components in the computer or the HP Memory Test utility to test memory only. NOTE: The HP Memory Test is a comprehensive memory diagnostic utility that is run as a stand-alone application, outside of Vision Diagnostics. 6. If running Vision Diagnostics, select the appropriate language and click Continue. 7. In the End User License Agreement page, select Agree if you agree with the terms. The Vision Diagnostics utility launches with the Survey tab displayed. Downloading the Latest Version of Vision Diagnostics 1. Go to http://www.hp.com. 2. Click the Support & Drivers link. 3. Select Download drivers and software (and firmware). 4. Enter your product name in the text box and press the Enter key. 5. Select your specific computer model. 6. Select your OS. 7. Click the Diagnostic link. 8. Click the Vision Diagnostics link. 9. Click the Download button. NOTE: The download includes instructions on how to create the bootable CD. Turning Off the Computer To properly turn off the computer, first shut down the operating system software. In Windows Vista, click Start, click the arrow on the lower right corner of the Start menu, then select Shut Down. The computer automatically shuts down. In Windows 7 and Windows XP Professional, click Start > Shut Down. In Windows XP Home, click Start > Turn Off Computer. In Linux systems, click Computer > Shut Down. 4 Getting Started ENWW
-
 1
1 -
2
-
3
-
4
-
 5
5 -
 6
6 -
 7
7 -
 8
8 -
 9
9 -
 10
10 -
 11
11 -
 12
12 -
 13
13 -
 14
14 -
 15
15 -
16
-
17
-
18
-
19
 |
 |