HP Pro 3115 Getting Started Guide - Page 8
Installing or Upgrading Device Drivers (Windows systems)
 |
View all HP Pro 3115 manuals
Add to My Manuals
Save this manual to your list of manuals |
Page 8 highlights
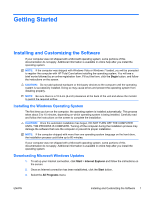
4. Click on the Windows Update link. In Windows Vista and Windows 7, the Windows Update screen appears. Click view available updates and make sure all critical updates are selected. Click the Install button and follow the instructions on the screen. In Windows XP, you will be directed to the Microsoft Windows Update Web site. If you see one or more pop-up windows that ask you to install a program from http://www.microsoft.com, click Yes to install the program. Follow the instructions on the Microsoft Web site to scan for updates and install critical updates and service packs. It is recommended that you install all of the critical updates and service packs. 5. After the updates have been installed, Windows will prompt you to reboot the machine. Be sure to save any files or documents that you may have open before rebooting. Then select Yes to reboot the machine. Installing or Upgrading Device Drivers (Windows systems) When installing optional hardware devices after the operating system installation is complete, you must also install the drivers for each of the devices. If prompted for the i386 directory, replace the path specification with C:\i386, or use the Browse button in the dialog box to locate the i386 folder. This action points the operating system to the appropriate drivers. Obtain the latest support software, including support software for the operating system from http://www.hp.com/support. Select your country and language, select Download drivers and software (and firmware), enter the model number of the computer, and press Enter. Customizing the Monitor Display (Windows systems) If you wish, you can select or change the monitor model, refresh rates, screen resolution, color settings, font sizes, and power management settings. To do so, right-click on the Windows Desktop, then click Personalize in Windows Vista and Windows 7 or Properties in Windows XP to change display settings. For more information, refer to the online documentation provided with the graphics controller utility or the documentation that came with your monitor. Launching Windows XP from Windows 7 Windows XP Mode for Windows 7 allows you to install and launch Windows XP applications from the Windows 7 taskbar. This feature is available on some computer models only. To set up from a pre-installed Windows 7 desktop, click Start > Windows Virtual PC > Virtual Windows XP and follow the instructions on the screen. Accessing Disk Image (ISO) Files There are disk image files (ISO files) included on your PC that contain the installation software for additional software. These CD image files are located in the folder C:\SWSetup\ISOs. Each .iso file can be burned to CD media to create an installation CD. It is recommended that these disks be 2 Getting Started ENWW
-
 1
1 -
2
-
 3
3 -
 4
4 -
 5
5 -
 6
6 -
 7
7 -
 8
8 -
 9
9 -
 10
10 -
 11
11 -
 12
12 -
 13
13 -
14
-
15
-
16
-
17
-
18
-
19
 |
 |