HP Pro All-in-One 3520 Maintenance & Service Guide HP Pro 3520 All-in-One - Page 88
Samsung and LG panels, CMI panels, Lift the bracket assembly off the display panel.
 |
View all HP Pro All-in-One 3520 manuals
Add to My Manuals
Save this manual to your list of manuals |
Page 88 highlights
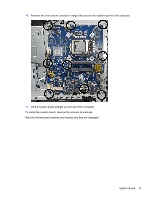
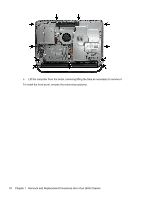
5. Remove the four screws that secure the display panel to the bracket. Each panel is secured with two screws on opposite sides of the bracket. Samsung and LG panels use screw holes on left and ride sides. CMI panels use screw holes on the top and bottom sides. Samsung and LG panels: CMI panels: 6. Disconnect the cable that connects the display panel to the converter board. 7. Lift the bracket assembly from the bottom side of the display. 8. Disconnect the display cable from the display panel. 9. Lift the bracket assembly off the display panel. To install a display panel, reverse the removal procedures. 80 Chapter 7 Removal and Replacement Procedures All-in One (AIO) Chassis
-
 1
1 -
2
-
3
-
4
-
5
-
6
-
7
-
8
-
9
-
10
-
11
-
12
-
13
-
14
-
15
-
16
-
17
-
18
-
19
-
20
-
21
-
22
-
23
-
24
-
25
-
26
-
27
-
28
-
29
-
30
-
31
-
32
-
33
-
34
-
35
-
36
-
37
-
38
-
39
-
40
-
41
-
42
-
43
-
44
-
45
-
46
-
47
-
48
-
49
-
50
-
51
-
52
-
53
-
54
-
55
-
56
-
57
-
58
-
59
-
60
-
61
-
62
-
63
-
64
-
65
-
66
-
67
-
68
-
69
-
70
-
71
-
72
-
73
-
74
-
75
-
76
-
77
-
78
-
79
-
80
-
81
-
82
-
 83
83 -
 84
84 -
 85
85 -
 86
86 -
 87
87 -
 88
88 -
 89
89 -
 90
90 -
 91
91 -
 92
92 -
 93
93 -
94
-
95
-
96
-
97
-
98
-
99
-
100
-
101
-
102
-
103
-
104
-
105
-
106
-
107
-
108
-
109
-
110
-
111
-
112
-
113
-
114
-
115
-
116
-
117
-
118
-
119
-
120
-
121
-
122
-
123
-
124
-
125
-
126
-
127
-
128
-
129
-
130
-
131
-
132
-
133
-
134
-
135
-
136
-
137
-
138
-
139
-
140
-
141
-
142
-
143
-
144
-
145
-
146
-
147
-
148
-
149
-
150
-
151
-
152
 |
 |
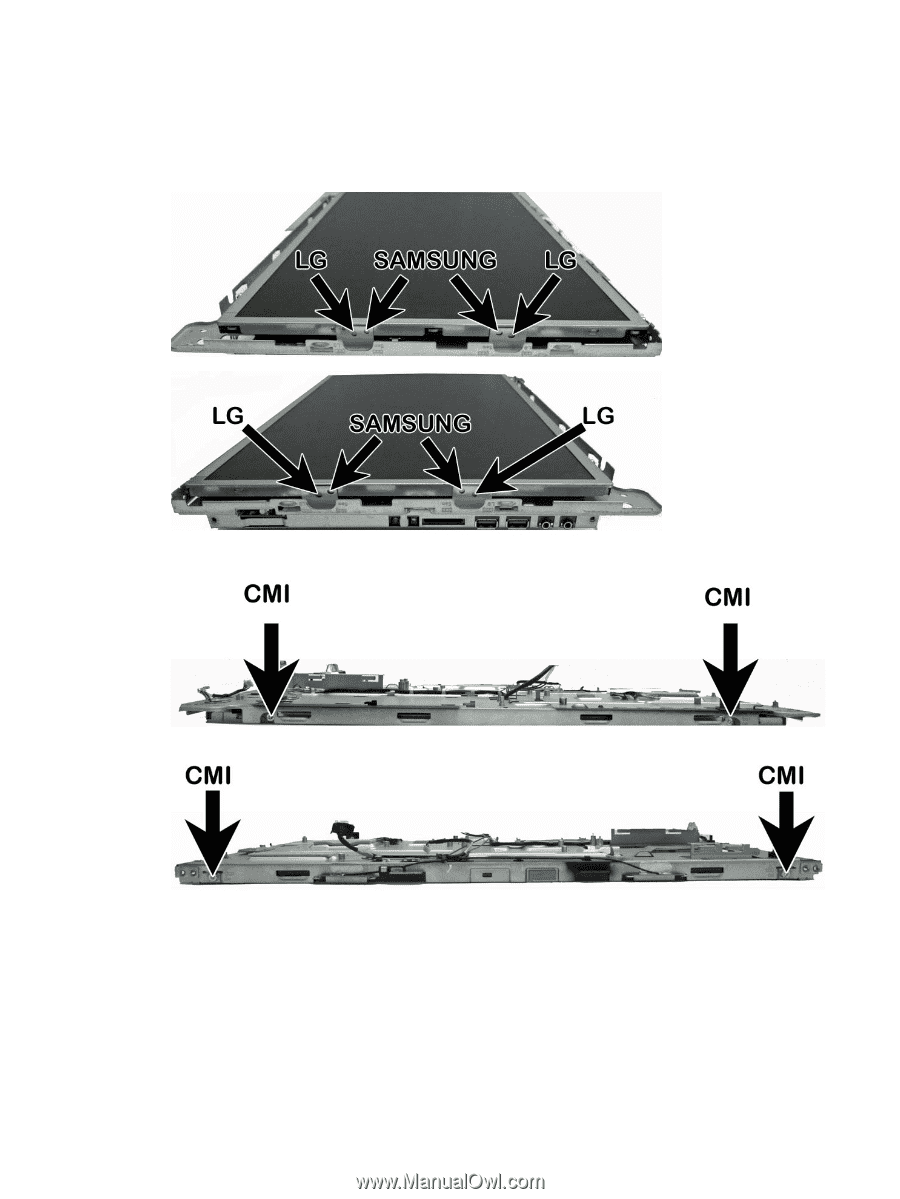
5.
Remove the four screws that secure the display panel to the bracket. Each panel is secured with
two screws on opposite sides of the bracket. Samsung and LG panels use screw holes on left
and ride sides. CMI panels use screw holes on the top and bottom sides.
Samsung and LG panels:
CMI panels:
6.
Disconnect the cable that connects the display panel to the converter board.
7.
Lift the bracket assembly from the bottom side of the display.
8.
Disconnect the display cable from the display panel.
9.
Lift the bracket assembly off the display panel.
To install a display panel, reverse the removal procedures.
80
Chapter 7
Removal and Replacement Procedures All-in One (AIO) Chassis