HP ProDesk 680 HP ProtectTools Security Software,Version 6.0 User Guide - Page 51
Using Privacy Manager in Microsoft Outlook
 |
View all HP ProDesk 680 manuals
Add to My Manuals
Save this manual to your list of manuals |
Page 51 highlights
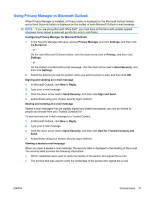
Using Privacy Manager in Microsoft Outlook When Privacy Manager is installed, a Privacy button is displayed on the Microsoft Outlook toolbar, and a Send Securely button is displayed on the toolbar of each Microsoft Outlook e-mail message. NOTE: If you are using Microsoft Office 2007, you must have all the Microsoft updates applied otherwise some signed e-mails will go into the Junk E-mail folder. Configuring Privacy Manager for Microsoft Outlook 1. In the Security Manager left pane, expand Privacy Manager and click Settings, and then click the E-mail tab. - or - On the main Microsoft Outlook toolbar, click the down arrow next to Privacy, and then click Settings. - or - On the toolbar of a Microsoft e-mail message, click the down arrow next to Send Securely, and then click Settings. 2. Select the actions you want to perform when you send a secure e-mail, and then click OK. Signing and sending an e-mail message 1. In Microsoft Outlook, click New or Reply. 2. Type your e-mail message. 3. Click the down arrow next to Send Securely, and then click Sign and Send. 4. Authenticate using your chosen security logon method. Sealing and sending an e-mail message Sealed e-mail messages that are digitally signed and sealed (encrypted) can only be viewed by people you choose from your Trusted Contacts list. To seal and send an e-mail message to a Trusted Contact: 1. In Microsoft Outlook, click New or Reply. 2. Type your e-mail message. 3. Click the down arrow next to Send Securely, and then click Seal for Trusted Contacts and Send. 4. Authenticate using your chosen security logon method. Viewing a sealed e-mail message When you open a sealed e-mail message, the security label is displayed in the heading of the e-mail. The security label provides the following information: ● Which credentials were used to verify the identity of the person who signed the e-mail ● The product that was used to verify the credentials of the person who signed the e-mail ENWW General tasks 41
-
 1
1 -
2
-
3
-
4
-
5
-
6
-
7
-
8
-
9
-
10
-
11
-
12
-
13
-
14
-
15
-
16
-
17
-
18
-
19
-
20
-
21
-
22
-
23
-
24
-
25
-
26
-
27
-
28
-
29
-
30
-
31
-
32
-
33
-
34
-
35
-
36
-
37
-
38
-
39
-
40
-
41
-
42
-
43
-
44
-
45
-
 46
46 -
 47
47 -
 48
48 -
 49
49 -
 50
50 -
 51
51 -
 52
52 -
 53
53 -
 54
54 -
 55
55 -
 56
56 -
57
-
58
-
59
-
60
-
61
-
62
-
63
-
64
-
65
-
66
-
67
-
68
-
69
-
70
-
71
-
72
-
73
-
74
 |
 |
