HP ProLiant DL590/64 Deployment of Red Hat Linux 7.2 for Itanium Processor on - Page 7
Use Daylight Savings Time US Only, Con using DHCP
 |
View all HP ProLiant DL590/64 manuals
Add to My Manuals
Save this manual to your list of manuals |
Page 7 highlights
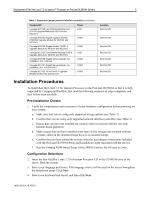
Deployment of Red Hat Linux 7.2 for Itanium™ Processor on ProLiant DL590/64 Servers 7 5. Setup your mouse. a. Choose your mouse type, and check the Emulate 3 buttons checkbox, if you want to use your two-button mouse as if it had three buttons (by pressing both mouse buttons simultaneously). Note: The third button is highly recommended for use with the X Window System. b. Verify all three buttons are working. 6. Select your installation type. The available options are workstation, server, laptop, custom, or upgrade. For the purposes of this paper, select the Custom radio button under the Install section. 7. Partition your hard disk by selecting the Have the installer automatically partition for you radio button and clicking Next. 8. Click Yes to initialize the drive. 9. Select Remove all Linux Partitions on this system. Check the Review checkbox, and click Next. 10. Click Yes to confirm the removal of existing Linux partitions. The DISK DRUID Utility window will be displayed. Click Next. 11. On the eth0 tab of the Network Configuration screen, do the following: a. Choose whether or not you want to configure your IP address using DHCP. b. By checking the Activate on boot checkbox, the network interface controller will start when the server boots. If you check the Configure using DHCP checkbox, ignore steps c and d. c. Type in the IP Address, Netmask, Network, and Broadcast addresses in the appropriate windows, if needed. If you have a fully qualified domain name for the network device, type it in the Hostname window. d. Type the Gateway DNS and Primary DNS addresses. (If applicable, type the Secondary DNS and Ternary DNS addresses as well.) e. Click Next. 12. Choose the security level (High, Medium, or No firewall). For the purposes of this paper, select the No firewall radio button, and click Next. The Additional Languages Support screen will be displayed with a default language selection of the language chosen in step 3. 13. Select additional languages or accept the default language, and click Next. 14. Select your time zone configuration. a. On the Location tab, select the continent where the server resides. b. On the UTC tab, check the Use Daylight Savings Time (US Only) checkbox, if the server resides in the United States. c. Check the system clock uses UTC checkbox, if you don't want to use local time. d. Click Next. 15. Set the root password and add users. 16S6-0502A-WWEN
-
 1
1 -
 2
2 -
 3
3 -
 4
4 -
 5
5 -
 6
6 -
 7
7 -
 8
8 -
 9
9
 |
 |
