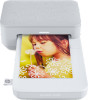
HP Sprocket Studio App User Guide - Page 3
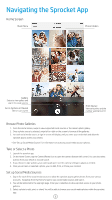
Navigating the Sprocket App
 |
View all HP Sprocket Studio manuals
Add to My Manuals
Save this manual to your list of manuals |
Page 3 highlights
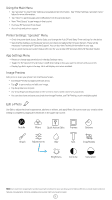
Navigating the Sprocket App Home Screen Main Menu Photo folders Gallery Swipe to view gallery and sign in to social sources Go to Camera or Reveal Take or scan a print Print Queue View sent prints and the number waiting to print Browse Photo Galleries 1. From the Home Screen, swipe to view supported social sources or the camera photo gallery. 2. Once a photo source is selected, swipe left or right on the screen to browse all the galleries. 3. For each social media source, a sign in screen will display until you enter your credentials and allow the sprocket app to access your photos. • See "Set up Social Media Sources" for information on accessing social media account photos. Take or Select a Photo 1. Launch the sprocket app. 2. On the Home Screen, tap the Camera/Reveal icon to open the camera (bottom left corner). You can also select a photo from your device or a social source. 3. If you choose to take a photo, your camera will open. Use the camera settings to adjust as needed. 4. Once you've taken or selected a photo, you can Edit, Print, or Share your creation! Set up Social Media Sources 1. Sign in for each of the social media sources to allow the sprocket app to gather photos from your various accounts. Swipe/tap from the Home Screen to view social media sources and sign in. 2. You will be redirected to the app login page. Enter your credentials to allow sprocket access to your photo galleries. 3. Select a photo to edit, print, or share! You will be able to browse your social media photos within the sprocket app. 2
-
 1
1 -
 2
2 -
 3
3 -
 4
4 -
 5
5 -
 6
6 -
 7
7 -
 8
8 -
 9
9 -
10
 |
 |
