HP TouchSmart 520-1165xt Wall Mounting Guide (For Select Models Only) - Page 10
HP TouchSmart PC back to a desktop unit in the future. To reinstall the stand, follow all the steps
 |
View all HP TouchSmart 520-1165xt manuals
Add to My Manuals
Save this manual to your list of manuals |
Page 10 highlights
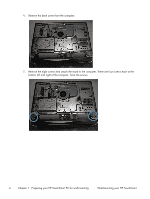
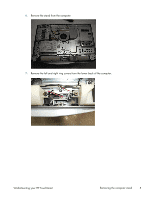
8. Snap the rings into place on the lower corners of the computer. 9. Replace the back cover on the computer and install the three screws securing the cover to the computer. NOTE: Save the computer stand and the eight screws, so that you can convert your HP TouchSmart PC back to a desktop unit in the future. To reinstall the stand, follow all the steps in Reinstalling the stand on your HP TouchSmart PC on page 8. 6 Chapter 1 Preparing your HP TouchSmart PC for wall-mounting Wall-Mounting your HP TouchSmart
-
 1
1 -
2
-
3
-
4
-
 5
5 -
 6
6 -
 7
7 -
 8
8 -
 9
9 -
 10
10 -
 11
11 -
 12
12 -
 13
13 -
 14
14 -
 15
15 -
16
 |
 |
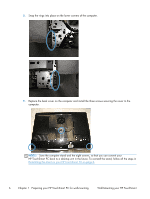
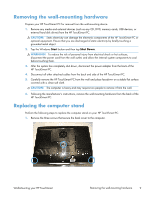
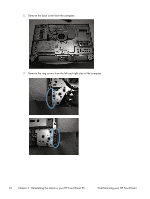
8.
Snap the rings into place on the lower corners of the computer.
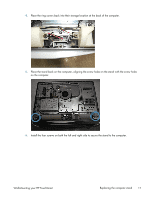
9.
Replace the back cover on the computer and install the three screws securing the cover to the
computer.
NOTE:
Save the computer stand and the eight screws, so that you can convert your
HP TouchSmart PC back to a desktop unit in the future. To reinstall the stand, follow all the steps in
Reinstalling the stand on your HP TouchSmart PC
on page
8
.
6
Chapter 1
Preparing your HP TouchSmart PC for wall-mounting
Wall-Mounting your HP TouchSmart