HP Vectra VA 6/xxx HP Vectra VA 6/xxx, User's Guide for Minitower models - Page 32
Installing an Additional Hard Disk Drive
 |
View all HP Vectra VA 6/xxx manuals
Add to My Manuals
Save this manual to your list of manuals |
Page 32 highlights
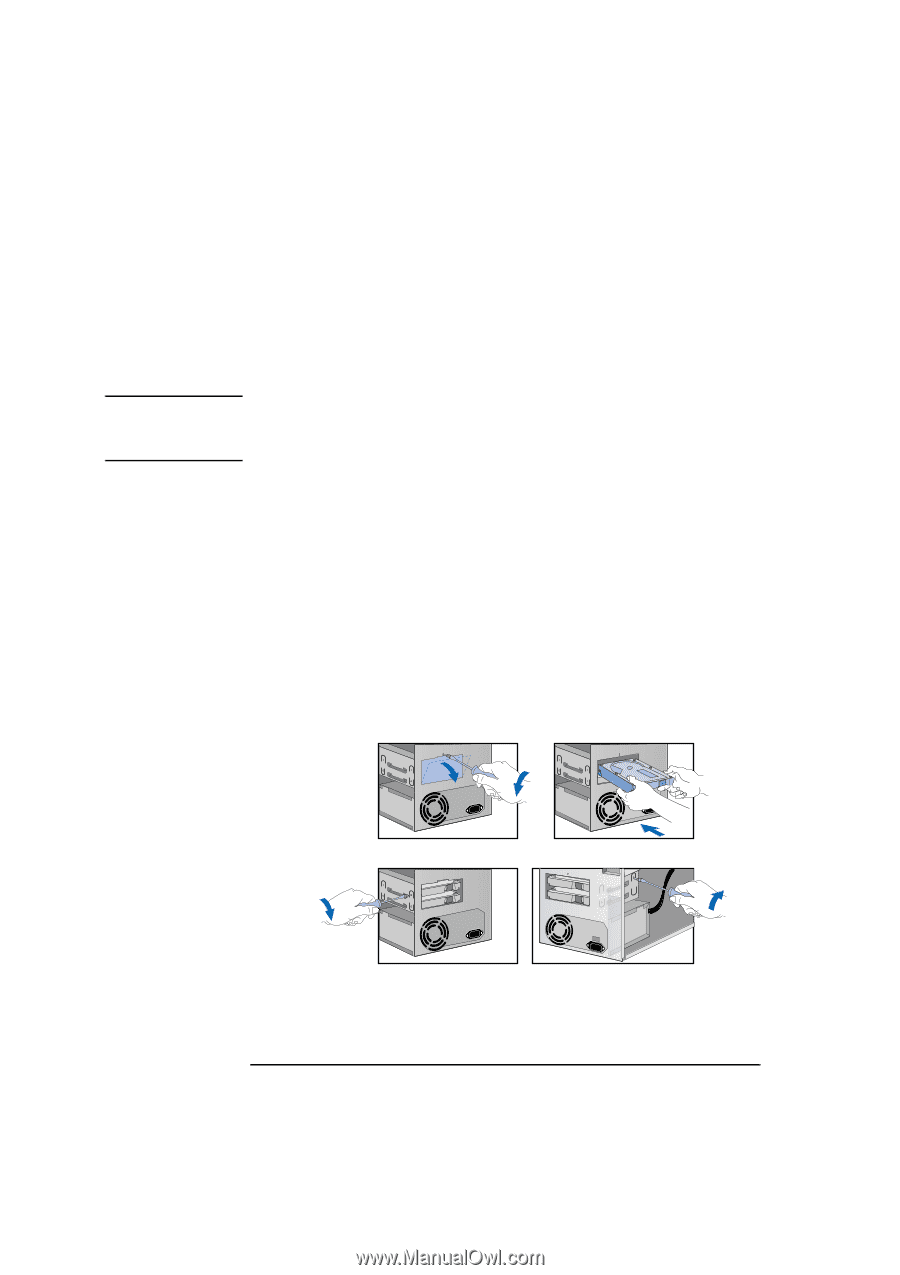
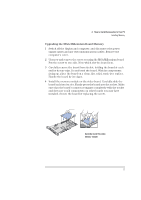
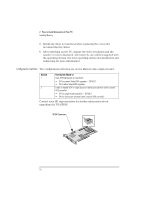
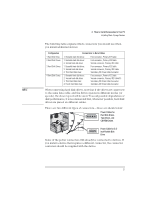
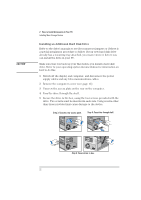
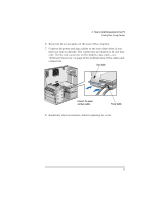
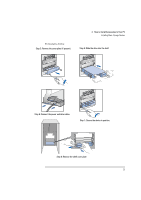
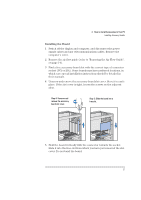
CAUTION 2 How to Install Accessories In Your PC Installing Mass Storage Devices Installing an Additional Hard Disk Drive Refer to the drive's manuals to see if you must set jumpers or if there is a special installation procedure to follow. If your new hard disk drive already has a mounting tray attached, you must remove it before you can install the drive in your PC. Make sure that you back up your files before you install a hard disk drive. Refer to your operating system documentation for information on how to do this. 1 Switch off the display and computer, and disconnect the power supply cables and any telecommunications cables. 2 Remove the computer's cover (see page 13). 3 Unscrew the access plate on the rear on the computer. 4 Pass the drive through the shelf. 5 Secure the drive to the box, using the four screws provided with the drive. Two screws must be inserted in each side. Using screws other than those provided may cause damage to the device. Step 3: Unscrew rear access plate. Step 4: Pass drive through shelf. 22 English Step 5: Secure drive to box.
-
 1
1 -
2
-
3
-
4
-
5
-
6
-
7
-
8
-
9
-
10
-
11
-
12
-
13
-
14
-
15
-
16
-
17
-
18
-
19
-
20
-
21
-
22
-
23
-
24
-
25
-
26
-
 27
27 -
 28
28 -
 29
29 -
 30
30 -
 31
31 -
 32
32 -
 33
33 -
 34
34 -
 35
35 -
 36
36 -
 37
37 -
38
-
39
-
40
-
41
-
42
-
43
-
44
-
45
-
46
-
47
-
48
-
49
-
50
-
51
-
52
-
53
-
54
-
55
-
56
-
57
-
58
-
59
-
60
-
61
-
62
-
63
-
64
-
65
-
66
-
67
-
68
-
69
-
70
-
71
-
72
-
73
-
74
-
75
-
76
-
77
-
78
-
79
-
80
-
81
-
82
-
83
-
84
-
85
-
86
-
87
-
88
-
89
-
90
-
91
-
92
-
93
-
94
-
95
-
96
 |
 |