HP Vectra XA 6/xxx HP Vectra Xa 6/xxx Pc DESKTOP user’s guide - d4779 - Page 32
Configuring an IDE Device After Installation, Installing an IDE Hard Disk Drive in the Rear Shelf
 |
View all HP Vectra XA 6/xxx manuals
Add to My Manuals
Save this manual to your list of manuals |
Page 32 highlights
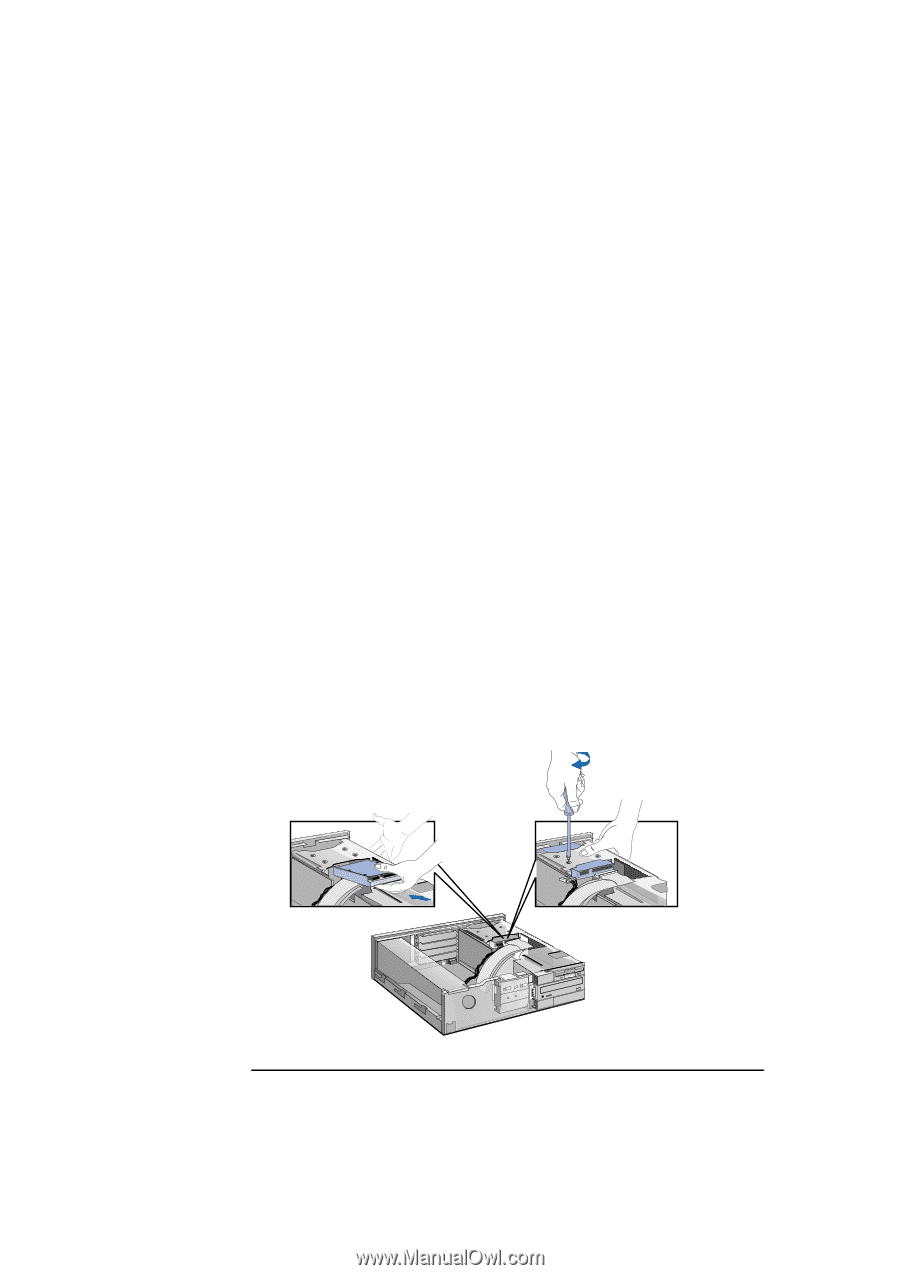
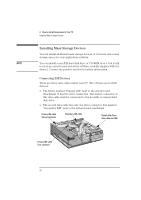
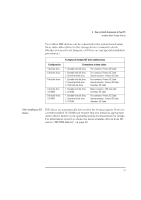
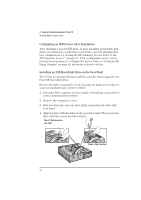
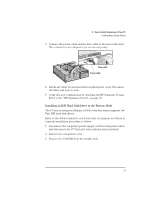
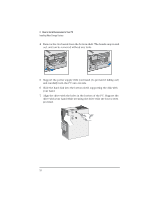
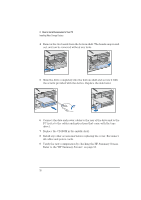
2 How to Install Accessories In Your PC Installing Mass Storage Devices Configuring an IDE Device After Installation After installing a second IDE drive, or after installing any flexible disk drive, you will need to verify that your PC has correctly identified the new configuration, by viewing the HP Summary Screen. Refer to the "HP Summary Screen", on page 53. If the configuration is not correct, run the Setup program to configure the device. Refer to "Using the HP Setup Program" on page 54, for details of how to do this. Installing an IDE Hard Disk Drive in the Rear Shelf The PC has an integrated Enhanced IDE controller which supports two Fast IDE hard disk drives. Refer to the drive's manuals to see if you must set jumpers or if there is a special installation procedure to follow. 1 Disconnect the computer's power supply cord and any connection to a telecommunications network. 2 Remove the computer's cover. 3 Slide the drive into the rear drive shelf, supporting the drive with your hand. 4 Align the drive with the holes in the rear drive shelf. Then secure the drive with the screws provided with it. Step 3: Slide drive into rear shelf Step 4: Align the drive. 22 English
-
 1
1 -
2
-
3
-
4
-
5
-
6
-
7
-
8
-
9
-
10
-
11
-
12
-
13
-
14
-
15
-
16
-
17
-
18
-
19
-
20
-
21
-
22
-
23
-
24
-
25
-
26
-
 27
27 -
 28
28 -
 29
29 -
 30
30 -
 31
31 -
 32
32 -
 33
33 -
 34
34 -
 35
35 -
 36
36 -
 37
37 -
38
-
39
-
40
-
41
-
42
-
43
-
44
-
45
-
46
-
47
-
48
-
49
-
50
-
51
-
52
-
53
-
54
-
55
-
56
-
57
-
58
-
59
-
60
-
61
-
62
-
63
-
64
-
65
-
66
-
67
-
68
-
69
-
70
-
71
-
72
-
73
-
74
-
75
-
76
-
77
-
78
-
79
-
80
-
81
-
82
-
83
-
84
-
85
-
86
-
87
-
88
-
89
-
90
-
91
-
92
-
93
-
94
-
95
-
96
-
97
-
98
-
99
-
100
-
101
-
102
 |
 |