HP Vectra XE320 hp vectra xe320, upgrade guide
HP Vectra XE320 Manual
 |
View all HP Vectra XE320 manuals
Add to My Manuals
Save this manual to your list of manuals |
HP Vectra XE320 manual content summary:
- HP Vectra XE320 | hp vectra xe320, upgrade guide - Page 1
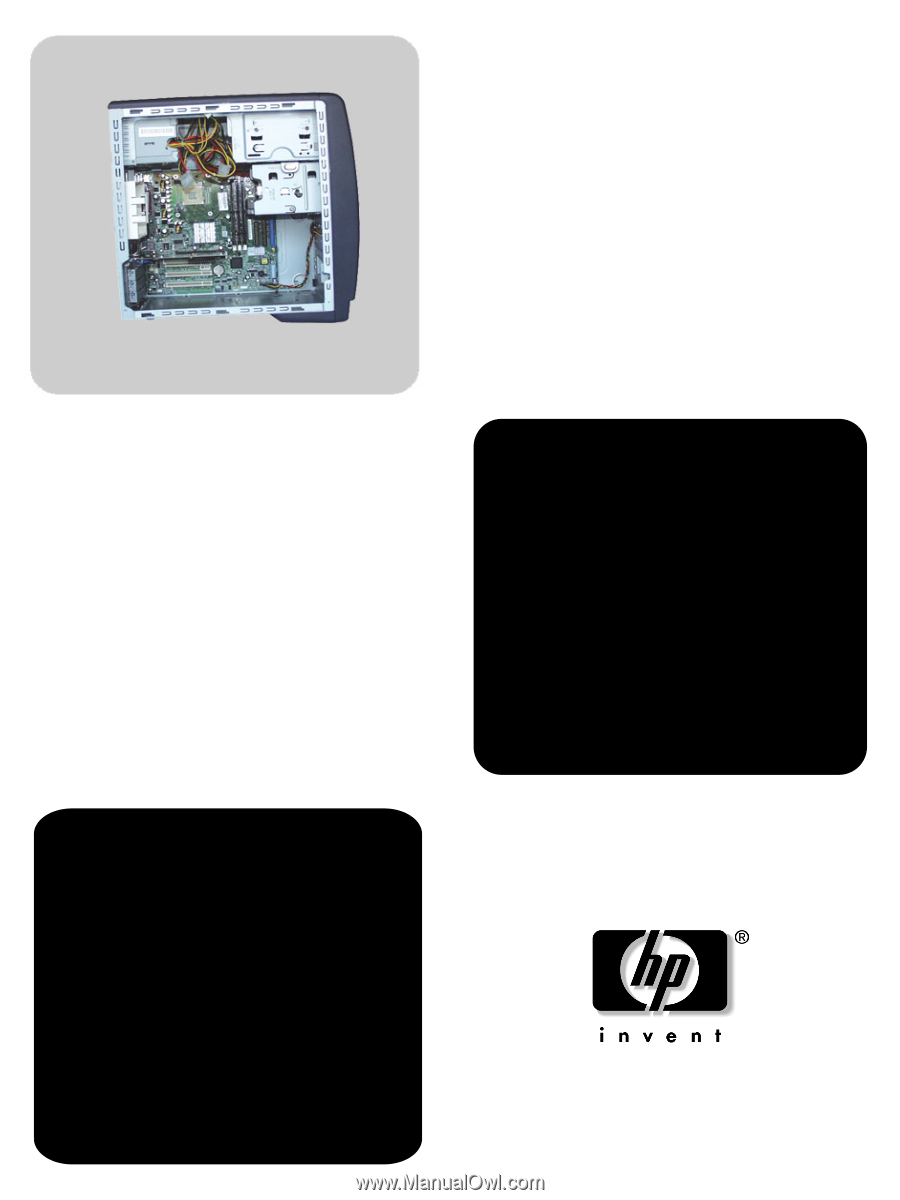
hp vectra xe320 upgrade guide hp business pcs www.hp.com/go/vectrasupport - HP Vectra XE320 | hp vectra xe320, upgrade guide - Page 2
copyright. All rights are reserved. No part of this document may be photocopied, reproduced Windows and Windows NT are U.S registered trademarks of Microsoft Corporation. HP do experience discomfort or pains while using any computing equipment, discontinue use immediately and consult your physician - HP Vectra XE320 | hp vectra xe320, upgrade guide - Page 3
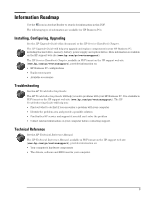
See the HP Upgrade Guide (this document) or the HP Service Handbook Chapter. The HP Upgrade Guide will help you upgrade and replace components in your HP Business PC, including the hard drive, memory, battery, power supply, and optical drives. More information is available on the HP support web site - HP Vectra XE320 | hp vectra xe320, upgrade guide - Page 4
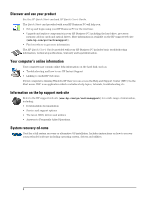
technical specifications, warranty and legal information. Your computer's online information Your computer may contain online help information on the hard disk, such as: • Troubleshooting and how to use HP Instant Support • Linking to useful HP web sites. If your computer is running Windows XP then - HP Vectra XE320 | hp vectra xe320, upgrade guide - Page 5
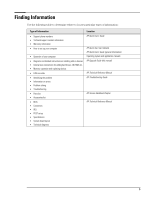
replacing devices • LAN controller • Identifying the problem • Information on errors • Problem solving • Troubleshooting • Parts list • Accessories list • BIOS • Connectors • IRQ • POST setup • Specifications • System board layout • Technical diagrams Location HP Quick User's Guide HP Quick Start - HP Vectra XE320 | hp vectra xe320, upgrade guide - Page 6
6 - HP Vectra XE320 | hp vectra xe320, upgrade guide - Page 7
Panel 12 Installing a Memory Module 13 Installing an AGP or PCI Expansion Card 14 Replacing the System Board 15 Replacing a Processor 16 Replacing the Floppy Drive 17 Replacing the Hard Drive 19 Adding a Second Hard Drive 21 Installing an Optical Drive 22 Replacing the Power Supply Unit 25 - HP Vectra XE320 | hp vectra xe320, upgrade guide - Page 8
parts of the computer may be hot. Please wait for them to cool down before touching them. To avoid electrical shock, do not open the power supply. There are no user-serviceable parts your PC, or to HP, so that they can monitor manual. Position the monitor on your desk. Position the computer - HP Vectra XE320 | hp vectra xe320, upgrade guide - Page 9
Status Upgrading and Replacing PC Hardware This section describes how to: • upgrade hardware components • replace faulty components. If you want to find out about available accessories for your PC, refer to the HP accessories web site at: www.hp.com/go/pcaccessories. - HP Vectra XE320 | hp vectra xe320, upgrade guide - Page 10
bag. Handle the accessory as little as possible and with care. Inside the PC Power supply (see "Replacing the Power Supply Unit" on page 25) Fan holder AGP Slot (see "Installing an AGP or the Hard Drive" on page 19) Main memory modules - 3 slots (see "Installing a Memory Module" on page 13) 10 - HP Vectra XE320 | hp vectra xe320, upgrade guide - Page 11
must also connect the main and auxiliary power connectors, status panel connector and CD audio connector (Linux models only) to the system board. Chassis fan Auxiliarly Power connector (12V) CD audio connector (Linux models only) Processor fan Main Power connector Status Panel (note that the two - HP Vectra XE320 | hp vectra xe320, upgrade guide - Page 12
Upgrading and Replacing PC Hardware Removing and Replacing the Side Panel WARNING For your safety, disconnect the power cord and all external cables. 1 Place the PC on a flat surface and stand behind it. 2 Disconnect all cables from the rear of the PC. 3 Undo - HP Vectra XE320 | hp vectra xe320, upgrade guide - Page 13
Upgrading and Replacing PC Hardware Installing a Memory Module WARNING For your safety, disconnect the power cord and all external cables. Note Only use HP memory modules provided for your PC model. The use of other memory modules is not supported. For information about supported HP accessories, - HP Vectra XE320 | hp vectra xe320, upgrade guide - Page 14
Upgrading and Replacing PC Hardware Installing an AGP or PCI Expansion Card WARNING For your safety, disconnect the power cord and all external cables. 1 Switch off the PC, disconnect the power cord and remove the PC's side panel (refer to "Removing and Replacing the Side Panel" on page 12). 2 - HP Vectra XE320 | hp vectra xe320, upgrade guide - Page 15
Upgrading and Replacing PC Hardware Replacing the System Board WARNING For your safety, disconnect the power cord and all reuse such as the graphics card, processor and heatsink cradle or memory modules. Refer to the appropriate section for instructions on removing the individual components. 5 - HP Vectra XE320 | hp vectra xe320, upgrade guide - Page 16
Upgrading and Replacing PC Hardware Replacing a Processor WARNING For your safety, disconnect the power cord and all external cables. 1 Switch off the PC, disconnect the power cord and remove the PC's side panel (refer to "Removing and Replacing the Side Panel" on page 12). 2 Lay the PC on its side - HP Vectra XE320 | hp vectra xe320, upgrade guide - Page 17
external cables. 1 Switch off the PC, disconnect the power cord and remove the PC's side panel (refer to "Removing and Replacing the Side Panel" on page 12). 2 Press the tab on the hard drive/floppy drive tray and pull the tray out part of the way. Press here 3 Disconnect all cables at - HP Vectra XE320 | hp vectra xe320, upgrade guide - Page 18
Upgrading and Replacing PC Hardware 7 Slide the new floppy drive into the drive tray. 8 Replace the two screws. 9 Reconnect the cables at the back of and correctly in place. 10 Replace the PC's side panel (refer to "Removing and Replacing the Side Panel" on page 12). 11 Reconnect the power cord. 18 - HP Vectra XE320 | hp vectra xe320, upgrade guide - Page 19
recovering the contents of your old hard drive, refer to the Vectra XE320 Troubleshooting Guide, available in PDF format from the HP Vectra support website (www.hp.com/go/vectrasupport). WARNING For your safety, disconnect the power cord and all external cables. 1 Switch off the PC, disconnect the - HP Vectra XE320 | hp vectra xe320, upgrade guide - Page 20
Upgrading and Replacing PC Hardware 7 Slide the new drive into the drive tray. 8 Replace the three screws. 9 Reconnect the cables at the back of the and correctly in place. 10 Replace the PC's side panel (refer to "Removing and Replacing the Side Panel" on page 12). 11 Reconnect the power cord. 20 - HP Vectra XE320 | hp vectra xe320, upgrade guide - Page 21
drivers, use the Recovery CD-ROMs provided with the PC. In addition, you can find the most up-to-date versions of HP drivers on HP's Web site at: www.hp.com/go/vectrasupport. 9 Replace the PC's side panel (refer to "Removing and Replacing the Side Panel" on page 12). 10 Reconnect the power cord. 21 - HP Vectra XE320 | hp vectra xe320, upgrade guide - Page 22
Upgrading open the laser module. The laser module should be serviced by service personnel only. Do not attempt to make any adjustment to power cord and remove the PC's side panel (refer to "Removing and Replacing the Side Panel" on page 12). 2 Disconnect the cables from the rear of the drive. audio - HP Vectra XE320 | hp vectra xe320, upgrade guide - Page 23
Upgrading and Replacing PC Hardware 5 Check that the jumpers on the rear of the new drive are set to CS (cable select) mode. 6 Slide the new drive in from the front of the PC. 7 Replace the two screws. 8 Replace the data and power cables. If your PC is a Linux model, replace the audio cable. audio - HP Vectra XE320 | hp vectra xe320, upgrade guide - Page 24
Upgrading and Replacing PC Hardware 3 Check that the jumpers on the rear of the new drive are set to CS (cable select) mode. fasten the drive to the bay. 6 Connect the data and power cables, and for DVD or CD-ROM drives on Linux models, the audio cable. • If this is the second device installed in the - HP Vectra XE320 | hp vectra xe320, upgrade guide - Page 25
not support power supply upgrades. This information is provided to help you replace a defective power supply unit. For your safety, only replace with a power supply provided by HP support services. To avoid electrical shock, do not open the power supply. There are no user-serviceable parts inside - HP Vectra XE320 | hp vectra xe320, upgrade guide - Page 26
Upgrading and Replacing PC Hardware Replacing the Battery WARNING There is a your PC, or to HP, so that they can either be recycled or disposed of in an environmentally sound way. Returned used batteries will be accepted free of charge. For your safety, disconnect the power cord and all external - HP Vectra XE320 | hp vectra xe320, upgrade guide - Page 27
- HP Vectra XE320 | hp vectra xe320, upgrade guide - Page 28
Produced: 02/2002
-
 1
1 -
 2
2 -
 3
3 -
 4
4 -
 5
5 -
 6
6 -
 7
7 -
8
-
9
-
10
-
11
-
12
-
13
-
14
-
15
-
16
-
17
-
18
-
19
-
20
-
21
-
22
-
23
-
24
-
25
-
26
-
27
-
28
 |
 |
upgrade guide
hp
vectra xe320
hp
business pcs
www.hp.com/go/vectrasupport