HP W1907 HP w19 LCD Monitor User's Guide - Page 12
Controls: HP w19 LCD Monitor, Operating Instructions, External Controls, OSD Lock Function
 |
UPC - 882780774636
View all HP W1907 manuals
Add to My Manuals
Save this manual to your list of manuals |
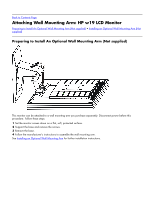
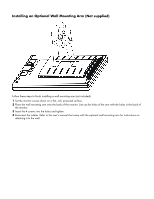
Page 12 highlights
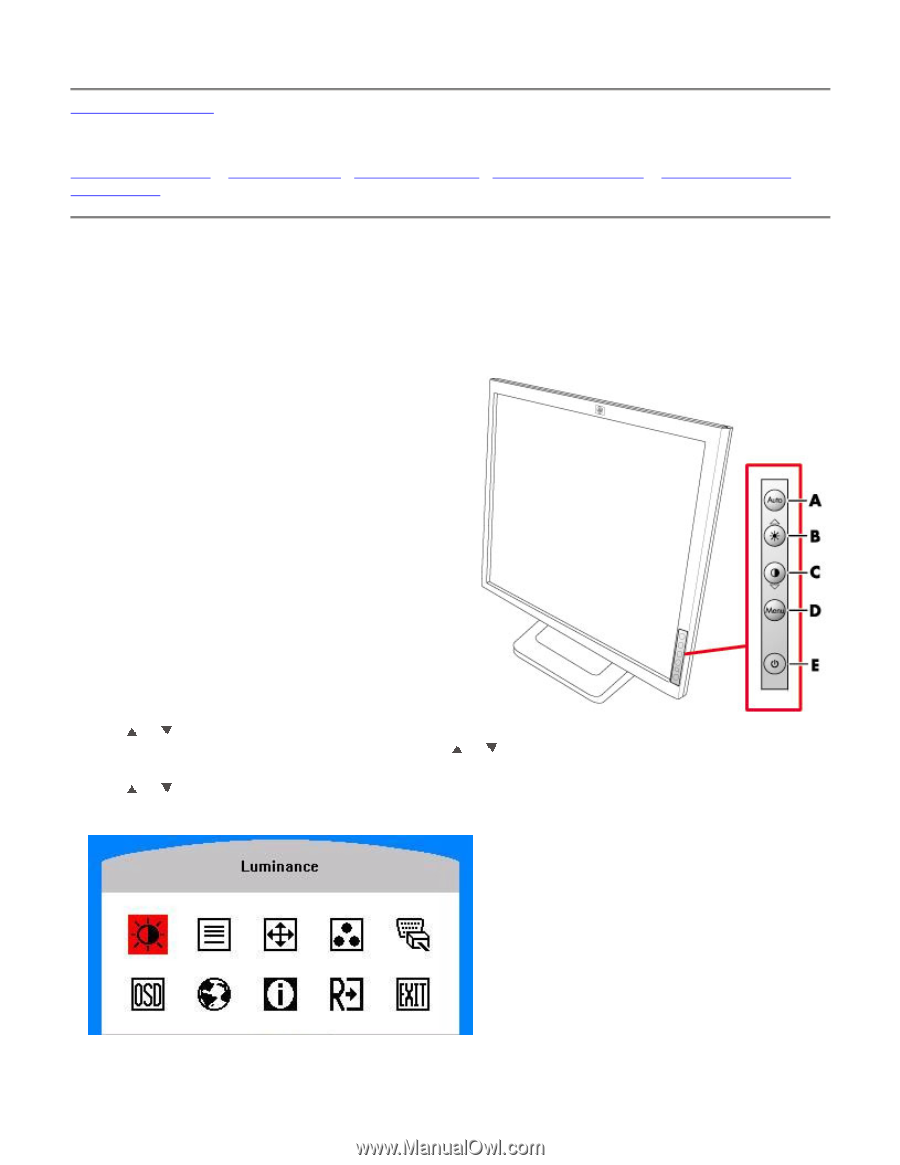
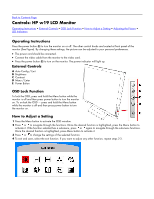
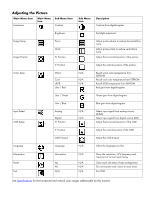
Back to Contents Page Controls: HP w19 LCD Monitor Operating Instructions • External Controls • OSD Lock Function • How to Adjust a Setting • Adjusting the Picture • LED Indicators Operating Instructions Press the power button (E) to turn the monitor on or off. The other control knobs are located at front panel of the monitor (See Figure). By changing these settings, the picture can be adjusted to your personal preferences. • The power cord should be connected. • Connect the video cable from the monitor to the video card. • Press the power button (E) to turn on the monitor. The power indicator will light up. External Controls A Auto Config / Exit B Brightness C Contrast D Menu / Enter E Power Button OSD Lock Function To lock the OSD, press and hold the Menu button while the monitor is off and then press power button to turn the monitor on. To un-lock the OSD - press and hold the Menu button while the monitor is off and then press power button to turn the monitor on. How to Adjust a Setting 1 Press the Menu button to activate the OSD window. 2 Press or to navigate through the functions. Once the desired function is highlighted, press the Menu button to activate it. If the function selected has a sub-menu, press or again to navigate through the sub-menu functions. Once the desired function is highlighted, press Menu button to activate it. 3 Press or to change the settings of the selected function. 4 To exit and save, select the exit function. If you want to adjust any other function, repeat steps 2-3.
-
 1
1 -
2
-
3
-
4
-
5
-
6
-
 7
7 -
 8
8 -
 9
9 -
 10
10 -
 11
11 -
 12
12 -
 13
13 -
 14
14 -
 15
15 -
 16
16 -
 17
17 -
18
-
19
-
20
-
21
-
22
 |
 |