HP W1907 HP w19 LCD Monitor User's Guide - Page 9
Attaching Wall Mounting Arm: HP w19 LCD Monitor
 |
UPC - 882780774636
View all HP W1907 manuals
Add to My Manuals
Save this manual to your list of manuals |
Page 9 highlights
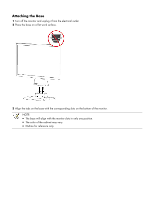
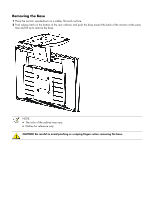
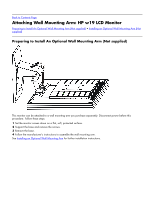
Back to Contents Page Attaching Wall Mounting Arm: HP w19 LCD Monitor Preparing to Install An Optional Wall Mounting Arm (Not supplied) • Installing an Optional Wall Mounting Arm (Not supplied) Preparing to Install An Optional Wall Mounting Arm (Not supplied) This monitor can be attached to a wall mounting arm you purchase separately. Disconnect power before this procedure. Follow these steps: 1 Set the monitor screen down on a flat, soft, protected surface. 2 Support the base and remove the screws. 3 Remove the base. 4 Follow the manufacturer's instructions to assemble the wall mounting arm. See Installing an Optional Wall Mounting Arm for further installation instructions.
-
 1
1 -
2
-
3
-
 4
4 -
 5
5 -
 6
6 -
 7
7 -
 8
8 -
 9
9 -
 10
10 -
 11
11 -
 12
12 -
 13
13 -
 14
14 -
15
-
16
-
17
-
18
-
19
-
20
-
21
-
22
 |
 |

Back to Contents Page
Attaching Wall Mounting Arm: HP w19 LCD Monitor
Preparing to Install An Optional Wall Mounting Arm (Not supplied)
•
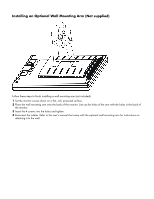
Installing an Optional Wall Mounting Arm (Not
supplied)
Preparing to Install An Optional Wall Mounting Arm (Not supplied)
This monitor can be attached to a wall mounting arm you purchase separately. Disconnect power before this
procedure. Follow these steps:
1
Set the monitor screen down on a flat, soft, protected surface.
2
Support the base and remove the screws.
3
Remove the base.
4
Follow the manufacturer's instructions to assemble the wall mounting arm.
See
Installing an Optional Wall Mounting Arm
for further installation instructions.