HP Workstation xw4000 SCSI Hard Drive Installation - HP Workstation xw Series - Page 4
Configuring the Workstation - reviews
 |
View all HP Workstation xw4000 manuals
Add to My Manuals
Save this manual to your list of manuals |
Page 4 highlights
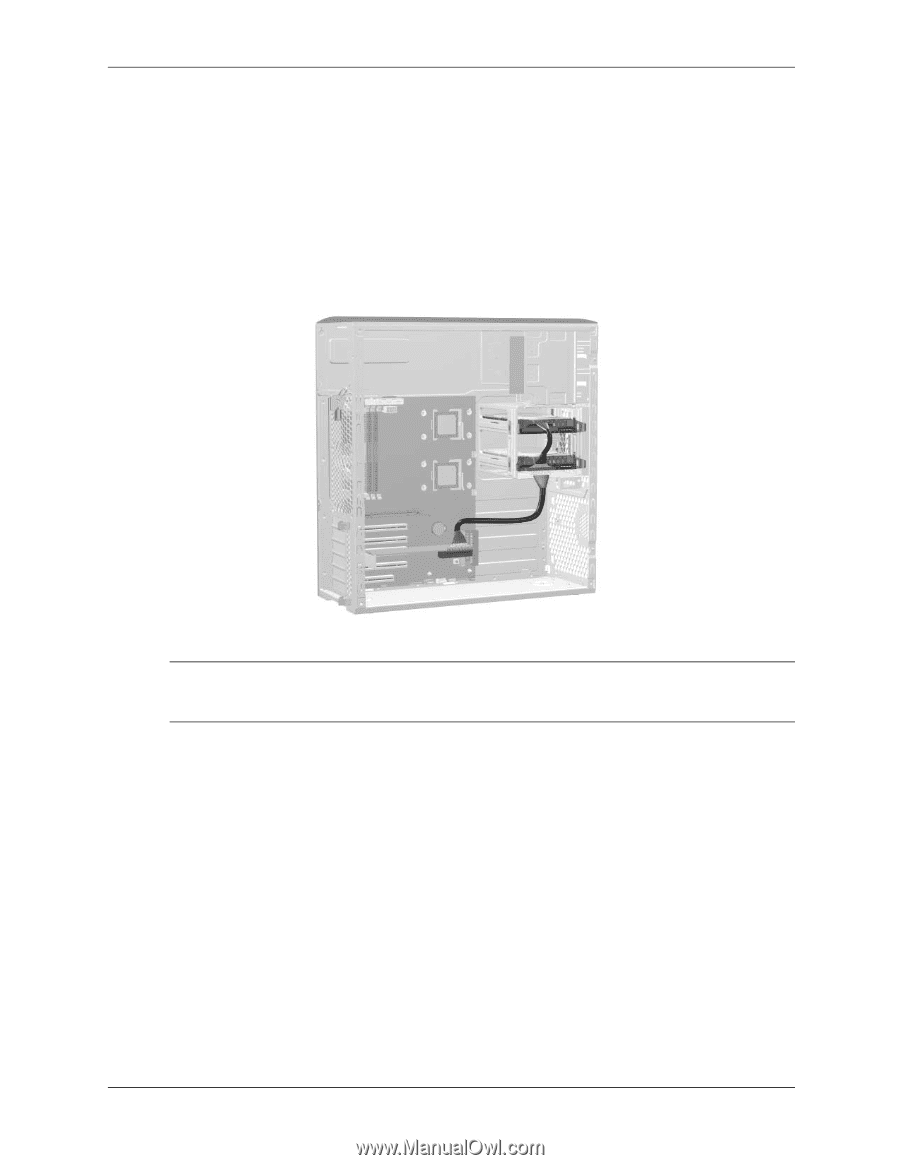
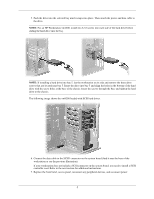
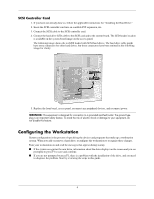
SCSI Controller Card 1. If you have not already done so, follow the applicable instructions for "Installing the Hard Drive.'' 2. Insert the SCSI controller card into an available PCI expansion slot. 3. Connect the SCSI cable to the SCSI controller card. 4. Connect the hard drive LED cable to the SCSI card and to the system board. The LED header location is available on the system board image on the access panel. The following image shows the xw6200 loaded with SCSI hard drives. The hard drive cable might have extra connectors for other hard drives, but those connectors have been omitted in the following image for clarity. 5. Replace the front bezel, access panel, reconnect any peripheral devices, and reconnect power. WARNING: This equipment is designed for connection to a grounded (earthed) outlet. The ground type plug is an important safety feature. To avoid the risk of electric shock or damage to your equipment, do not disable this feature. Configuring the Workstation System configuration is the process of specifying the devices and programs that make up a workstation system. When you add or remove a hard drive, reconfigure the workstation to recognize these changes. Turn your workstation on and read the messages that appear during startup. ■ If the system recognizes the new drive, information about the drive displays on the screen and you are prompted to press F1 to save and continue. ■ If you are not prompted to press F1, there is a problem with the installation of the drive, and you need to diagnose the problem. Start by reviewing the steps in this guide. 4
-
 1
1 -
 2
2 -
 3
3 -
 4
4 -
 5
5 -
 6
6 -
 7
7 -
 8
8 -
 9
9 -
 10
10 -
11
-
12
-
13
-
14
-
15
-
16
-
17
-
18
 |
 |