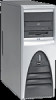
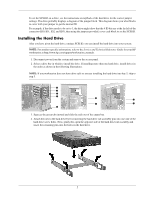
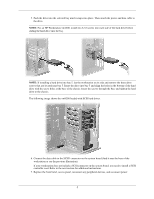
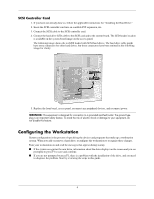
HP Workstation xw4000 SCSI Hard Drive Installation - HP Workstation xw Series - Page 7
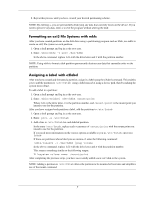
Formatting an ext3 File Systems with mkfs, Assigning a Label with e2label
 |
View all HP Workstation xw4000 manuals
Add to My Manuals
Save this manual to your list of manuals |
Page 7 highlights
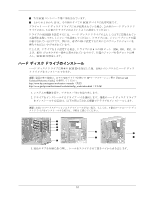
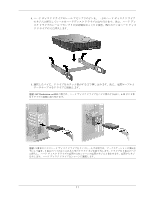
6. Repeat this process until you have created your desired partitioning scheme. NOTE: By entering w, you are permanently destroying any data that currently exists on the device. If you need to preserve any data, enter q to exit the program without altering the disk. Formatting an ext3 File Systems with mkfs After you have created partitions on the disk drive using a partitioning program such as fdisk, use mkfs to create an ext3 file system on each partition. 1. Open a shell prompt and log in as the root user. 2. Enter: /sbin/mkfs -t ext3 /dev/hdbX In the above command, replace hdb with the drive letter and X with the partition number. NOTE: Using mkfs to format a disk partition permanently destroys any data that currently exists on the partition. Assigning a Label with e2label After you have created and formatted a partition, assign it a label using the e2label command. This enables you to add the partition to /etc/fstab using a label instead of using a device path, thereby making the system more robust. To add a label to a partition: 1. Open a shell prompt and log in as the root user. 2. Enter: /sbin/e2label /dev/hdbX /mount/point Where hdb is the drive letter, X is the partition number, and /mount/point is the mount point you intend to use for the partition. After you have assigned each partition a label, add the partitions to /etc/fstab. 1. Open a shell prompt and log in as the root user. 2. Enter: pico -w /etc/fstab 3. Add a line to /etc/fstab for each labeled partition. In the entry /etc/fstab, replace each occurrence of /mount/point with the mount point you intend to use for the partition. If you need more information on the various options available to you in /etc/fstab, enter man fstab. If there are partitions whose label you are unsure of, enter the following command: /sbin/tune2fs -l /dev/hdbX |grep volume In the above command, replace hdb with the drive letter and X with the partition number. This returns something similar to the following output: Filesystem volume name: /mount/point After completing the previous steps, you have successfully added a new ext3 disk to the system. NOTE: Adding a partition to /etc/fstab allows the partition to be mounted at boot time and simplifies use of the mount command. 7
-
 1
1 -
 2
2 -
 3
3 -
 4
4 -
 5
5 -
 6
6 -
 7
7 -
 8
8 -
 9
9 -
 10
10 -
 11
11 -
 12
12 -
13
-
14
-
15
-
16
-
17
-
18
 |
 |