HP XL Class 500/550MHz HP Visualize Linux Workstation - Owner's Guide: XL-Clas - Page 26
Creating a Rescue Disk Set
 |
View all HP XL Class 500/550MHz manuals
Add to My Manuals
Save this manual to your list of manuals |
Page 26 highlights
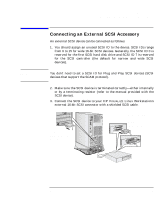
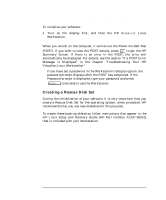
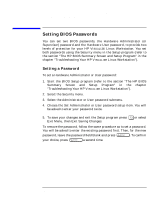
Setting Up and Using Your HP Visualize Linux Workstation Starting and Stopping Your HP Visualize Linux Workstation To initialize your software: 1. Turn on the display first, and then the HP VISUALIZE Linux Workstation. When you switch on the computer, it carries out the Power-On-Self-Test (POST). If you wish to view the POST details, press to get the HP Summary Screen. If there is an error in the POST, the error will automatically be displayed. For details, see the section "If a POST Error Message is Displayed" in the chapter "Troubleshooting Your HP Visualize Linux Workstation." If you have set a password in the Workstation's Setup program, the password prompt displays after the POST has completed. If the Password prompt is displayed, type your password and press to be able to use the Workstation. Creating a Rescue Disk Set During the initialization of your software, it is very important that you create a Rescue Disk Set for the operating system, when prompted. HP recommends that you use new diskettes for this purpose. To create these back-up diskettes, follow instructions that appear in the HP Linux Setup and Recovery Guide (HP Part Number A1297-90010) that is included with your Workstation. 12 Chapter 1
-
 1
1 -
2
-
3
-
4
-
5
-
6
-
7
-
8
-
9
-
10
-
11
-
12
-
13
-
14
-
15
-
16
-
17
-
18
-
19
-
20
-
 21
21 -
 22
22 -
 23
23 -
 24
24 -
 25
25 -
 26
26 -
 27
27 -
 28
28 -
 29
29 -
 30
30 -
 31
31 -
32
-
33
-
34
-
35
-
36
-
37
-
38
-
39
-
40
-
41
-
42
-
43
-
44
-
45
-
46
-
47
-
48
-
49
-
50
-
51
-
52
-
53
-
54
-
55
-
56
-
57
-
58
-
59
-
60
-
61
-
62
-
63
-
64
-
65
-
66
-
67
-
68
-
69
-
70
-
71
-
72
-
73
-
74
-
75
-
76
 |
 |