HP Xw6200 Processor Installation - HP Workstations - Page 2
Step 1-Upgrade the System BIOS, Step 2-Prepare the Workstation - bios upgrade
 |
UPC - 882780333536
View all HP Xw6200 manuals
Add to My Manuals
Save this manual to your list of manuals |
Page 2 highlights
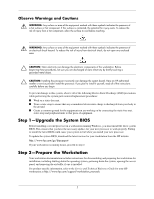
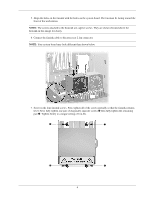
Observe Warnings and Cautions Å WARNING: Any surface or area of the equipment marked with these symbols indicates the presence of a hot surface or hot component. If this surface is contacted, the potential for injury exists. To reduce the risk of injury from a hot component, allow the surface to cool before touching. Å WARNING: Any surface or area of the equipment marked with these symbols indicates the presence of an electrical shock hazard. To reduce the risk of injury from electrical shock, do not open any enclosed area. Ä CAUTION: Static electricity can damage the electronic components of the workstation. Before beginning these procedures, be sure you are discharged of static electricity by briefly touching a grounded metal object. Ä CAUTION: Installing the processor incorrectly can damage the system board. Have an HP authorized reseller or service provider install the processor. If you plan to install it yourself, read all of the instructions carefully before you begin. To prevent damage to this system, observe all of the following Electro Static Discharge (ESD) precautions while performing the system parts removal/replacement procedures: ■ Work on a static-free mat. ■ Wear a static strap to ensure that any accumulated electrostatic charge is discharged from your body to the ground. ■ Create a common ground for the equipment you are working on by connecting the static-free mat, static strap and peripheral units to that piece of equipment. Step 1-Upgrade the System BIOS Before installing a second processor in a workstation running Windows, you must install the latest system BIOS. This ensures that you have the necessary updates for your new processor to work properly. Failing to install the latest BIOS could cause your system to fail when you install your new processor. To update the system BIOS, download the latest version for your workstation from the HP website: http://www.hp.com/go/bizsupport If your workstation is running Linux, proceed to step 2. Step 2-Prepare the Workstation Your workstation documentation includes instructions for disassembling and preparing the workstation for installation, including shutting down the operating system, powering down the system, opening the access panel, and removing the air baffle, if one is installed. For product-specific information, refer to the Service and Technical Reference Guide for your HP workstation at http://www.hp.com/support/workstation_manuals. 2
-
 1
1 -
 2
2 -
 3
3 -
 4
4 -
 5
5 -
 6
6 -
 7
7 -
 8
8 -
9
-
10
-
11
-
12
-
13
-
14
 |
 |