HP Xw6200 Processor Installation - HP Workstations - Page 3
Step 3-Install the Second Processor
 |
UPC - 882780333536
View all HP Xw6200 manuals
Add to My Manuals
Save this manual to your list of manuals |
Page 3 highlights
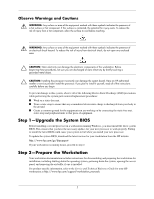
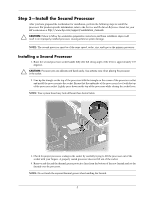
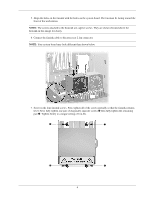
Step 3-Install the Second Processor After you have prepared the workstation for installation, perform the following steps to install the processor. For product-specific information, refer to the Service and Technical Reference Guide for your HP workstation at http://www.hp.com/support/workstation_manuals. Ä CAUTION: Failure to follow the workstation preparation instructions and these installation steps could result in an improperly installed processor, causing extensive system damage. NOTE: The second processor must be of the same speed, cache, size, and type as the primary processor. Installing a Second Processor 1. Raise the second processor socket handle fully (the full swing angle of the lever is approximately 135 degrees). Ä CAUTION: Processor pins are delicate and bend easily. Use extreme care when placing the processor in the socket. 2. Line up the triangle on the top of the processor with the triangle on the corner of the processor socket and install the processor into the socket. Ensure that the underside of the processor is level with the top of the processor socket. Lightly press down on the top of the processor while closing the socket lever. NOTE: Your system board may look different than shown below. 3. Check for proper processor seating in the socket by carefully trying to lift the processor out of the socket with your fingers. A properly seated processor does not lift out of the socket. 4. Remove and discard the thermal grease protective liner from the bottom of the new fansink and set the fansink over the processor. NOTE: Do not touch the exposed thermal grease when handling the fansink. 3
-
 1
1 -
 2
2 -
 3
3 -
 4
4 -
 5
5 -
 6
6 -
 7
7 -
 8
8 -
 9
9 -
10
-
11
-
12
-
13
-
14
 |
 |
