HP Xw6200 Sliding Rack Mount Kit Installation
HP Xw6200 - Workstation - 2 GB RAM Manual
 |
UPC - 882780333536
View all HP Xw6200 manuals
Add to My Manuals
Save this manual to your list of manuals |
HP Xw6200 manual content summary:
- HP Xw6200 | Sliding Rack Mount Kit Installation - Page 1
rack mount kit on an HP xw6200 Workstation and how to install the workstation into a rack. Kit Contents This product is shipped with the necessary supplies for installing the sliding rack kit on an HP xw6200 Workstation in HP round hole and square hole racks, earlier HP racks, and some third-party - HP Xw6200 | Sliding Rack Mount Kit Installation - Page 2
to the replace access panel and front bezel after removing the top cover. For information on these tasks, refer to the Service and Technical Reference Guide for your HP Workstation at: http://www.hp.com/support/workstation_manuals. For product-specific information, refer to the Service and Technical - HP Xw6200 | Sliding Rack Mount Kit Installation - Page 3
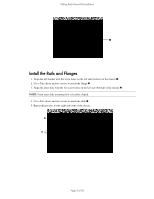
Kit Installation 1 Install the Rails and Flanges 1. Align the left bracket with the screw holes on the left side (bottom) of the chassis 1. 2. Use a Torx driver and two screws to attach the flange 2. 3. Align the inner slide with the two screw holes on the left side (bottom) of the chassis 3. NOTE - HP Xw6200 | Sliding Rack Mount Kit Installation - Page 4
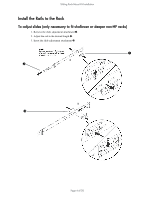
Sliding Rack Mount Kit Installation Install the Rails to the Rack To adjust slides (only necessary to fit shallower or deeper non-HP racks) 1. Remove the slide adjustment attachment 1. 2. Adjust the rail to the desired length 2. 3. Insert the slide adjustment attachment 3. 1 A 2 A 3 Page 4 of 20 - HP Xw6200 | Sliding Rack Mount Kit Installation - Page 5
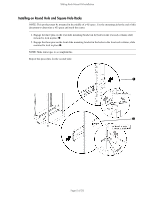
Sliding Rack Mount Kit Installation Installing on Round Hole and Square Hole Racks NOTE: This product must be mounted in the middle of a 4U space. Use the mounting aid at the end of this document to determine a 4U space and mark the center. 1. Engage the three pins on the rear slide mounting bracket - HP Xw6200 | Sliding Rack Mount Kit Installation - Page 6
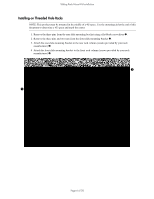
Sliding Rack Mount Kit Installation Installing on Threaded Hole Racks NOTE: This product must be mounted in the middle of a 4U space. Use the mounting aid at the end of this document to determine a 4U space and mark the center. 1. Remove the three pins from the rear slide mounting bracket using a - HP Xw6200 | Sliding Rack Mount Kit Installation - Page 7
Sliding Rack Mount Kit Installation Installing on Earlier HP Racks NOTE: The parts for this procedure are available separately in adapter kit number 5064-9677. 1. Remove the rear mounting brackets from the outer slides 1. 2. Remove the front mounting brackets from the outer slides 2. Save the nuts - HP Xw6200 | Sliding Rack Mount Kit Installation - Page 8
already installed unit in a rack). 2. Align the circles with the rack holes to determine a 4U space. 3. The 4U space will be the top of the workstation after it is installed. 4. Mark the center at 2U. This will be the center line of the slides. Page 8 of 20 - HP Xw6200 | Sliding Rack Mount Kit Installation - Page 9
Sliding Rack Mount Kit Installation Page 9 of 20 - HP Xw6200 | Sliding Rack Mount Kit Installation - Page 10
Sliding Rack Mount Kit Installation Page 10 of 20 - HP Xw6200 | Sliding Rack Mount Kit Installation - Page 11
HP xw6200 Workstation HP xw6200 HP HP HP xw6200 A. B. C. D. A x2) C x2) B x2) D M4 ネジ (x8) HP ラ ッ ク HP 5064-9677 AA. BB. CC. AA x2) BB M5x16mm ネジ (x4) CC M6 皿ネジ (x2) 11 / 20 ページ - HP Xw6200 | Sliding Rack Mount Kit Installation - Page 12
■ T-15 ■ T-15 HP HP E3660B、 E3661B、 E3662B、 J1450B、 J1487A、 B T-15 T-25 M10 1 2 1 Web Service and Technical Reference Guide http://www.hp.com/support/workstation_manuals Web Service and Technical Reference Guide http://www.hp.com/support/workstation_manuals - HP Xw6200 | Sliding Rack Mount Kit Installation - Page 13
1 1 1 2 2 2 3 3 2 4 2 4 5 B 3 D 4 2 C1 13 / 20 ページ - HP Xw6200 | Sliding Rack Mount Kit Installation - Page 14
HP 1 1 。 2 2。 3 3 。 1 A 2 A 3 14 / 20 ページ - HP Xw6200 | Sliding Rack Mount Kit Installation - Page 15
4U 4U 1 3 1。 2 3 2。 2 1 A 2 15 / 20 ページ - HP Xw6200 | Sliding Rack Mount Kit Installation - Page 16
4U 4U 1 3 1。 2 3 2 2。 3 3。 4 4。 3 1 A 4 2 16 / 20 ページ - HP Xw6200 | Sliding Rack Mount Kit Installation - Page 17
HP 5064-9677 1 1。 2 2。 手順 5 と 6 3 3。 A A 2 3 1 4U 4U 4 2 本の M5x16 4。 5 M6 2 ます 5。 6 M6 2 ます 6。 CC 4 AA BB 5 6 17 / 20 ページ - HP Xw6200 | Sliding Rack Mount Kit Installation - Page 18
1 2 3 ま す。 1 2 4U 3. 4U 4. 中央の 2U 18 / 20 ページ - HP Xw6200 | Sliding Rack Mount Kit Installation - Page 19
19 / 20 ページ - HP Xw6200 | Sliding Rack Mount Kit Installation - Page 20
361403-002 © 2004-2005 Hewlett-Packard Development Company, L.P. The HP Invent logo is a registered trademark of Hewlett-Packard Development Company, L.P. 20 / 20 ページ
-
 1
1 -
 2
2 -
 3
3 -
 4
4 -
 5
5 -
 6
6 -
 7
7 -
8
-
9
-
10
-
11
-
12
-
13
-
14
-
15
-
16
-
17
-
18
-
19
-
20
 |
 |
Page 1 of 20
Sliding Rack Mount Kit Installation
Sliding Rack Mount Kit Installation
HP xw6200 Workstation
This document describes how to install the sliding rack mount kit on an HP xw6200 Workstation and how
to install the workstation into a rack.
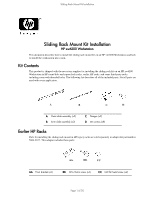
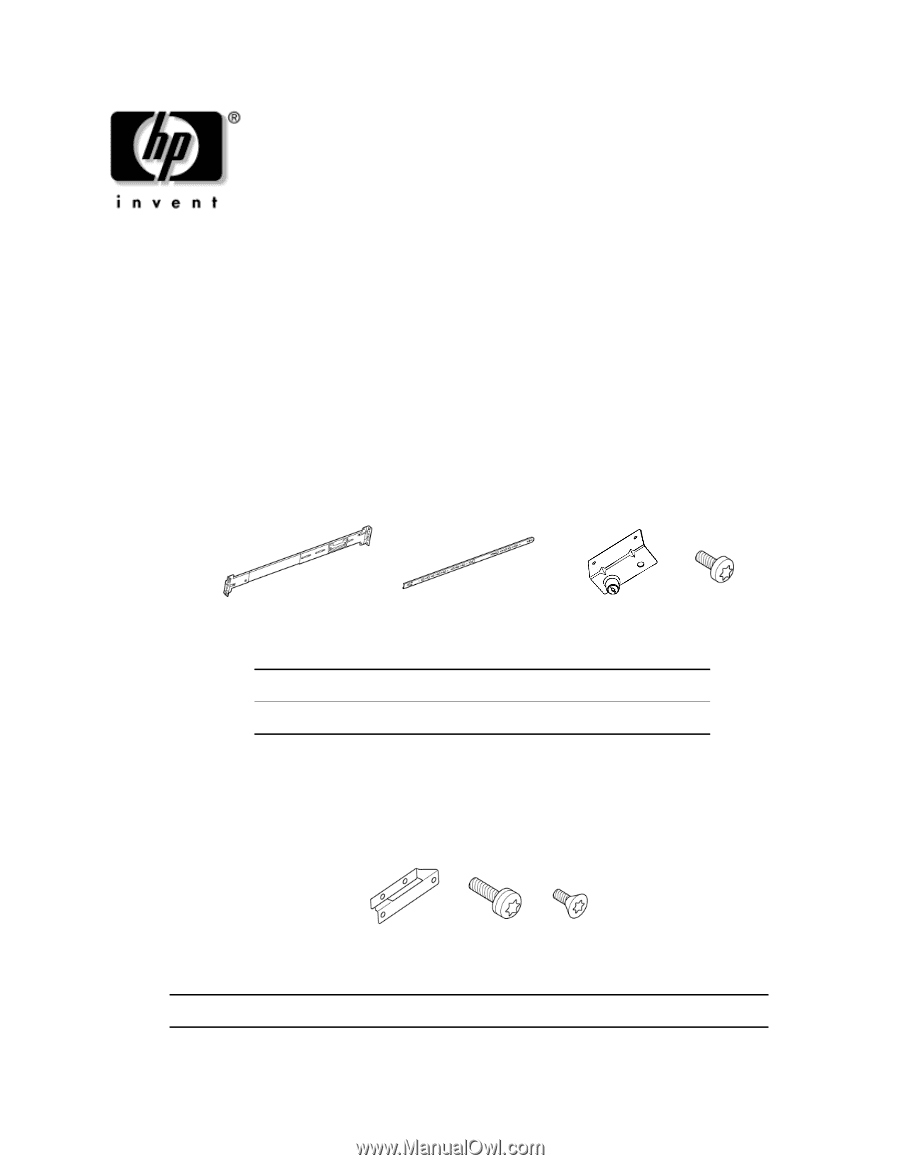
Kit Contents
This product is shipped with the necessary supplies for installing the sliding rack kit on an HP xw6200
Workstation in HP round hole and square hole racks, earlier HP racks, and some third-party racks
including some with threaded holes. The following list describes all of the included parts. Not all parts are
used with every application.
Earlier HP Racks
Parts for installing the sliding rack mount in HP legacy racks are sold separately in adapter kit part number
5064-9677. This adapter includes these parts:
A
Outer slide assembly (x2)
C
Flanges (x2)
B
Inner slide assembly (x2)
D
M4 screws (x8)
B
.
C
.
A
.
D
.
AA
Front bracket (x2)
BB
M5x16mm screw (x4)
CC
M6 flat head screw (x2)
AA
.
BB
.
CC
.