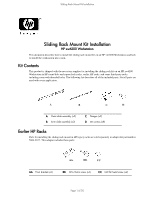
HP Xw6200 Sliding Rack Mount Kit Installation - Page 3
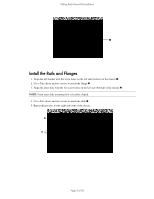
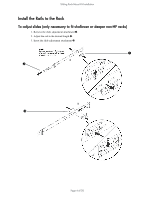
Install the Rails and Flanges
 |
UPC - 882780333536
View all HP Xw6200 manuals
Add to My Manuals
Save this manual to your list of manuals |
Page 3 highlights
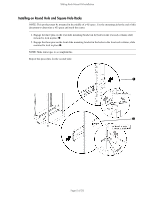
Sliding Rack Mount Kit Installation 1 Install the Rails and Flanges 1. Align the left bracket with the screw holes on the left side (bottom) of the chassis 1. 2. Use a Torx driver and two screws to attach the flange 2. 3. Align the inner slide with the two screw holes on the left side (bottom) of the chassis 3. NOTE: Front inner slide mounting hole is keyhole shaped. 4. Use a Torx driver and two screws to attach the slide 4. 5. Repeat this process for the right side (top) of the chassis. B 3 D 4 2 C1 Page 3 of 20
-
 1
1 -
 2
2 -
 3
3 -
 4
4 -
 5
5 -
 6
6 -
 7
7 -
 8
8 -
 9
9 -
10
-
11
-
12
-
13
-
14
-
15
-
16
-
17
-
18
-
19
-
20
 |
 |

Sliding Rack Mount Kit Installation
Page 3 of 20
Install the Rails and Flanges
1.
Align the left bracket with the screw holes on the left side (bottom) of the chassis
1
.
2.
Use a Torx driver and two screws to attach the flange
2
.
3.
Align the inner slide with the two screw holes on the left side (bottom) of the chassis
3
.
NOTE:
Front inner slide mounting hole is keyhole shaped.
4.
Use a Torx driver and two screws to attach the slide
4
.
5.
Repeat this process for the right side (top) of the chassis.
1
B
D
3
4
C
1
2