HP Xw6200 Sliding Rack Mount Kit Installation - Page 2
Tools Required, Remove the Top Cover
 |
UPC - 882780333536
View all HP Xw6200 manuals
Add to My Manuals
Save this manual to your list of manuals |
Page 2 highlights
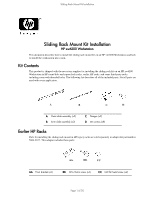
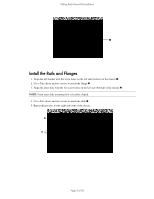
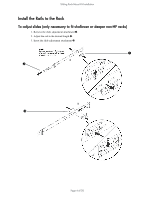
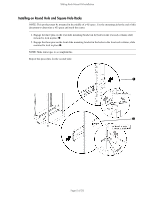
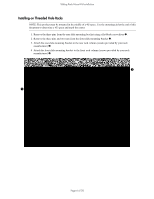
Sliding Rack Mount Kit Installation Tools Required Round Hole and Square Hole Racks ■ T-15 Torx driver ■ Flat blade driver Threaded Hole Racks ■ T-15 Torx driver ■ Flat blade driver ■ Cross-tip driver Earlier HP racks include E3660B, E3661B, E3662B, J1450B, J1487A,B. ■ T-15 Torx driver ■ T-25 Torx driver ■ M10 socket ■ Flat blade driver Remove the Top Cover 1. Turn off the system and disconnect the power cable and all other cables from the back of the system. 2. Remove the top cover by pushing a flat screw driver into the slot 1 on the rear of the chassis and gently pry the cover upward while pushing the top cover toward the rear of the workstation and lift it off. NOTE: If the top cover is difficult to remove, open the access panel and remove the front bezel. This will allow you to get a better grip on the top cover and push it toward the rear. Be sure to the replace access panel and front bezel after removing the top cover. For information on these tasks, refer to the Service and Technical Reference Guide for your HP Workstation at: http://www.hp.com/support/workstation_manuals. For product-specific information, refer to the Service and Technical Reference Guide for your HP Workstation at http://www.hp.com/support/workstation_manuals. Page 2 of 20
-
 1
1 -
 2
2 -
 3
3 -
 4
4 -
 5
5 -
 6
6 -
 7
7 -
 8
8 -
9
-
10
-
11
-
12
-
13
-
14
-
15
-
16
-
17
-
18
-
19
-
20
 |
 |
