HP Xw9400 HP xw9400 Workstation - Service and Technical Reference Guide - Page 182
Appendix B—SATA devices, Enable SATA RAID option in BIOS, Configuring a SATA RAID array
 |
View all HP Xw9400 manuals
Add to My Manuals
Save this manual to your list of manuals |
Page 182 highlights
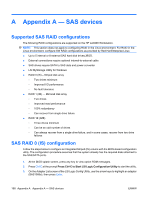
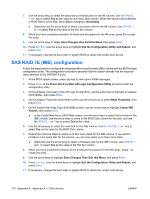
B Appendix B-SATA devices This appendix describes how to use the NVIDIA MediaShield utility to set up and manage SATA RAID volumes. The SATA RAID option must be enabled in BIOS and the SATA drives must be attached to the workstation ports to configure them into a RAID array. Attach the required number of SATA HDDs for the desired RAID level: ● RAID 0-two to six HDDs-data is striped across drives for performance ● RAID 1-two HDDs-data is mirrored on two drives for security ● RAID 5-three to six HDDs-data is striped across drives with parity for performance with security ● RAID 10-four to six HDDs-data is mirrored and striped across all drives for security and some performance Enable SATA RAID option in BIOS To enable the SATA RAID option in BIOS: 1. During boot up, press F10 to enter the Setup menu. Entering BIOS Setup (Press F10) appears at the bottom of the screen. 2. If first boot, select the desired language and press Enter. 3. Use the arrow keys to highlight I/O>Device Options and press Enter. 4. Use the up/down arrow keys to place the cursor next to SATA RAID. Use the left/right arrow keys to change the State to Enable. NOTE: All six ports (0-5) then indicate they are enabled. If the operating system boot drive is a non-RAID SATA drive, this port should have RAID disabled. 5. Use the up/down arrow keys to place the cursor next to the ports that are not to be included in the RAID array. Use the left/right arrow keys to change the state of each of them to Disable. 6. Press F10 when all ports have been set to the desired state. 7. Use the arrow keys to highlight File>Save Changes and Exit. Press Enter, then press F10 to save changes. The workstation will reboot after the changes are saved. After the workstation reboots, the BIOS displays the MediaShield copyright message. Configuring a SATA RAID array To configure a SATA RAID array: 1. At the BIOS splash screen, press any key to view option ROM messages. 2. Press F6 to enter the RAID setup utility when Press F6 to enter RAID setup utility is displayed. 172 Appendix B Appendix B-SATA devices ENWW
-
 1
1 -
2
-
3
-
4
-
5
-
6
-
7
-
8
-
9
-
10
-
11
-
12
-
13
-
14
-
15
-
16
-
17
-
18
-
19
-
20
-
21
-
22
-
23
-
24
-
25
-
26
-
27
-
28
-
29
-
30
-
31
-
32
-
33
-
34
-
35
-
36
-
37
-
38
-
39
-
40
-
41
-
42
-
43
-
44
-
45
-
46
-
47
-
48
-
49
-
50
-
51
-
52
-
53
-
54
-
55
-
56
-
57
-
58
-
59
-
60
-
61
-
62
-
63
-
64
-
65
-
66
-
67
-
68
-
69
-
70
-
71
-
72
-
73
-
74
-
75
-
76
-
77
-
78
-
79
-
80
-
81
-
82
-
83
-
84
-
85
-
86
-
87
-
88
-
89
-
90
-
91
-
92
-
93
-
94
-
95
-
96
-
97
-
98
-
99
-
100
-
101
-
102
-
103
-
104
-
105
-
106
-
107
-
108
-
109
-
110
-
111
-
112
-
113
-
114
-
115
-
116
-
117
-
118
-
119
-
120
-
121
-
122
-
123
-
124
-
125
-
126
-
127
-
128
-
129
-
130
-
131
-
132
-
133
-
134
-
135
-
136
-
137
-
138
-
139
-
140
-
141
-
142
-
143
-
144
-
145
-
146
-
147
-
148
-
149
-
150
-
151
-
152
-
153
-
154
-
155
-
156
-
157
-
158
-
159
-
160
-
161
-
162
-
163
-
164
-
165
-
166
-
167
-
168
-
169
-
170
-
171
-
172
-
173
-
174
-
175
-
176
-
 177
177 -
 178
178 -
 179
179 -
 180
180 -
 181
181 -
 182
182 -
 183
183 -
 184
184 -
 185
185 -
 186
186 -
 187
187 -
188
-
189
-
190
-
191
-
192
-
193
-
194
-
195
-
196
-
197
-
198
-
199
-
200
-
201
-
202
-
203
-
204
-
205
-
206
-
207
-
208
-
209
-
210
-
211
-
212
-
213
-
214
-
215
-
216
-
217
-
218
-
219
-
220
-
221
 |
 |