HP Z3200 HP Designjet Z3200ps Photo Printer Series - User Guide [English] - Page 54
Alternatively, you can use the, When the paper has been cut - 44
 |
UPC - 884420403371
View all HP Z3200 manuals
Add to My Manuals
Save this manual to your list of manuals |
Page 54 highlights
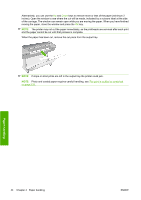
Alternatively, you can use the Up and Down keys to remove more or less of the paper (minimum 2 inches). Open the window to see where the cut will be made, indicated by a scissors label at the side of the carriage. The window can remain open while you are moving the paper. When you have finished moving the paper, close the window and press the OK key. NOTE: The printer may not cut the paper immediately, as the printheads are serviced after each print and the paper cannot be cut until that process is complete. When the paper has been cut, remove the cut piece from the output tray. NOTE: If strips or short prints are left in the output tray the printer could jam. NOTE: Photo and coated paper requires careful handling, see The print is scuffed or scratched on page 154. Paper handling 44 Chapter 4 Paper handling ENWW
-
 1
1 -
2
-
3
-
4
-
5
-
6
-
7
-
8
-
9
-
10
-
11
-
12
-
13
-
14
-
15
-
16
-
17
-
18
-
19
-
20
-
21
-
22
-
23
-
24
-
25
-
26
-
27
-
28
-
29
-
30
-
31
-
32
-
33
-
34
-
35
-
36
-
37
-
38
-
39
-
40
-
41
-
42
-
43
-
44
-
45
-
46
-
47
-
48
-
 49
49 -
 50
50 -
 51
51 -
 52
52 -
 53
53 -
 54
54 -
 55
55 -
 56
56 -
 57
57 -
 58
58 -
 59
59 -
60
-
61
-
62
-
63
-
64
-
65
-
66
-
67
-
68
-
69
-
70
-
71
-
72
-
73
-
74
-
75
-
76
-
77
-
78
-
79
-
80
-
81
-
82
-
83
-
84
-
85
-
86
-
87
-
88
-
89
-
90
-
91
-
92
-
93
-
94
-
95
-
96
-
97
-
98
-
99
-
100
-
101
-
102
-
103
-
104
-
105
-
106
-
107
-
108
-
109
-
110
-
111
-
112
-
113
-
114
-
115
-
116
-
117
-
118
-
119
-
120
-
121
-
122
-
123
-
124
-
125
-
126
-
127
-
128
-
129
-
130
-
131
-
132
-
133
-
134
-
135
-
136
-
137
-
138
-
139
-
140
-
141
-
142
-
143
-
144
-
145
-
146
-
147
-
148
-
149
-
150
-
151
-
152
-
153
-
154
-
155
-
156
-
157
-
158
-
159
-
160
-
161
-
162
-
163
-
164
-
165
-
166
-
167
-
168
-
169
-
170
-
171
-
172
-
173
-
174
-
175
-
176
-
177
-
178
-
179
-
180
-
181
-
182
-
183
-
184
-
185
-
186
-
187
-
188
-
189
-
190
-
191
-
192
-
193
-
194
-
195
-
196
-
197
-
198
-
199
-
200
-
201
-
202
-
203
-
204
-
205
 |
 |
