HP Z400 HP Z400 Workstation Maintenance and Service Guide - Page 165
Problem, Cause, Solution, Auto-Adjustment, Start>All Programs> Accessories>System
 |
UPC - 890552660926
View all HP Z400 manuals
Add to My Manuals
Save this manual to your list of manuals |
Page 165 highlights
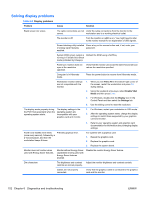
Table 6-5 Display problems (continued) Problem Cause Solution Blurry video or requested resolution cannot be set. If the graphics controller was upgraded, the correct video drivers might not be loaded. Install the video drivers included in the upgrade kit, or download and install the latest drivers for your graphics card from http://welcome.hp.com/country/us/en/ support.html. Monitor cannot display requested resolution. Change the requested resolution. The picture is broken up, rolls, jitters, or flashes. The monitor connections might 1. be faulty, or the monitor might be incorrectly adjusted. 2. Be sure the monitor cable is securely connected to the workstation. In a multiple CRT monitor system, ensure that the monitors' electromagnetic fields are not interfering with each other . Move them apart if necessary. 3. Move fluorescent lights or fans that are too close to the CRT monitor. Monitor must be degaussed. Degauss the monitor. Vibrating or rattling noise coming from inside a CRT monitor when powered on. Monitor degaussing coil has been activated. None. It is normal for the degaussing coil to be activated when the monitor is powered on. Clicking noise coming from inside a Electronic relays have been CRT monitor. activated inside the monitor. None. It is normal for some monitors to make a clicking noise when turned on and off, when going in and out of Standby mode, and when changing resolutions. High pitched noise coming from inside a flat-panel monitor. Brightness and contrast settings are too high. Lower brightness and contrast settings. Fuzzy focus; streaking, ghosting, or shadowing effects; horizontal scrolling lines; faint vertical bars; or unable to center the picture on the screen (flat-panel monitors using an analog VGA input connection only.) Flat-panel monitor's internal digital conversion circuits might be unable to correctly interpret the output synchronization of the graphics card. 1. Select the monitor's Auto-Adjustment option in the monitor's onscreen display menu. 2. Manually synchronize the Clock and Clock Phase onscreen display functions. 3. Download SoftPaq SP22333 to assist with the synchronization). Some typed symbols do not appear The font you are using does correctly. not support that symbol. Use the Character Map to locate and select the appropriate symbol. Select Start>All Programs> Accessories>System Tools>Character Map. You can copy the symbol from the Character Map into a document. ENWW Troubleshooting scenarios and solutions 153
-
 1
1 -
2
-
3
-
4
-
5
-
6
-
7
-
8
-
9
-
10
-
11
-
12
-
13
-
14
-
15
-
16
-
17
-
18
-
19
-
20
-
21
-
22
-
23
-
24
-
25
-
26
-
27
-
28
-
29
-
30
-
31
-
32
-
33
-
34
-
35
-
36
-
37
-
38
-
39
-
40
-
41
-
42
-
43
-
44
-
45
-
46
-
47
-
48
-
49
-
50
-
51
-
52
-
53
-
54
-
55
-
56
-
57
-
58
-
59
-
60
-
61
-
62
-
63
-
64
-
65
-
66
-
67
-
68
-
69
-
70
-
71
-
72
-
73
-
74
-
75
-
76
-
77
-
78
-
79
-
80
-
81
-
82
-
83
-
84
-
85
-
86
-
87
-
88
-
89
-
90
-
91
-
92
-
93
-
94
-
95
-
96
-
97
-
98
-
99
-
100
-
101
-
102
-
103
-
104
-
105
-
106
-
107
-
108
-
109
-
110
-
111
-
112
-
113
-
114
-
115
-
116
-
117
-
118
-
119
-
120
-
121
-
122
-
123
-
124
-
125
-
126
-
127
-
128
-
129
-
130
-
131
-
132
-
133
-
134
-
135
-
136
-
137
-
138
-
139
-
140
-
141
-
142
-
143
-
144
-
145
-
146
-
147
-
148
-
149
-
150
-
151
-
152
-
153
-
154
-
155
-
156
-
157
-
158
-
159
-
 160
160 -
 161
161 -
 162
162 -
 163
163 -
 164
164 -
 165
165 -
 166
166 -
 167
167 -
 168
168 -
 169
169 -
 170
170 -
171
-
172
-
173
-
174
-
175
-
176
-
177
-
178
-
179
-
180
-
181
-
182
-
183
-
184
-
185
-
186
-
187
-
188
-
189
-
190
-
191
-
192
-
193
-
194
-
195
-
196
-
197
-
198
-
199
-
200
-
201
-
202
-
203
-
204
-
205
-
206
-
207
-
208
-
209
-
210
-
211
-
212
-
213
-
214
-
215
-
216
-
217
-
218
-
219
-
220
-
221
-
222
 |
 |