HP Z600 HP xw and Z Series Workstations - HP SATA/SAS Hard Drive and Solid Sta - Page 4
HP xw6000, xw8000, and xw9000 series Workstations, HP Z600 and Z800 Workstations,
 |
UPC - 884962074053
View all HP Z600 manuals
Add to My Manuals
Save this manual to your list of manuals |
Page 4 highlights
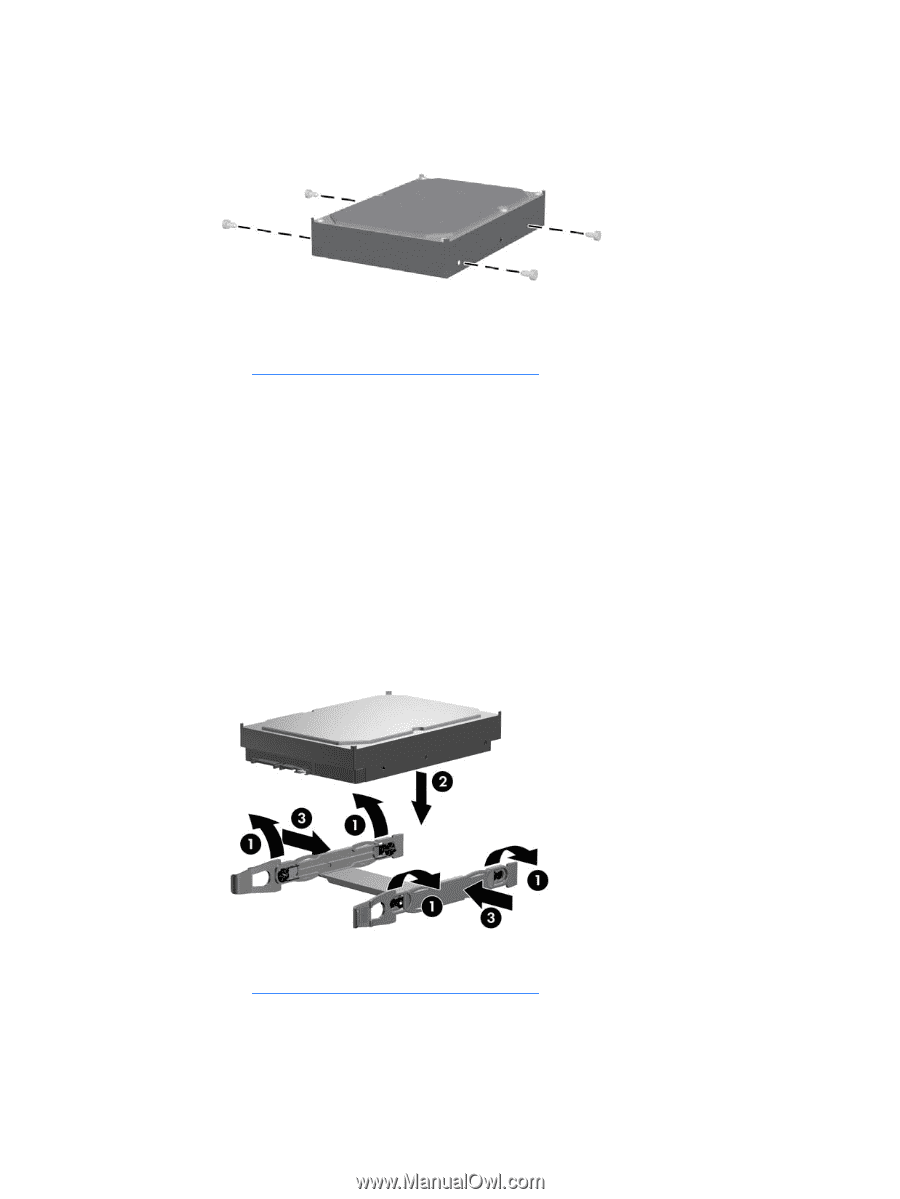
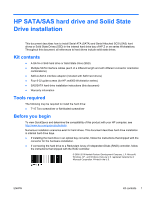
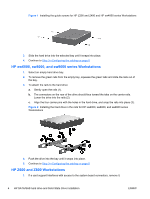
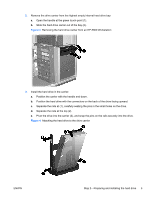
Figure 1 Installing the guide screws for HP Z200 and Z400 and HP xw4000 series Workstations 3. Slide the hard drive into the selected bay until it snaps into place. 4. Continue to Step 3-Configuring the cabling on page 6 HP xw6000, xw8000, and xw9000 series Workstations 1. Select an empty hard drive bay. 2. To remove the green rails from the empty bay, squeeze the green tabs and slide the rails out of the bay. 3. To attach the rails to the hard drive: a. Gently open the rails (1). b. The connectors on the rear of the drive should face toward the tabs on the carrier rails. Lower the drive into the rails (2). c. Align the four carrier pins with the holes in the hard drive, and snap the rails into place (3). Figure 2 Installing the hard drive in the rails for HP xw6000, xw8000, and xw9000 series Workstations 4. Push the drive into the bay until it snaps into place. 5. Continue to Step 3-Configuring the cabling on page 6 HP Z600 and Z800 Workstations 1. If a card support interferes with access to the system board connectors, remove it. 4 HP SATA/SAS hard drive and Solid State Drive installation ENWW
-
 1
1 -
 2
2 -
 3
3 -
 4
4 -
 5
5 -
 6
6 -
 7
7 -
 8
8
 |
 |