HP Z600 HP xw and Z Series Workstations - HP SATA/SAS Hard Drive and Solid Sta - Page 5
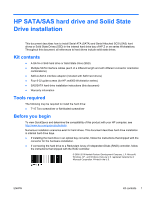
Separate the rails at 1, carefully seating the pins in the small holes on the drive.
 |
UPC - 884962074053
View all HP Z600 manuals
Add to My Manuals
Save this manual to your list of manuals |
Page 5 highlights
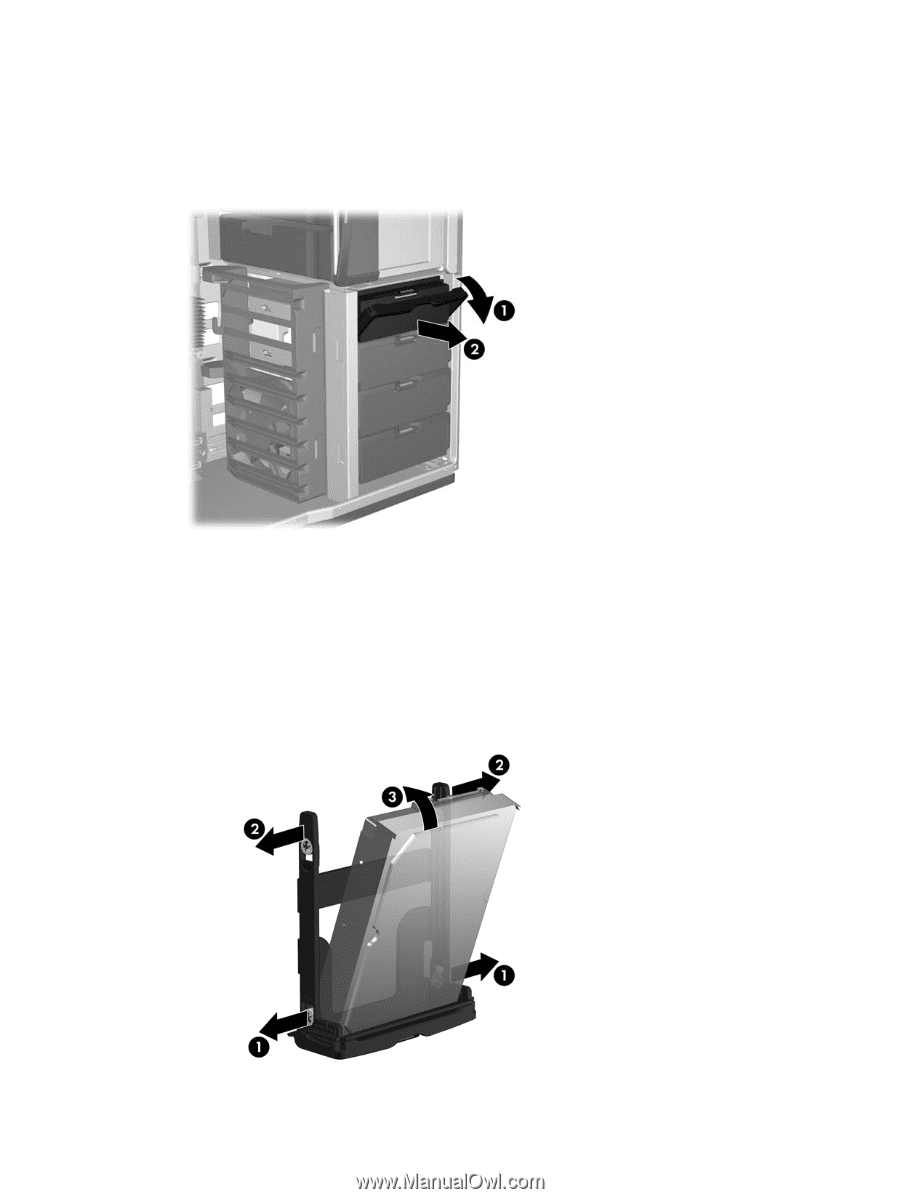
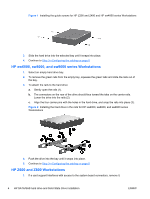
2. Remove the drive carrier from the highest empty internal hard drive bay: a. Open the handle at the green touch-point (1). b. Slide the hard drive carrier out of the bay (2). Figure 3 Removing the hard drive carrier from an HP Z800 Workstation 3. Install the hard drive in the carrier: a. Position the carrier with the handle end down. b. Position the hard drive with the connectors on the back of the drive facing upward. c. Separate the rails at (1), carefully seating the pins in the small holes on the drive. d. Separate the rails at the top (2). e. Pivot the drive into the carrier (3), and snap the pins on the rails securely into the drive. Figure 4 Attaching the hard drive to the drive carrier ENWW Step 2-Preparing and installing the hard drive 5
-
 1
1 -
 2
2 -
 3
3 -
 4
4 -
 5
5 -
 6
6 -
 7
7 -
 8
8
 |
 |