HP ap5000 Quick Setup & Getting Started HP ap5000 All-In-One Point of Sale - Page 23
Before You Call for Technical Support, Start, All Programs, HP User, Manuals, HP User Manuals - video
 |
View all HP ap5000 manuals
Add to My Manuals
Save this manual to your list of manuals |
Page 23 highlights
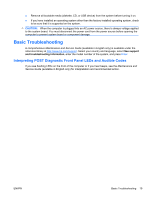
To access HP user guides on the hard drive: ▲ In Windows XP and Windows Embedded POSReady 2009, select Start > All Programs > HP User Manuals. In Windows 7, select Start > HP User Manuals. To access the HP Backup and Recovery Manager User Guide (some Windows XP systems only): ▲ Select Start > HP Backup and Recovery > HP Backup and Recovery Manager Manual. The menu and books are displayed in the language chosen during initial system setup or as specified later in the Windows Regional Settings. If the Regional Settings do not match one of the supported languages, the menu and books are displayed in English. Before You Call for Technical Support WARNING! When the computer is plugged into an AC power source, voltage is always applied to the system board. To reduce the risk of personal injury from electrical shock and/or hot surfaces, be sure to disconnect the power cord from the wall outlet and allow the internal system components to cool before touching. If you are having problems with the computer, try the appropriate solutions below to try to isolate the exact problem before calling for technical support. ● Run the diagnostics utility. ● Check the power LED on the front of the computer to see if it is flashing red. The flashing lights are error codes that will help you diagnose the problem. Refer to Interpreting POST Diagnostic Front Panel LEDs and Audible Codes on page 19 in this guide for details. ● If the screen is blank on an attached second monitor, ensure that the monitor is powered on, that the monitor is plugged into the VGA video port on the rear panel, and that the VGA connector is enabled in the Computer Setup utility. ● If you are working on a network, plug another computer with a different cable into the network connection. There may be a problem with the network plug or cable. ● If you recently added new hardware, remove the hardware and see if the computer functions properly. ● If you recently installed new software, uninstall the software and see if the computer functions properly. ● Boot the computer to the Safe Mode to see if it will boot without all of the drivers loaded. When booting the operating system, use "Last Known Configuration." ● Refer to the comprehensive online technical support at http://www.hp.com/support. ● Refer to Helpful Hints on page 18 in this guide for more general suggestions. ● Refer to the comprehensive Maintenance and Service Guide (available in English only) for more detailed information. ● Restore the system from the Recovery Disc Set that you created or restore the system to its original factory condition in HP Backup and Recovery Manager. NOTE: An external optical drive (not included) and keyboard (not included) are required to complete a restore. CAUTION: Restoring the system will erase all data on the hard drive. Be sure to back up all data files before running the restore process. ENWW Before You Call for Technical Support 17
-
 1
1 -
2
-
3
-
4
-
5
-
6
-
7
-
8
-
9
-
10
-
11
-
12
-
13
-
14
-
15
-
16
-
17
-
 18
18 -
 19
19 -
 20
20 -
 21
21 -
 22
22 -
 23
23 -
 24
24 -
 25
25
 |
 |