HP iPAQ Legacy-free PC P500/810e Quick Setup and User's Guide - Page 4

Contents

Page 4 highlights

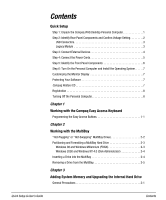
Contents Quick Setup Step 1: Unpack the Compaq iPAQ Desktop Personal Computer 1 Step 2: Identify Rear Panel Components and Confirm Voltage Setting 2 USB Connectors 3 Legacy Module 3 Step 3: Connect External Devices 4 Step 4: Connect the Power Cords 5 Step 5: Identify the Front Panel Components 6 Step 6: Turn On the Personal Computer and Install the Operating System. . . . . .7 Customizing the Monitor Display 7 Protecting Your Software 7 Compaq Restore CD 7 Registration 8 Turning Off the Personal Computer 8 Chapter 1 Working with the Compaq Easy Access Keyboard Programming the Easy Access Buttons 1-1 Chapter 2 Working with the MultiBay "Hot-Plugging" or "Hot-Swapping" MultiBay Drives 2-2 Partitioning and Formatting a MultiBay Hard Drive 2-3 Windows 98 and Windows Millennium (FDISK 2-3 Windows 2000 and Windows NT 4.0 (Disk Administrator 2-4 Inserting a Drive into the MultiBay 2-4 Removing a Drive from the MultiBay 2-5 Chapter 3 Adding System Memory and Upgrading the Internal Hard Drive General Precautions 3-1 Quick Setup & User's Guide Contents

  • 1
  • 2
  • 3
  • 4
  • 5
  • 6
  • 7
  • 8
  • 9
  • 10
  • 11
  • 12
  • 13
  • 14
  • 15
  • 16
  • 17
  • 18
  • 19
  • 20
  • 21
  • 22
  • 23
  • 24
  • 25
  • 26
  • 27
  • 28
  • 29
  • 30
  • 31
  • 32
  • 33
  • 34
  • 35
  • 36
  • 37
  • 38
  • 39
  • 40
  • 41
  • 42
  • 43
  • 44
  • 45
  • 46
  • 47
  • 48
  • 49
  • 50
  • 51
  • 52
  • 53
  • 54
  • 55
  • 56
  • 57
  • 58
  • 59
  • 60
  • 61
  • 62
  • 63
  • 64
  • 65
  • 66
  • 67
  • 68
  • 69
  • 70
  • 71
  • 72
  • 73

Quick Setup & User’s Guide
Contents
Contents
Quick Setup
Step 1: Unpack the Compaq iPAQ Desktop Personal Computer. . . . . . . . . . . . . .1
Step 2: Identify Rear Panel Components and Confirm Voltage Setting. . . . . . . . .2
USB Connectors. . . . . . . . . . . . . . . . . . . . . . . . . . . . . . . . . . . . . . . . . . . . . . .3
Legacy Module . . . . . . . . . . . . . . . . . . . . . . . . . . . . . . . . . . . . . . . . . . . . . . .3
Step 3: Connect External Devices. . . . . . . . . . . . . . . . . . . . . . . . . . . . . . . . . . . .4
Step 4: Connect the Power Cords . . . . . . . . . . . . . . . . . . . . . . . . . . . . . . . . . . . .5
Step 5: Identify the Front Panel Components . . . . . . . . . . . . . . . . . . . . . . . . . . .6
Step 6: Turn On the Personal Computer and Install the Operating System. . . . . .7
Customizing the Monitor Display . . . . . . . . . . . . . . . . . . . . . . . . . . . . . . . . . . . .7
Protecting Your Software . . . . . . . . . . . . . . . . . . . . . . . . . . . . . . . . . . . . . . . . . .7
Compaq Restore
CD. . . . . . . . . . . . . . . . . . . . . . . . . . . . . . . . . . . . . . . . . . . . . .7
Registration . . . . . . . . . . . . . . . . . . . . . . . . . . . . . . . . . . . . . . . . . . . . . . . . . . . .8
Turning Off the Personal Computer. . . . . . . . . . . . . . . . . . . . . . . . . . . . . . . . . . .8
Chapter 1
Working with the Compaq Easy Access Keyboard
Programming the Easy Access Buttons. . . . . . . . . . . . . . . . . . . . . . . . . . . . . . 1-1
Chapter 2
Working with the MultiBay
“Hot-Plugging” or “Hot-Swapping” MultiBay Drives . . . . . . . . . . . . . . . . . . . . 2-2
Partitioning and Formatting a MultiBay Hard Drive . . . . . . . . . . . . . . . . . . . . .2-3
Windows 98 and Windows Millennium (FDISK). . . . . . . . . . . . . . . . . . . . . . 2-3
Windows 2000 and Windows NT 4.0 (Disk Administrator) . . . . . . . . . . . . .2-4
Inserting a Drive into the MultiBay . . . . . . . . . . . . . . . . . . . . . . . . . . . . . . . . .2-4
Removing a Drive from the MultiBay. . . . . . . . . . . . . . . . . . . . . . . . . . . . . . . . 2-5
Chapter 3
Adding System Memory and Upgrading the Internal Hard Drive
General Precautions . . . . . . . . . . . . . . . . . . . . . . . . . . . . . . . . . . . . . . . . . . . . 3-1