HP nx9105 Reference Guide - Page 12
Step 2: Connecting to AC Power, To lower the Expansion Base
 |
View all HP nx9105 manuals
Add to My Manuals
Save this manual to your list of manuals |
Page 12 highlights
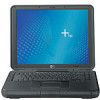
Getting Started To lower the Expansion Base: 1. Pull out the handles on each side of the Expansion Base 1. 2. Grasp the handles and lower the upper panel of the Expansion Base 2. Step 2: Connecting to AC Power Å WARNING: To reduce the risk of electric shock or damage to your equipment: ■ Plug the power cord into an electrical outlet that is easily accessible at all times. ■ Disconnect power from the product by unplugging the power cord from the electrical outlet. ■ If provided with a three-pin attachment plug on your power cord, plug the cord into a grounded (earthed) three-pin outlet. Do not disable the power cord grounding pin. The grounding pin is an important safety feature. 1-8 Reference Guide
-
 1
1 -
2
-
3
-
4
-
5
-
6
-
 7
7 -
 8
8 -
 9
9 -
 10
10 -
 11
11 -
 12
12 -
 13
13 -
 14
14 -
 15
15 -
 16
16 -
 17
17 -
18
-
19
-
20
-
21
-
22
-
23
-
24
-
25
-
26
-
27
-
28
-
29
-
30
-
31
-
32
-
33
-
34
-
35
-
36
-
37
-
38
-
39
-
40
-
41
-
42
-
43
-
44
-
45
-
46
-
47
-
48
-
49
-
50
-
51
-
52
 |
 |

1–8
Reference Guide
Getting Started
To lower the Expansion Base:
1. Pull out the handles on each side of the Expansion Base
1
.
2. Grasp the handles and lower the upper panel of the
Expansion Base
2
.
Step 2: Connecting to AC Power
Å
WARNING:
To reduce the risk of electric shock or damage to your
equipment:
■
Plug the power cord into an electrical outlet that is easily accessible
at all times.
■
Disconnect power from the product by unplugging the power cord
from the electrical outlet.
■
If provided with a three-pin attachment plug on your power cord,
plug the cord into a grounded (earthed) three-pin outlet. Do not
disable the power cord grounding pin. The grounding pin is an
important safety feature.