HP s5120y Upgrade and Service - Page 33
Lay the computer on its side., Locate the add-in card you want to replace, and
 |
UPC - 884962371145
View all HP s5120y manuals
Add to My Manuals
Save this manual to your list of manuals |
Page 33 highlights
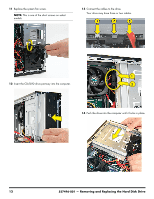
3 Disconnect all peripherals and cables, including the power cord. 5 Slide the side cover toward the back of the computer, lift it off, and set it aside. 6 Lay the computer on its side. 4 With a screwdriver, loosen the side panel thumbscrew on the back of the computer. 7 Locate the add-in card you want to replace, and the bracket on the back of the computer that secures the add-in cards. 537497-001 - Removing and Replacing an Add-in Card 3
-
 1
1 -
2
-
3
-
4
-
5
-
6
-
7
-
8
-
9
-
10
-
11
-
12
-
13
-
14
-
15
-
16
-
17
-
18
-
19
-
20
-
21
-
22
-
23
-
24
-
25
-
26
-
27
-
 28
28 -
 29
29 -
 30
30 -
 31
31 -
 32
32 -
 33
33 -
 34
34 -
 35
35 -
 36
36 -
 37
37 -
 38
38 -
39
-
40
-
41
-
42
-
43
-
44
-
45
-
46
-
47
-
48
-
49
-
50
-
51
-
52
-
53
-
54
-
55
-
56
 |
 |
537497-001
— Removing and Replacing an Add-in Card
3
3
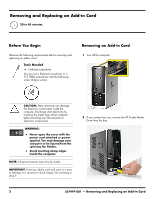
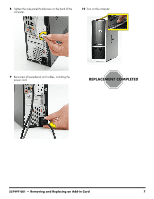
Disconnect all peripherals and cables, including the
power cord.
4
With a screwdriver, loosen the side panel thumbscrew
on the back of the computer.
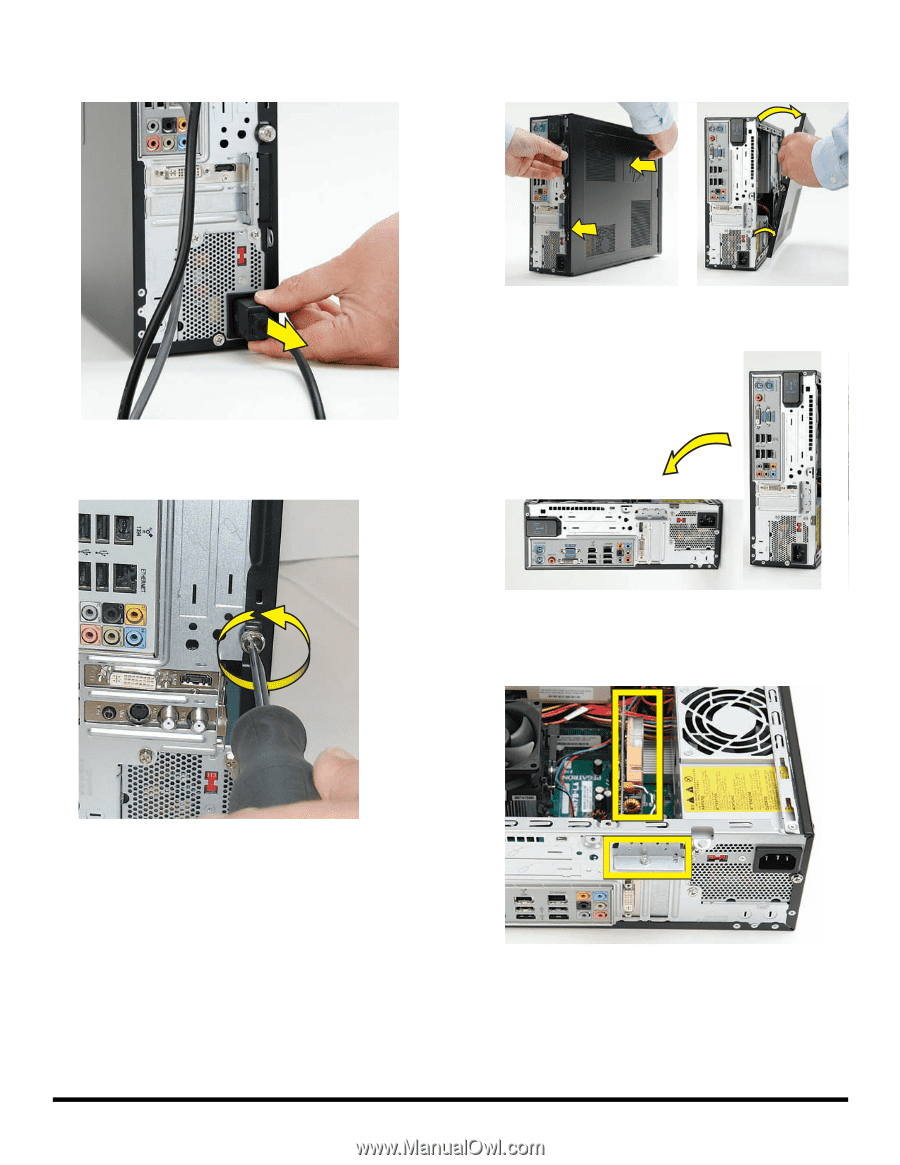
5
Slide the side cover toward the back of the computer,
lift it off, and set it aside.
6
Lay the computer on its side.
7
Locate the add-in card you want to replace, and the
bracket on the back of the computer that secures the
add-in cards.