HP t5565 HP ThinPro, version 3.2, Administrator's Guide - Page 62
Advanced, CDA Mode - vnc
 |
View all HP t5565 manuals
Add to My Manuals
Save this manual to your list of manuals |
Page 62 highlights
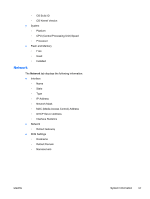
To allow a thin client to be accessed from another location: 1. Double-click VNC Shadow. 2. Select Enable VNC Shadow to enable the thin client to be accessed using VNC. 3. Select VNC Read Only to make the VNC session read only. 4. Select VNC Use Password to require a password to access the thin client using VNC. 5. Select VNC Notify User to Allow Refuse to display a message when someone uses VNC to access the thin client and allow a user to refuse VNC access. a. Select VNC Show Timeout for Notification and set a time delay to allow the user to refuse. b. Type a User Notification Message in the field. 6. Select Re-set VNC server right now and click OK to reset the VNC server. 7. Click OK to save the settings and exit the dialog box. NOTE: You will need to restart the thin client for the changes to take effect. Advanced These utilities allow you to enable CDA mode, open a text utility, and access the root directory. The following utilities are available on the Advanced tab: ● CDA Mode on page 54 ● DHCP Option Manager on page 55 ● Mousepad on page 55 ● X Terminal on page 55 CDA Mode This utility allows you to enable Citrix Desktop Appliance (CDA) Mode and set the URL. To use CDA mode: 1. Be sure that Web Browser preferences have been set. For more information, see Web Browser on page 9. 2. Double-click CDA Mode. 3. Select Enable CDA and type the URL in the field. 4. Click OK to save your changes and close the dialog box. NOTE: CDA mode can also be enabled by configuring DHCP tag 191 as a string whose value is the URL to the Citrix environment. To disable CDA mode: 1. Press Ctrl+Alt+End to minimize Web Browser. 2. Click Control Panel > Advanced > CDA Mode. 54 Chapter 3 Reference ENWW
-
 1
1 -
2
-
3
-
4
-
5
-
6
-
7
-
8
-
9
-
10
-
11
-
12
-
13
-
14
-
15
-
16
-
17
-
18
-
19
-
20
-
21
-
22
-
23
-
24
-
25
-
26
-
27
-
28
-
29
-
30
-
31
-
32
-
33
-
34
-
35
-
36
-
37
-
38
-
39
-
40
-
41
-
42
-
43
-
44
-
45
-
46
-
47
-
48
-
49
-
50
-
51
-
52
-
53
-
54
-
55
-
56
-
 57
57 -
 58
58 -
 59
59 -
 60
60 -
 61
61 -
 62
62 -
 63
63 -
 64
64 -
 65
65 -
 66
66 -
 67
67 -
68
-
69
 |
 |