HP t5745 HP ezUpdate Administrator's Guide - Page 2
Setup Overview, Setting Up the FTP Server, t5735 with HP ThinPro image M6CL0007
 |
View all HP t5745 manuals
Add to My Manuals
Save this manual to your list of manuals |
Page 2 highlights
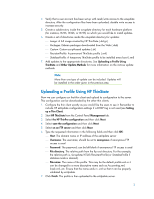
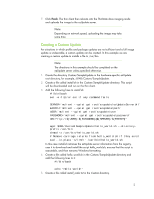
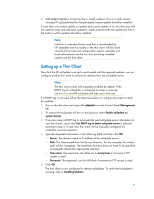
This white paper describes how to set up HP ezUpdate on a thin client and server; how to create new packages and upload profiles and images using HP ThinState; and how to debug common problems. The examples in this white paper have been validated on servers running Windows® XP Professional Edition and the Debian 5.0 ("lenny") operating systems. This administration guide applies to the following HP thin clients: • t5735 with HP ThinPro image M6CL0007 • t5745 with HP ThinPro image M6CL0007 • t5325 with HP ThinPro image M5AR0013 Note: This white paper does not apply to the HP t5545 thin client with image M5ST0031 or M5ST0019. Setup Overview Complete the following steps to set up HP ezUpdate and a series of thin clients in a new environment: 1. Set up an FTP server service/daemon on the ezUpdate server. 2. (Optional) Add ezUpdate DHCP tag 137 to the DHCP server configuration. 3. Set up the ezUpdate server directory structure (see Server Setup). 4. Configure the first thin client and upload its profile to the ezUpdate server (see Upload a Profile Using ThinState). 5. (Optional) Upload image/packages/custom updates to the ezUpdate server (see Other Update Methods). 6. (Optional) Configure ezUpdate on the remaining clients if a DHCP tag is not used (see Setting up a Thin Client). 7. Reboot the thin clients, triggering ezUpdate to install new updates. Setting Up the FTP Server The first step to configuring HP ezUpdate is to ensure that the FTP server is properly set up. 1. Verify that you are able to reach the server via FTP. See Troubleshooting for more information on testing an FTP connection. 2. If the ezUpdate server information is to be supplied by the DHCP server, configure DHCP tag 137 on the DHCP server. The tag should be: ftp://username:password@server/path 3. Create a directory on the FTP server in which to put the updates. In this example, we are calling the directory ezupdate. A sample server layout may also be included with this documentation. If so, extract server_sample.zip and skip to step 6. 2
-
 1
1 -
 2
2 -
 3
3 -
 4
4 -
 5
5 -
 6
6 -
 7
7 -
 8
8 -
9
 |
 |